background image


NECK  

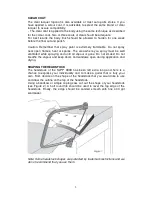
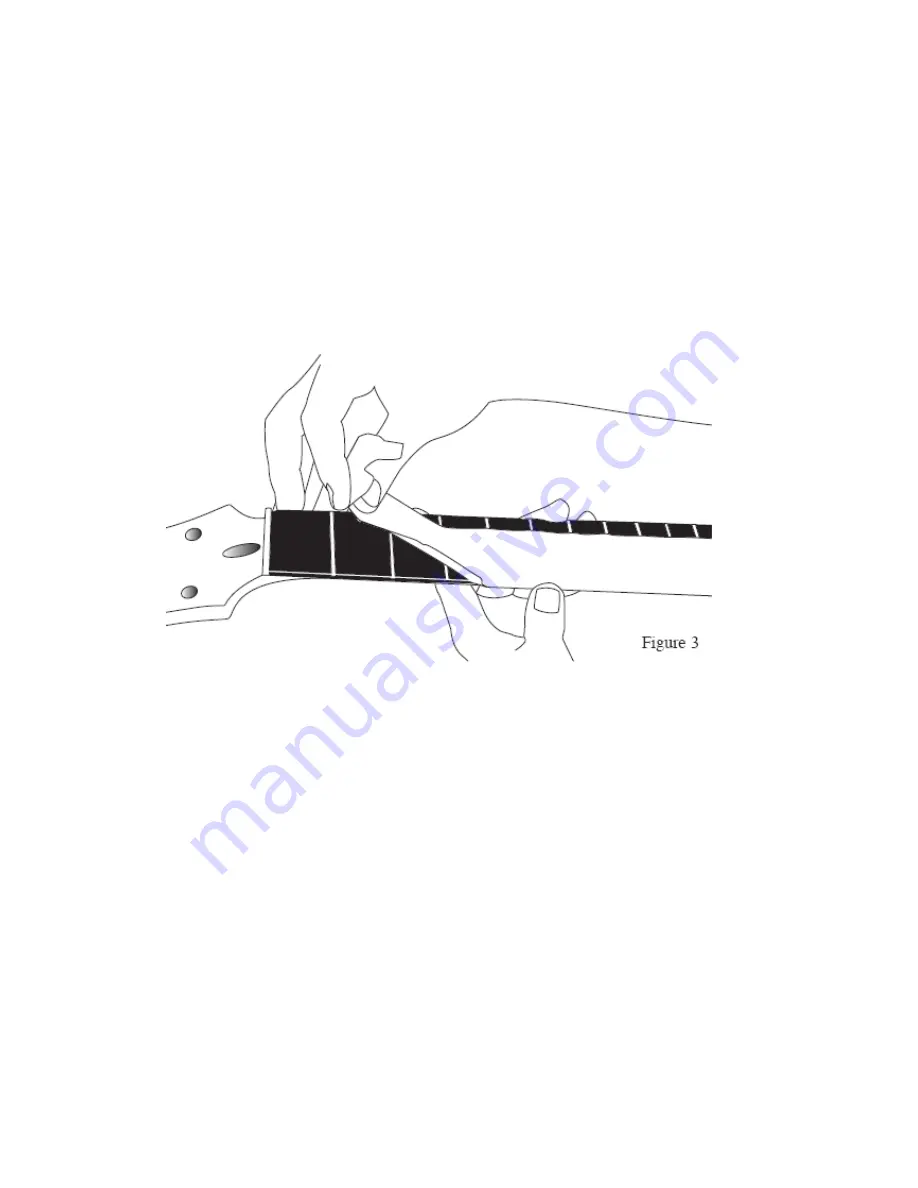
Before  application  of finish,  the fingerboard  should  be  masked  off  to  prevent 
finish  from  adhering  to  the  fretted  surface  (see  Figure  3).  A  screw  can  be 
inserted  temporarily  in  one  of  the  four  holes  at  the  heel  which  will  later  be 
used for attaching the neck to the body. Secure a wire or cord to that screw so 
that the neck can be hung during spraying.  
 -  Spray  all  exposed  surfaces  evenly.  The  neck  of  your  Guitar  has  been 
sanded  level  so  it  should  not  be  necessary  to  sand  between  coats  unless 
runs, orange peel or drips appear. Use the same procedure that you followed 
on  the  body  –  again,  two  or  three  coats  should  do  the  job.  The  face  of  the 
headstock  is  traditionally  finished  black.  The  final  cut  and  polish  takes  place 
about one week later when the lacquer has cured.


FINAL RUBBING AND POLISHING  

After allowing the clear lacquered surfaces to dry and harden for at least one 
week, sand lightly with non-loading 400 grit sandpaper (commonly known as 
“wet  and  dry”).  During  sanding  be  sure  to  place  a  firm  material  behind  the 
sandpaper. A large rubber eraser works fine. The eraser is flexible enough to 
sand  the  gradual  curves  but  is  stiff  enough  to  prevent  the  sharper edges  (of 
the headstock, for example) from being rounded off. Be sure to sand with the 
grain of the wood.  
 - All sanded surfaces should now be a bit dull, indicating that the finish is flat 
and level. Now repeat the sanding process with very fine 600 grit sandpaper 
using water and a small amount of dishwashing detergent as a lubricant. This 
will remove any sanding marks left by the previous step and leave all surfaces 
a dull gloss. 
 -  The  finish  may  now  be  rubbed  out  using  a  medium  grade  automotive 
rubbing  compound  (DuPont  White  Polishing  Compound  for  example).  The 
compound should be used sparingly with fairly good pressure at first –– as a 
high  gloss  develops,  pressure  should  be  diminished.  An  extra  fine  grade  of 
polishing  compound  may  be  used  to  get  that  final  bit  of  gloss.  If  instructions 
have  been  followed  you  should  now  have  a  professional  quality  finish.  You 
can protect your work with a light wax –– Guitar Polish is a good choice. 
 

Summary of Contents for SPR01

Page 1: ...KIT SP SP SP SPR R R R 01 01 01 01 Joint Bolt on Body Basswood with Flamed Maple Top Neck Maple Fingerboard Rosewood Tuning Machines Chrome Die cast Scale Length 628mm 24 75 Fret 22 Control 1V 1T 3 Wa...

Page 2: ...u may order replacements from your local music shop or directly from us Quantity Description A 1 Basswood with Flame Maple Carve top body B 1 Maple Neck with Rosewood Fingerboard C 1 Output Jack Chrom...

Page 3: ...ur from the many available shades including metallic options used for automobile touch up work A spray can will make your job much easier and will produce great results Hang the body as shown in Figur...

Page 4: ...l ventilated while spraying and until all vapour is gone Do not smoke Do not breathe the vapour and keep doors and windows open during application and drying SHAPING THE HEADSTOCK The headstock of the...

Page 5: ...n as wet and dry During sanding be sure to place a firm material behind the sandpaper A large rubber eraser works fine The eraser is flexible enough to sand the gradual curves but is stiff enough to p...

Page 6: ...the locator holes on the back of the body 2 THREE WAY PICKUP SWITCH PART E Looking at the back of the guitar body push the threaded shaft of the switch through the 1 2 hole on the bottom right of the...

Page 7: ...ol cavity also Attach the bridge position humbucking pickup to the body with four 5 8 screws 5 VOLUME AND TONE CONTROLS PART D There is one volume and one tone control for this guitar The 1 volume and...

Page 8: ...ece of wood on top of the bushing to prevent damage and tap the bushing in place with an ordinary hammer Now screw the tailpiece mounting screws back into the bushings 8 THE BRIDGE PART J Now tap the...

Page 9: ...might want to make some adjustment Here s how to do it Push the sixth string down between second and third fret The space between the top of the first fret and the bottom of the string should be about...

Page 10: ...humbucking pickup is adjustable on the bass and treble sides Finding the best combination of tone and volume will require some experimentation A good place to start is to adjust the pickup height so t...

Page 11: ...10...

Reviews: