background image


SPR 01 FLEMING DIY GUITAR KIT Assembly Instructions


Please  read  these  instructions  carefully  before  beginning  to build  your  guitar 
in order to have a complete overview of the project. There are five steps that 
you will need to follow to complete your Electric Guitar Kit. 
 
1. Check and Identify Parts 
2. Finishing the Body and Neck 
3. Shaping the Headstock 
4. Assembling the Guitar 
5. Setup 
 
Following is the list of parts that are included with your kit. If parts are lost or 
run through the stump shredder during assembly you may order replacements 
from your local music shop or directly from us. 
 

                   Quantity 

Description 

Basswood with Flame Maple Carve top body 

Maple Neck with Rosewood Fingerboard 

Output Jack & Chrome Jack Plate 

1 each 

500 Ohm Tone Pot & 500 Ohm Volume Pot 

3 Way Pickup Toggle Switch 

Black Single Ply Black Plate with Screws 

Neck Position Pickup with Black Mounting Ring 

Bridge Position Pickup with Black Mounting Ring 

Chrome Stop Tailpiece 

Chrome Tune-o-Matic Bridge 

Set of 6 

Chrome Machine Heads 

Chrome Neck Plate with Neck Plate Pad 

Set of 6 

Electric Guitar Strings 

2m Guitar Lead 

Chrome Strap Buttons, Screws and Rubber Pads 

Truss Rod Cover and Screws 

Control Knobs 

Summary of Contents for SPR01

Page 1: ...KIT SP SP SP SPR R R R 01 01 01 01 Joint Bolt on Body Basswood with Flamed Maple Top Neck Maple Fingerboard Rosewood Tuning Machines Chrome Die cast Scale Length 628mm 24 75 Fret 22 Control 1V 1T 3 Wa...

Page 2: ...u may order replacements from your local music shop or directly from us Quantity Description A 1 Basswood with Flame Maple Carve top body B 1 Maple Neck with Rosewood Fingerboard C 1 Output Jack Chrom...

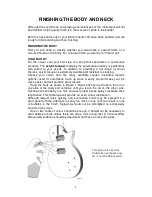
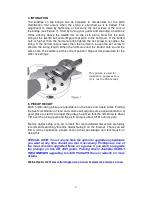
Page 3: ...ur from the many available shades including metallic options used for automobile touch up work A spray can will make your job much easier and will produce great results Hang the body as shown in Figur...

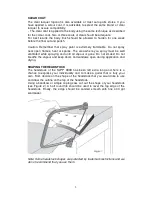
Page 4: ...l ventilated while spraying and until all vapour is gone Do not smoke Do not breathe the vapour and keep doors and windows open during application and drying SHAPING THE HEADSTOCK The headstock of the...

Page 5: ...n as wet and dry During sanding be sure to place a firm material behind the sandpaper A large rubber eraser works fine The eraser is flexible enough to sand the gradual curves but is stiff enough to p...

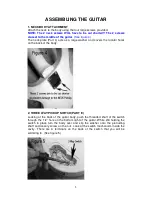
Page 6: ...the locator holes on the back of the body 2 THREE WAY PICKUP SWITCH PART E Looking at the back of the guitar body push the threaded shaft of the switch through the 1 2 hole on the bottom right of the...

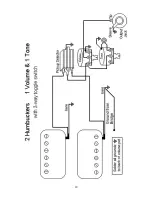
Page 7: ...ol cavity also Attach the bridge position humbucking pickup to the body with four 5 8 screws 5 VOLUME AND TONE CONTROLS PART D There is one volume and one tone control for this guitar The 1 volume and...

Page 8: ...ece of wood on top of the bushing to prevent damage and tap the bushing in place with an ordinary hammer Now screw the tailpiece mounting screws back into the bushings 8 THE BRIDGE PART J Now tap the...

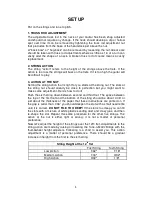
Page 9: ...might want to make some adjustment Here s how to do it Push the sixth string down between second and third fret The space between the top of the first fret and the bottom of the string should be about...

Page 10: ...humbucking pickup is adjustable on the bass and treble sides Finding the best combination of tone and volume will require some experimentation A good place to start is to adjust the pickup height so t...

Page 11: ...10...

Reviews: