background image


©2020 Flavor Burst Company                                                  Printed in February 


Printed in  

All Rights Reserved 


                               The United States of America


Flavor Burst

 ®


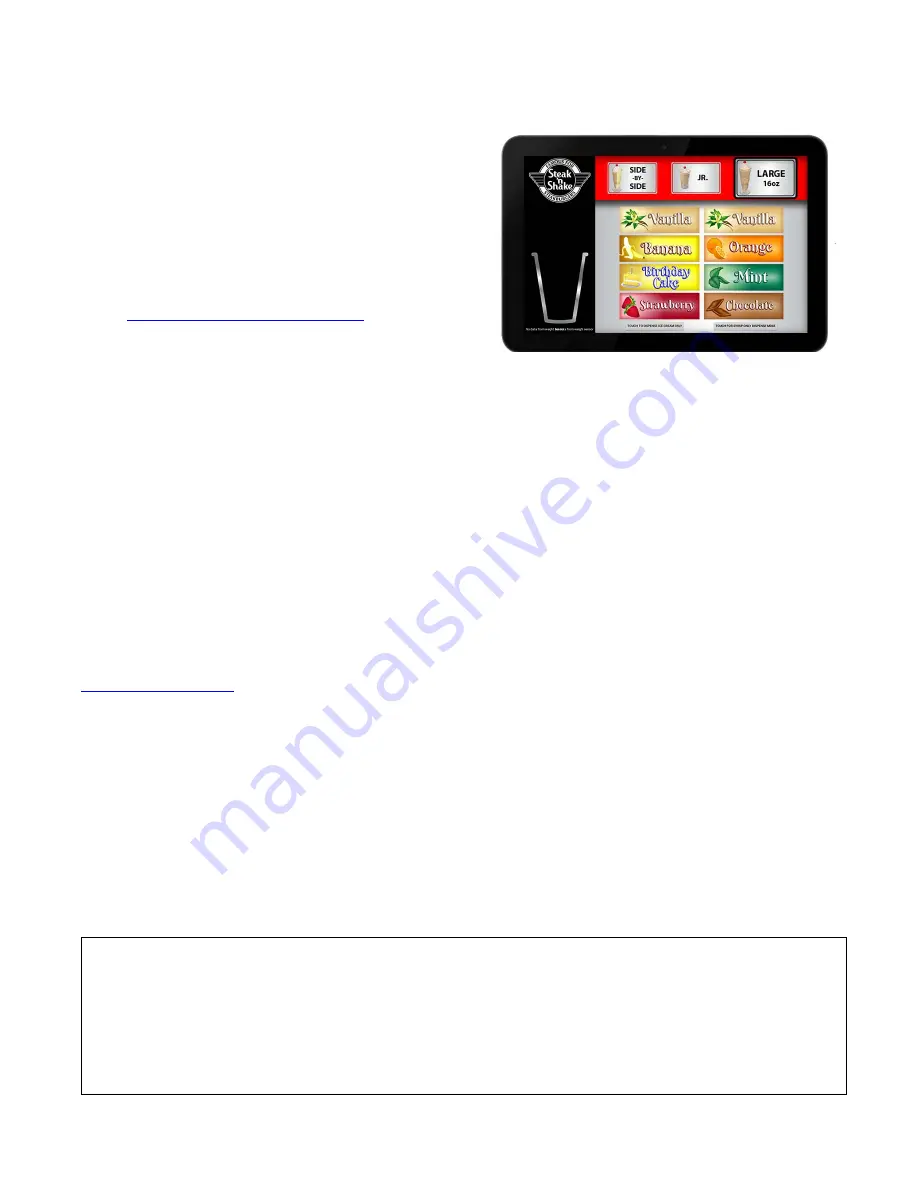
Color Touch Panel 

CTP-SNS Model


*for installation and maintenance 
information on your Color Touch Panel, 
please consult your model’s full  
Operations Manual.   
 
*Visit 

www.flavorburst.com/support/


“Color Touch Panel Files” to update your 
panel to the most current program.   


Manufactured by 
 
Flavor Burst Company 
499 Commerce Drive 
Danville, IN  46122 
 
For general information and to locate a 
distributor near you, call or visit our website: 
Phone:  (317) 745-2952 
Toll Free Number: (800) 264-3528 
Fax:  (317) 745-2377 

www.flavorburst.com


Warranty 


An installation and warranty form is provided with every Color Touch Panel “CTP-SNS” system, located 
inside  the  unit  with  this  manual.    It  is  important  that  the  operator  carefully  review  the  warranty  and 
installation documents accompanying the unit before using this system.  Any questions or concerns 
regarding the warranty should be clarified upon delivery or installation.  For more information, contact 
your local authorized Flavor Burst


®

 distributor. 

Summary of Contents for CTP-SNS

Page 1: ...ville IN 46122 For general information and to locate a distributor near you call or visit our website Phone 317 745 2952 Toll Free Number 800 264 3528 Fax 317 745 2377 www flavorburst com Warranty An...

Page 2: ...0 PAGE INTENTIONALLY LEFT BLANK...

Page 3: ...alibration 17 Flavor Options 23 Enable or Disable Syrup Trays 23 Change Syrup View Usage 24 Maintenance Functions 27 Equipment Cleaning Functions 27 View Equipment Cleaning Videos 33 Serving Options 3...

Page 4: ...a residential installation This equipment generates uses and can radiate radio frequency energy and if not installed and used in accordance with the instructions may cause harmful interference to radi...

Page 5: ...once it is complete Always follow these safety precautions when operating the Flavor Burst system DO NOT operate the system without reading this operator s manual Failure to follow this instruction m...

Page 6: ...ting speakers to the Color Touch Panel 6 RJ45 PORT 2 Secondary communications port provides additional serial communications and two additional switch ports 7 RJ45 PORT 1 Primary communications port a...

Page 7: ...5 Color Touch Panel Ports Features...

Page 8: ...6 PAGE INTENTIONALLY LEFT BLANK...

Page 9: ...WHILE THE SYSTEM IS DISPENSING 2 Select the size of the serving at the top of the screen By default the serving size is set to LARGE 3 Depending on what you want to dispense do one of the following Di...

Page 10: ...ensing syrup and stop when the serving is complete NOTE To return to the main dispense screen touch FULL DISPENSE MODE 4 When the screen indicates that the serving is finished remove the cup If you di...

Page 11: ...nd change settings on the system 1 Touch and hold the logo in the upper left corner of the Touch Panel until the Maintenance Menu appears Swipe the screen up and down to see the full menu options 2 Th...

Page 12: ...10 PAGE INTENTIONALLY LEFT BLANK...

Page 13: ...time and date by pressing the CHANGE TIME key 3 Leave the two Automatic settings deactivated These require constant wifi 4 Touch the Set date key 5 To change the year touch the year displayed in the...

Page 14: ...or the current time of day Touch OK to save this setting 11 Touch Select time zone and choose the time zone of your current location 12 Leave the use 24 hour format deactivated in most cases 13 When f...

Page 15: ...r Bank B on the driver board inside the cabinet By default it is set to Bank A 17 Change Switch Input Ensure the switch cord from the flavor burst door assembly is fully plugged into the freezer Press...

Page 16: ...the Priming Functions section in the Maintenance Menu Enter the Administrator Password if prompted 3 Select the flavor of the syrup line you are priming Flavor will dispense immediately 4 The flavor b...

Page 17: ...you like Sharing the password with others allow them access to these sensitive areas so only share this password with those you trust won t abuse the Touch Panel s features Once the password is enter...

Page 18: ...protected sections of the Maintenance Menu such as Equipment Setup Wizard The password box should appear 6 Type in the Administrator Password and press OK to access the restricted areas NOTE ONCE THE...

Page 19: ...spensing feature of this system It detects when there is a cup in the holder and allow the user to proceed with the serving alternatively if there is no cup in the holder it prevents product from bein...

Page 20: ...oor Assembly 6 Twist as you remove the weight It may be seated snuggly 7 Reinstall the Auto Draw Lift bracket while closing the Door Assembly and secure with the locking pin 8 Reinstall the Door Assem...

Page 21: ...g the Flavor Burst system it may take some time for the pumps to acclimate Therefore it is necessary to calibrate the syrups ONCE A WEEK for 4 weeks to ensure the output and syrup levels are accurate...

Page 22: ...The weight sensor determines how long the freezer draws ice cream product according to the serving size chosen But at times the spout can hang on to a dollop of ice cream This ice cream typically fal...

Page 23: ...REPEAT THE CALIBRATION FROM THE BEGINNING WITH A NEW CUP 22 Make sure all of the ice cream is free from the spout and inside the cup If there is still ice cream hanging from the spout twist the cup or...

Page 24: ...for a 2nd and then 3rd time 26 Once the 3rd cycle has completed the screen will display the results of the calibration Press DONE 27 Everything is calibrated once each section shows a green CALIBRATED...

Page 25: ...ord if prompted 2 To disable a flavor from the menu toggle the button next to the flavor name so that it is in the OFF position Do this for any other flavors that need to be disabled To enable flavors...

Page 26: ...elected for a serving until the empty bag of syrup is replaced with a new one Press and hold the logo in the upper left corner to access the Maintenance Menu 2 Touch the Change Syrup View Usage sectio...

Page 27: ...abinet Discard the empty bag 7 Select a new flavor bag and remove the dust cap Ensure that the flavor is the SAME FLAVOR as the empty one 8 Place the bag into the tray and ensure the bag fitment is ac...

Page 28: ...26 11 Go back to the screen and press NEXT 12 The following screen asks to confirm whether or not the syrup bag has been replaced with a new bag 13 Once replaced the flavor will show 100...

Page 29: ...how many days cleaning is overdue This step by step guide will take you through the necessary cleaning procedures for one flavor or all 8 flavors and the relevant parts The cleaning process takes app...

Page 30: ...E LINE TOUCH ONE 1 8 Prepare detergent water by mixing several drops of Dawn dish soap with a gallon of warm water 108 F 42 C 9 With a towel under the connection disconnect the syrup bag connector fro...

Page 31: ...ushing all 8 lines will dispense a lot of liquid Then press START 16 Allow the system to clear clean and then soaking the lines for 20 25 minutes The cycle includes several 2 minute periods of soaking...

Page 32: ...er you are connecting the same bag of syrup or a new bag of syrup of the SAME flavor Make selections for each of the flavors NOTE ALWAYS INSTALL A BAG OF THE SAME FLAVOR THAT WAS PREVIOUSLY IN THE TRA...

Page 33: ...OU ARE READY TO FLUSH THE SYRUP LINES OTHERWISE THE TANK SHOULD REMAIN EMPTY FOR NORMAL OPERATIONS View Equipment Cleaning Videos The Touch Panel allows for cleaning and instructional videos to be upl...

Page 34: ...ord Touch the ASSEMBLE LIST OF VIDEO FILES button and enable the videos you wish to add to the list using the toggle buttons The videos you enable will be accessible to anyone who has access to the Ma...

Page 35: ...Draw servings for each section that was changed and adjust as needed General Settings This section shows the percentage of syrup left in the syrup bag that remains before the system disables that flav...

Page 36: ...34 PAGE INTENTIONALLY LEFT BLANK...

Page 37: ...nt Cleaning Videos section Disabling the video removes it from View section but keeps it here in this Edit list so that it can easily be enabled again 3 To swap out a video for another one that is alr...

Page 38: ...en prompted 9 To add more videos previously uploaded to the Touch Panel touch the ADD VIDEO button at the bottom of the screen 10 Select a video file shown on the media screen NOTE IF THE DESIRED VIDE...

Page 39: ...if prompted If the USB is connection the USB Status at the top of the screen will say Connected 3 Insert the thumb drive into the USB port underneath the Touch Panel If the USB is connecting properly...

Page 40: ...38 PAGE INTENTIONALLY LEFT BLANK...

Page 41: ...act and System Info section in the Maintenance Menu Enter the Administrator Password if prompted 2 To add or update your distributor s information for easy access to their phone number touch the UPDAT...

Page 42: ...d switches of the system and will detect if anything isn t working properly 1 Press the Diagnostics section in the Maintenance Menu 2 Bank A Bank B Motor Tests On the electronics board located inside...

Page 43: ...mber and select how many seconds you wish each motor to run in the test 5 To run the test on the enabled motors touch the MOTORS ARE OFF button The button will then read MOTORS ARE ON and you will hea...

Page 44: ...up Checker This tests how much syrup is dispensed in a given time measuring volume as well as weight 11 Place a cup into the cup holder 12 Select a flavor to test and then touch the START button 13 Th...

Page 45: ...iFi and or a USB Connection 2 If a connection cannot be established the wifi for the Touch Panel may not be turned on Touch the CONFIGURE WIFI button 3 Then SCAN for wifi networks A password may need...

Page 46: ...e the whole Flavor Burst application press the Exit Application section in the Maintenance Menu Enter the Administrator Password if prompted The Flavor Burst app will close and the Android s main scre...

Page 47: ...to address the issue 1 Calibration Due When first installing the Flavor Burst SNS system you will need to go through the System Calibration section of the Maintenance Menu Calibrating the weight senso...

Page 48: ...to remove the message from the screen NOTE DO NOT HOLD OR DISTURB THE CUP WHILE THE SYSTEM IS DISPENSING NOTE IF THIS MESSAGE APPEARS AND THE CUP IS IN THE CUP HOLDER YOU MAY NEED TO RE CALIBRATE THE...

Page 49: ...ts A message and flashing icon will appear on the main dispense screen when this cleaning procedure is due You can hide the message for 4 hours at a time but it will keep track of how many days cleani...

Page 50: ...48 PAGE INTENTIONALLY LEFT BLANK...

Page 51: ...these instructions to draw a serving and test your settings 1 Place cup firmly in the cup holder Allow the cup to rest freely NOTE DO NOT HOLD OR DISTURB THE CUP WHILE THE SYSTEM IS DISPENSING 2 Selec...

Page 52: ...serving and determine if it is the correct volume for the size you selected Taste the serving to determine if the flavor level is acceptable Draw servings of the other flavors and sizes to evaluate th...

Page 53: ...51...

Page 54: ...52 2019 Flavor Burst is a registered trademark of the Flavor Burst Company Taylor is a registered trademark of the Taylor Company All rights reserved...

Reviews: