background image

User Manual 

Instrukcja Obsługi

 Please keep this User Manual for future 

consultation.  If  you  sell  the  fixture  to 

another user, be sure that they also receive 

this instruction booklet.

 Unpack and check carefully there is no 

transportation damage before using the 

fixture.

 Before operating, ensure that the voltage 

and frequency of power supply match the 

power requirements of the fixture.

 It’s important to ground the yellow/green 

conductor to earth in order to avoid electric 

shock.

 Disconnect main power before servicing 

and maintenance.

 Use safety chain when fixes this fixture. 

Don’t handle the fixture by taking its head 

only, but always by taking its base.

 Maximum ambient temperature is: 400C


IMPORTANT!


Do not point strong light output from other fixtures 

at the 

LED PAR

, as intense illumination can 

damaged the display.

Don’t operate it where the temperature is 

higher than this.

 In the event of serious operating problem, 

stop  using  the  fixture  immediately.  Never 

try to repair the fixture by yourself. Repairs 

carried out by unskilled people can lead to 

damage or malfunction. Please contact the 

nearest authorized technical assistance 

center. Always use the same type spare 

parts.

 Do not connect the device to any dimmer 

pack.

 Do not touch any wire during operation 

and there might be a hazard of electric 

shock.

 To prevent or reduce the risk of electrical 

shock or fire, do not expose the fixture to 

rain or moisture.

 The housing must be replaced if they are 

visibly damaged.

 Do not look directly at the LED light spot 

while the fixture is on.

2. SAFETY INFORMATION

1. INTRODUCTION

THANK  YOU  FOR  PURCHASING 

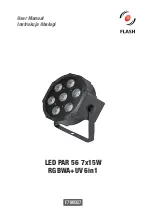
LED PAR 56 7x15W RGBWA+UV 6in1

.  FOR  SAFETY 

REASONS  AND  TO  ENSURE  THE  TROUBLE-FREE  OPERATION,  CAREFULLY  READ 

THE INSTRUCTIONS.

W A R N I N G !

Figure 2.

 Lenses can focused sunlight and strong light, presenting a risk of fire and damage to the fixture. 


Shield or shade the head if necessary.

Summary of Contents for F7100327

Page 1: ...User Manual Instrukcja Obsługi F7100327 LED PAR 56 7x15W RGBWA UV 6in1 ...

Page 2: ...t where the temperature is higher than this Intheeventofseriousoperatingproblem stop using the fixture immediately Never try to repair the fixture by yourself Repairs carried out by unskilled people can lead to damage or malfunction Please contact the nearest authorized technical assistance center Always use the same type spare parts Do not connect the device to any dimmer pack Do not touch any wi...

Page 3: ... be fixed at a place where is out of the touch of people and has no one pass by or under it The device is equipped with the following interfaces 1 DMX in out XLR 3 5 pin socket 2 Power in out powerCON socket 1 3 2 2 FEMALE XLR GROUND DMX DMX MALE XLR 3 1 CAUTION At the last fixture the DMX signal has to be terminated with a terminator Solder a 120Ω resistor between signal and signal into a XLR plu...

Page 4: ...00 Y255 Yellow Dimmer Dark Light Y255 14 O000 O255 Color Dimmer Dark Light O255 15 F000 F255 Strobe F000 LED display window function control table all the function are selected and than press D key to save confirm The connection is performed using power cable with PowerCon connector included The device must be operated by qualified personnel 5 2 Voltage specification Input Voltage Total Power Freq...

Page 5: ...plain 1 Strobe 000 000 No Strobe 001 009 Close LED 010 255 Strobe Slow Fast 2 Red Dimming 000 255 Linear Dimming from Dark Light 3 Green Dimming 000 255 Linear Dimming from Dark Light 4 Blue Dimming 000 255 Linear Dimming from Dark Light 5 White Dimming 000 255 Linear Dimming from Dark Light 6 Color Dimming 000 255 Linear Dimming from Dark Light 7 Yellow Dimming 000 255 Linear Dimming from Dark Li...

Page 6: ...o strumienia świetlnego z innych urządzeń ponieważ intensywne oświetlenie może uszkodzić wyświetlacz Rysunek 2 Soczewki mogą skupiać światło słoneczne i silne światło stwarzając ryzyko pożaru i uszkodzenia urządzenia W razie potrzeby należy osłonić lub zasłonić głowę ...

Page 7: ...ządzenie powinno być zainstalowane w dobrze wentylowanym pomieszczeniu w odległości co najmniej 15cm od najbliższej powierzchni ściany sufitu itp Jednocześnie należy upewnić się że otwory wentylacyjne nie są zatkane oraz wentylatory działają poprawnie Po wyjęciu urządzenia z opakowania należy sprawdzić czy nie zostało ono uszkodzone podczas transportu Przed podłączeniem do sieci elektrycznej należ...

Page 8: ...ĘSKI XLR 3 1 Połączenie odbywa się przy użyciu przewodu zakończonego z jednej strony wtyczką sieci elektrycznej i wtyczką typu powerCON z drugiej strony w zestawie Urządzenie musi być obsługiwane przez UWAGA W przypadku uszkodzenia przewodu nie należy dokonywać samodzielnejnaprawy Wymianalubnaprawamożebyćwykonanajedynie w serwisie producenta lub przez osobę z odpowiednimi uprawnieniami wykwalifiko...

Page 9: ...Koloru brak świa tła gdy nie ma dźwięku SOUD 8 SUND Głosowa zmiana Koloru zawsze włączony LED SUND 9 R000 R255 Czerwony Dimmer Ciemny Jasny R255 10 G000 G255 Zielony Dimmer Ciemny Jasny G255 11 B000 B255 Niebieski Dimmer Ciemny Jasny B255 12 W000 W255 Biały Dimmer Ciemny Jasny W255 13 Y000 Y255 Żółty Dimmer Ciemny Jasny Y255 14 O000 O255 Kolor Dimmer Ciemny Jasny O255 15 F000 F255 Strobe Błysk F00...

Page 10: ...nearny Dimm z Ciemny Jasny Nr Funkcja Wartość Opis 1 Strobe Błysk 000 000 Brak Strobe Błysku 001 009 Wyłączony LED 010 255 Strobe Błysk Wolno Szybko 2 Czerwony Dimming 000 255 Linearny Dimm z Ciemny Jasny 3 Zielony Dimming 000 255 Linearny Dimm z Ciemny Jasny 4 Niebieski Dimming 000 255 Linearny Dimm z Ciemny Jasny 5 Biały Dimming 000 255 Linearny Dimm z Ciemny Jasny 6 Kolor Dimming 000 255 Linear...

Page 11: ...LED PAR 56 7x15W RGBWA UV 6in1 Art No F7100327 ...

Page 12: ...www flash butrym pl F7100327 ...

Reviews: