background image

BODY MOUNTING

1.

 Disconnect the cable from the control housing

and unwind all but the last 12 inches or so from
the stem. Secure the lower end of the cable with
a Velcro strap at least 12 inches up from the coil.

2.

Remove the control housing from the pistol

grip by holding the grip with one hand and sliding
the housing toward you wilth the other hand.

3.

Attach the belt loop to the control housing by

slipping it over the brass posts on the bottom of
the control housing and pulling it toward the
control panel to lock it in place.

4.

Reconnect the cable to the control housing.

5.

The control housing can then be mounted on

your belt or on the optional Fisher Chest Harness,
which is especially useful for shallow water
hunting.

It is especially important that the cable connector be
installed tightly to prevent false signals during body-mount
use. Tight, but never tightened with anything but your hands.

For belt mounting, left handers should wear the housing on their right hip and
right handers should wear it on their left hip.

8

Summary of Contents for CZ-7a PRO Quicksilver

Page 1: ...CZ 7a PRO Quicksilver Operating Manual Deep Search Body Mount Target I D Metal Detector F I S H E R R E S E A R C H L A B O R A T O R Y...

Page 2: ...und Balancing pg 17 Pushbutton pg 18 Bobbing pg 19 Search Modes pg 22 Autotune pg 22 Target I D pg 23 Audio Response Chart pg 25 Searching pg 28 Pinpointing Depth Reading pg 31 Target Identification p...

Page 3: ...d a command 3 Liquid Crystal Display with Back Light A large liquid crystal display gives you quick and accurate information about the target operating mode and battery condition Use this function spa...

Page 4: ...tegories 8 Silent Search Slow Motion Target LD Mode No threshold tone no chatter The audio and visual target ID circuits ignore everything you ve notched out For example if you ve notched out iron tar...

Page 5: ...dentify 15 Wet Sand Operation Just press the NORM SALT touch pad reset the ground control and you can search wet salt sand like nobody s business In fact you can submerge the coil for shallow saltwate...

Page 6: ...n The CZ 7a Pro breaks down to fit into an optional carrying case not much bigger than a briefcase and small enough for most airline carry on luggage 23 Last Setting Turn On Memory When you turn your...

Page 7: ...3 Adjust the stem length and coil angle so that the search coil rests flat on the ground about 6 to 12 inches in front of and slightly to the right of your right foot to the left of your left foot for...

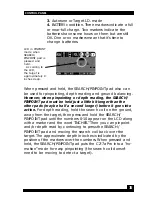
Page 8: ...ly adjusted wrap the search coil cable snugly around the lower stem and the center section Leave just enough slack near the coil to allow it to be tilted completely backward and forward NOTE A loose c...

Page 9: ...e shaft length and coil angle properly adjusted you should be able to move into your search position by leaning forward very slightly and raising angle so the coil rests flat on the ground about 6 to...

Page 10: ...ver the brass posts on the bottom of the control housing and pulling it toward the control panel to lock it in place 4 Reconnect the cable to the control housing 5 The control housing can then be moun...

Page 11: ...e the GROUND BALANCE knob clockwise to the red 5 3 Press and release the PRESET touch pad 4 Your CZ 7a Pro is now in a coins only mode preset at the factory to accept U S coins and reject small ferrou...

Page 12: ...target 8 When you get a good repeatable signal pinpoint the target by placing the coil on the ground away from the target pressing and holding the SEARCH PINPOINT pad and then bringing the coil back o...

Page 13: ...Use this function sparingly as it will significantly reduce battery life VOL Press and hold until the numbers 0 10 a row of cursors and the abbreviated word VOL appear Adjust the volume by using the...

Page 14: ...ou know which mode you are in See p 17 for more on the Autotune mode SENS Press and hold until the numbers 0 10 a row of cursors and SENS appear Adjust sensitivity as you did the volume above Exit the...

Page 15: ...o indication on the LCD to alert you to the fact that you may have changed your volume modes sensitivity and notch settings NOTCH Press and hold the NOTCH pad until you see a cursor appear below the r...

Page 16: ...se this pad to get out of the Volume Sensitivity and Notch functions You must do this if you are in one of these functions VOL for example and you want to get into another function NOTCH for example P...

Page 17: ...to press the SEARCH PINPOINT pad and moving the search coil back over the target The approximate depth in inches is indicated by the position of the markers over the numbers When pressed and held the...

Page 18: ...over a large shallow target NOTE If your headset has volume controls first adjust your headset volume controls to minimum and the CZ 7a Pro volume to maximum Then gradually increase the headset contro...

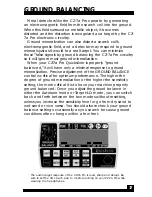
Page 19: ...ve only a minimal response to ground mineralization Precise adjustment of the GROUND BALANCE control is critical for optimum performance The higher the degree of ground mineralization or the higher th...

Page 20: ...in either the Autotune or Target LD mode 1 With your controls set as in the Turn On procedure See page 9 GROUND BALANCE control at 10 hold your search coil parallel to the ground and 6 to 12 inches o...

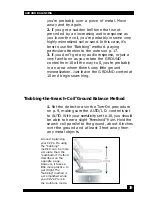
Page 21: ...eralization Just leave the GROUND control at 10 and begin searching Bobbing the Search Coil Ground Balance Method 1 Set the detector as in the Turn On procedure on p 9 making sure the AUTO I D control...

Page 22: ...gain As you bob the search coil one of three things will happen to your threshold hum 1 It will fade again as you lower the coil and increase as you raise it 2 It will get louder as you lower the coil...

Page 23: ...control at 10 you re probably over a piece of metal Move away and try again 2 If you get a sudden bell tone not preceded by an increasing audio response you re probably in some very highly mineralized...

Page 24: ...de To realize the benefits of the Autotune mode search in the Autotune mode until you find a target Pinpoint the target using the SEARCH PINPOINT pad and then push the AUTO I D touch to switch to I D...

Page 25: ...foil on the ground at least 18 inches apart Include some large targets as well jar lids soda cans etc 2 Using the NOTCH and Arrow pads set the NOTCH control to accept all target categories Set the sen...

Page 26: ...metal detectors have a difficult time separating gold rings nickels tabs and foil But the patented circuitry of your CZ 7a Pro can easily tell the difference between nickels and most trash Better yet...

Page 27: ...ategory by removing the marker from below the IRON icon You will find that the CZ 7a Pro rejects small iron targets and no longer responds either with an audio tone or a display identification LCD in...

Page 28: ...ow pads You can reject notch out any combination of target categories For example if you re hunting for iron Civil War relics you can reject every category except IRON Or if you re hunting in an area...

Page 29: ...loaded with round tabs however you could notch them out also You d lose rings that fail into that category but you d still get all the rings falling into the rectangular tab foil and nickel categorie...

Page 30: ...re so the audio response will give them some clue as to the target s depth or size 4 Only experience will tell you how to set your sensitivity in every situation but you ll probably want to run it as...

Page 31: ...that your coil s search pattern in conical and if you don t overlap each sweep you ll miss the deeper targets 8 Search in a methodical manner Pay close attention to where you re going and where Keep...

Page 32: ...Autotune search mode 4 Missed target Many targets well within the range of you CZ 7a Pro will not be detected unless you overlap your sweeps Effects of sweep speed ground mineralization and search mod...

Page 33: ...0 to 10 a MARKER and the word INCHES will appear on the LCD 3 Still pressing the SEARCH PINPOINT touch pad bring the search coil back over the target area Note that as you approach the target the volu...

Page 34: ...y level and or raising the coil so you can just barely hear the signal For very weak signals make sure you press the SEARCHlPINPOINT pad with the coil completely out of the target area You may also tr...

Page 35: ...Keeping these four rules in mind follow these steps for accurate target identification 1 Once you ve located a target pinpoint its exact location as in the Pinpointing procedure see p 24 Since accurat...

Page 36: ...r CZ 7a Pro Whichever method you choose remember that responsible treasure hunters take pride in their ability to leave soil and vegetation intact and undamaged Recovery Tools 1 A heavy duty blunt scr...

Page 37: ...the object as you pass the search coil over it Another false signal response may be a one way or disappearing signal You ll sweep over the target and get a good signal but you ll get nothing on the re...

Page 38: ...power lines or nearby detectors operating at one of the CZ 7a Pro search frequencies The best solution is to move away from the source of the interference You may also try one of the following Switch...

Page 39: ...detectors often give false signals at the edges of the search pattern just as the coil stops and begins accelerating back toward the operator If this is a problem try one or more of the following Keep...

Page 40: ...e as shown in the drawing below may give a single target response but may pinpoint several inches away from its true location Check around the inside edges of your hole If you still don t find it enla...

Page 41: ...I D set the search coil down close to the target and then whip it rapidly across the target just once with what can best be described as a flick of the wrist If the target disappears it s probably a s...

Page 42: ...ignals If you hear a good beep but can t repeat it when you ve pinpointed it in the Pinpoint mode or if it beeps in only one sweep direction it s probably a piece of trash something you ve notched out...

Page 43: ...hole for a second signal and carefully search the immediate area by walking slowly around the hole two or three times overlapping your sweeps in an ever widening circle Always dig every suspicious so...

Page 44: ...m the handle grip by holding the grip in one hand and sliding the control housing toward you 2 Remove the battery doors by gently lifting the two tabs at the end of the control housing 3 Remove the ba...

Page 45: ...xtreme temperatures Don t leave it inside a closed car that s sitting in the sun Or even worse the trunk of a car 3 If you scrub the search coil on the ground you ll eventually wear through the bottom...

Page 46: ...ting Search Coil Submersible Control Housing Splashproof11 Speaker Splashproof Visual Display Custom Liquid Crystal Display Batteries 2 9 volt Alkaline 12 transistor drop in Battery Life Alkaline 15 2...

Page 47: ...certain types of false signals 10 The length and terms of the warranty will vary outside the U S Check with your distributor for detarts Fisher Research Laboratory does not warrant suitability to spec...

Page 48: ...with a Limited Lifetime Warranty Warranty may vary outside the United States See your dealer for details S E R V I C E Fisher is committed to providing you our valued customer with superior service E...

Reviews: