9
Assembly
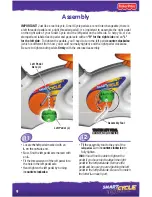
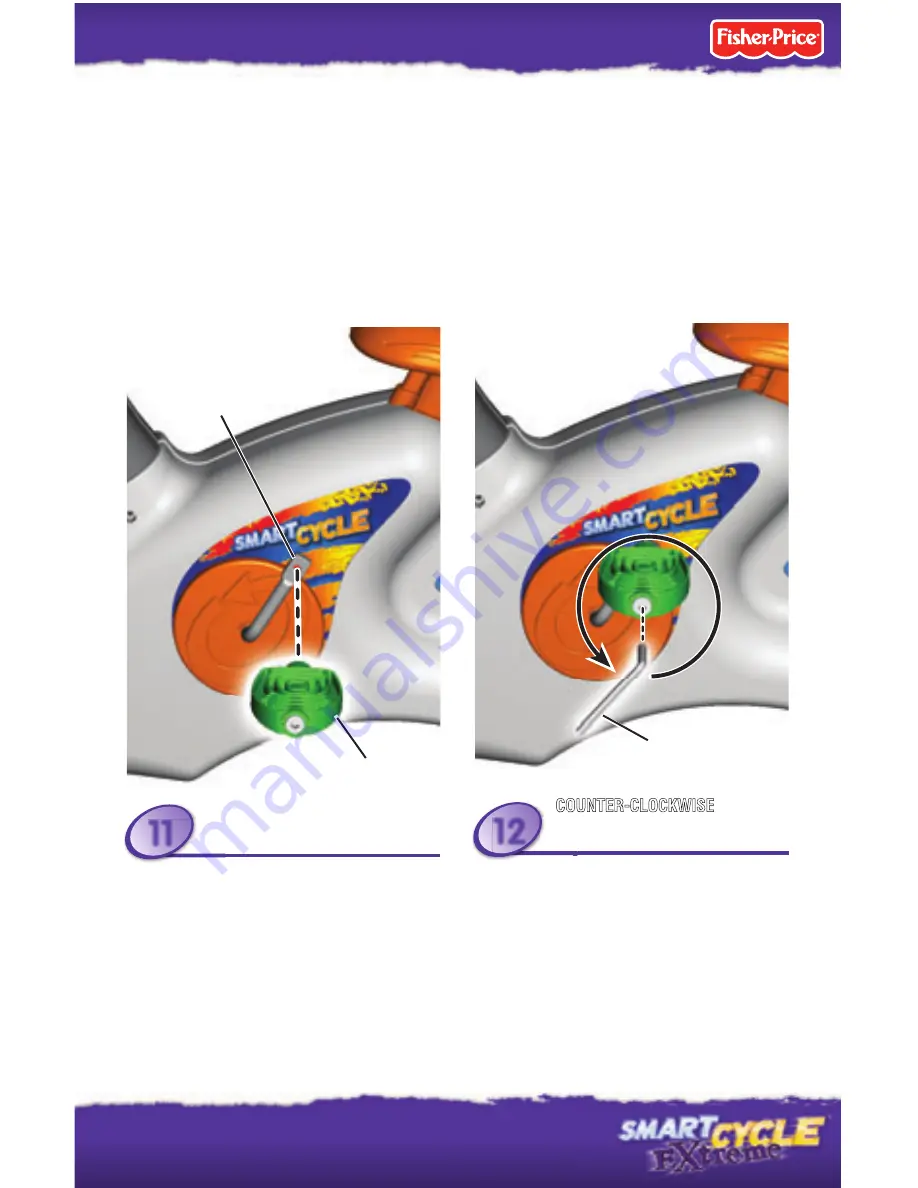
• Locate the left pedal marked with an
L
on the outside end.
• Now, fi nd the left pedal axle marked with
an
L
.
• Fit the threaded end of the left pedal into
the hole in the left pedal axle.
• Hand-tighten the left pedal by turning
it
counter-clockwise
.
• Fit the assembly tool to the end of the
left pedal. Turn it
counter-clockwise
to
fully tighten.
Hint:
You will not be able to tighten the
pedal if you have tried to attach the right
pedal to the left pedal axle. Remove the
pedal and be sure you are attaching the left
pedal to the left pedal axle. Be sure to match
the letter
L
on each part.
Left Pedal (L)
Left Pedal
Axle (L)
TIGHTEN LEFT PEDAL
TIGHTEN LEFT PEDAL
COUNTER-CLOCKWISE
Assembly Tool
• Fit the assem
left pedal Tu
CO
CO
Fit th
12
• Locate the le
L
on the out
L
L
h l
11
IMPORTANT!
Just like a real bicycle, Smart Cycle pedals are not interchangeable (there is
a left threaded pedal and a right threaded pedal). It's important to assemble the right pedal
on the right side of your Smart Cycle, and the left pedal on the left side. To help you, we’ve
stamped and labeled each pedal and pedal axle with an
"R" for the right side
and an
"L"
for the left side
. To tighten the pedals, you'll need to turn the left pedal
counter-clockwise
(which is different from how you would normally tighten) and the right pedal clockwise.
Be sure to tighten both pedals
fi rmly
with the enclosed assembly.


