the fish haWk Probe
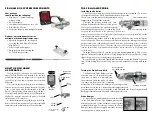
Installing the Batteries
The Probe is powered by four AA Alkaline batteries (not included.) Do not use
rechargeable batteries. Fresh Alkaline batteries will provide
100+ hours of in-the-water life depending on water
temperature. To install the batteries:
Unscrew the probe’s battery cap. Care-
fully pull the battery holder out of the probe.
Place the four batteries into the battery hold-
er matching the appro/- terminals. Please
note: pay special attention to the polarity of the batteries
because the probe will function if only three of four batteries are correctly installed, but the
readings provided may be inaccurate.
Place the battery holder back into the probe with the battery wires facing the
rear of the probe. The wires are encased in nylon-mesh wire tubing to encourage
proper orientation of the battery holder. Please note: if the battery holder is replaced
with the wires facing the front of the probe, the wires can be damaged. While this can be
repaired by installing a replacement battery holder, it may cause you to lose fishing time
with the probe.
Turn the battery cap back onto the probe and hand-tighten snug. Do not over-
tighten. The battery cap has a double O-ring design that does not need to be overly
tight to keep water out of the battery compartment.
Keep the O-rings clean and lightly lubricated and loosen the battery cap at the
end of each fishing day to relieve any pressure and naturally occurring condensa-
tion.
Turning the Probe On and Off
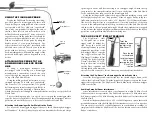
The Fish Hawk Probe features a water
activated auto on/off switch that turns
the probe on when it is lowered into
the water and shuts the probe off when
it is removed from the water, conserving
battery life. To test the probe, simply wet your fingers and
place them across the two activated metal temperature sen-
sors coming out of the front of the probe. A red LED inside the body of the probe will
flash approximately every 10-seconds when the probe is on.
Probe Bumper
A clear silicone rubber bumper comes installed
on the Fish Hawk Probe. The bumper provides ad-
ditional protection for the thermistor tubes against
accidental damage. For storage, remove the Probe
Bumper, insuring that trapped moisture does not
turn the probe on when not in use.
fish haWk X2 sYstem ComPonents
Your package
should include the following:
• Slip-Ducer™ (Patent Pending)
with 10’ cable
• X2 LCD display
• Gimbal bracket and knobs for LCD
• Fish Hawk X4 Probe
• Protective rubber probe bumper installed
Optional, not-included accessories
available at fishhawkelectronics.com:
• Specially designed 35” trolling rod
for using the Fish Hawk Probe and
Slip-Ducer™
• Vinyl coated ball weights
• Adapter plate for mounting the
X2 LCD in track systems
hoW the fish haWk
X2 oPerates
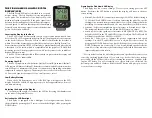
The Fish Hawk X2 can be used with or without a down-
rigger. The Fish Hawk Probe is fastened to the downrig-
ger cable just above the downrigger ball, or to a probe line
spooled on a short rod and reel set-up with a one-pound
ball weight.
It has sensors that constantly monitor water tempera-
ture and speed as it travels through the water. The probe
sends a sonar signal with that information to the Slip-
Ducer™ (Patent Pending) which rides on the probe line or
downrigger cable. When hooked up to the LCD display, the
Slip-Ducer™ sends the data from the probe to the liquid
crystal display (LCD) in the boat.
As the water temperature or speed changes, the LCD up-
dates to reflect the new information. To provide a repeatable
number, the speed is calculated over a 20-second period.
*Leader and weight
not included
Twist off Battery Cap
Pull out battery holder
Flashing Red LED
Water sensitive
Auto On/Off switch
X2 Digital
Display
Slip-Ducer
™
Cable to X2
Display
Weight*
Line or
cable
Leader to
Weight*
Probe
Summary of Contents for X2
Page 1: ...User Guide ...


