background image

Cargo   Pocket   InstallaNon:   

Items   needed:   

1   -­‐   Assembled   Frame   
2   -­‐   Pockets   

1. Secure   the   (2)   pockets   onto   the   frame   next   to   the   oar   stands   using   the   side   release   buckles.      (See   image   on   front   page   for   

specific   locaNon.)

Items   needed:   

2   -­‐   Fish   Cat   Panther   Pontoons   
1   -­‐   Vinyl   Tubing   Adapter   
1   -­‐   Summit   2   Valve   Adapter   
1   -­‐   Pump   (not   included)   

Inflate   the   pontoons   using   a   hand,   foot   or   an   electric   pump   designed   for   inflatable   boats.      If   using   an   electric   pump   for   iniNal   
inflaNon,   a   hand   pump   must   be   used   to   top   off   the   pontoons.         

To   inflate:      

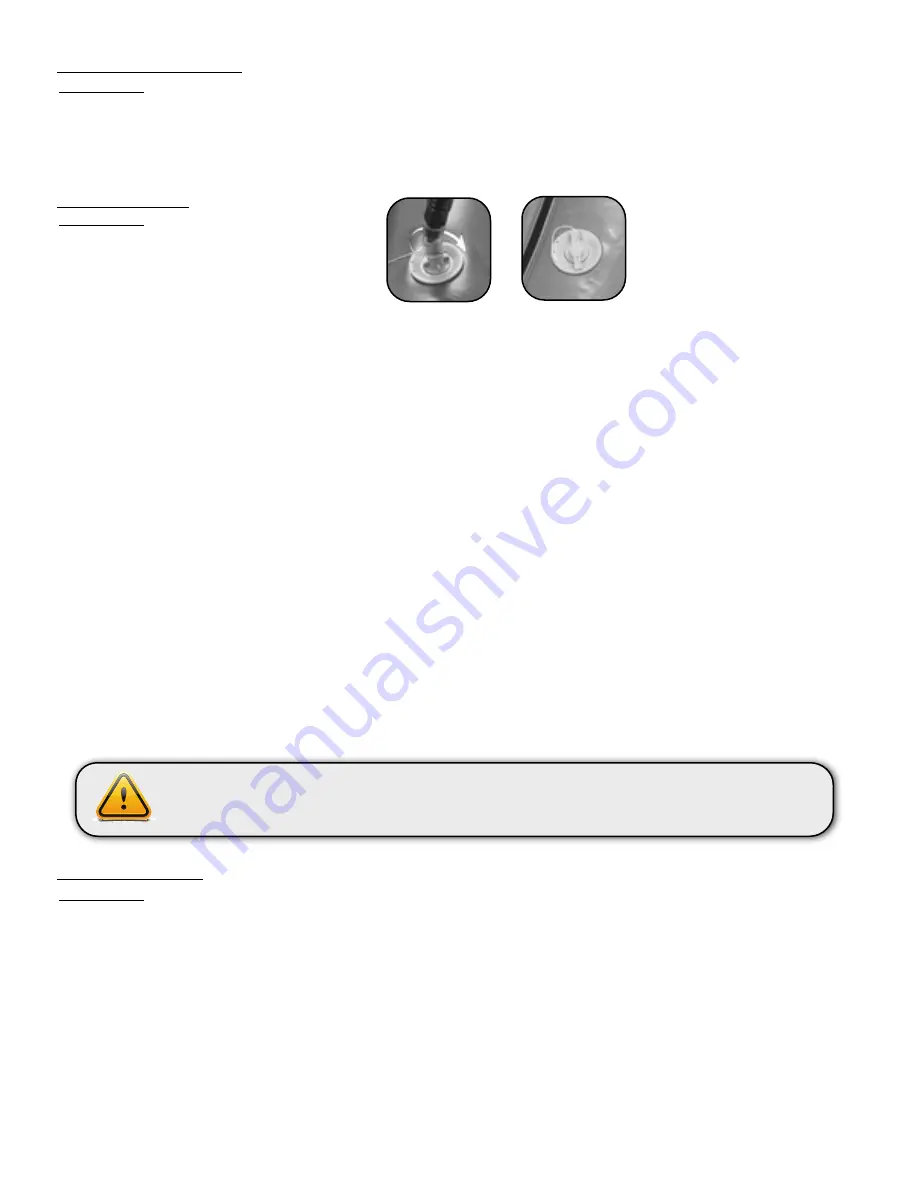
1. Remove   the   dust   cap   from   the   valve.         
2. Push   and   turn   the   valve   stem   1/4   turn   to   the   leR.      This   posiNons   the   valve   stem   in   the   up   or   closed   posiNon.   Having   the   

valve   stem   in   the   closed   posiNon   allows   air   to   be   pumped   into   the   pontoon   and   will   prevent   the   air   from   escaping.         

3. Connect   the   clear   vinyl   valve   adapter   to   the   pump   hose   and   to   the   gray   Summit   2   valve   adapter.         
4. Insert   the   Summit   2   valve   adapter   into   the   valve   on   the   boat.      A   1/4   turn   to   the   right   will   lock   the   adapter   to   the   valve.   
5. Inflate   the   boat   to   a   pressure   of   2.5   psi.   
6. Remove   adapter   and   lock   dust   cap   into   place   
7. Repeat   procedure   for   all   chambers.            

If   the   pontoons   start   to   look   disfigured   when   inflaNng,   stop   and   release   the   air   from   the   pontoon.      Carefully   unzip   the   pontoon   and   
adjust   the   interior   bladder   so   that   it   fills   the   disfigured   area.   Once   the   adjustment   is   completed,   carefully   close   the   zipper,   replace   
the   split   ring   and   re-­‐inflate   the   pontoons   following   the   steps   above.      

InflaNon   Pressure:      A   good   rule   for   gauging   the   proper   pressure   is   to   push   down   with   your   thumb   at   the   center   of   the   tube.      If   you   
can   deflect   about   a   half   an   inch   from   the   top   plane   of   the   tube,   it   will   be   close   to   2.5   psi.


To   deflate:      

1.

Depress   the   valve   stem   and   turn   it   1/4   turn   to   the   right   (clockwise).   This   posiNons   the   valve   stem   in   the   down   or   open   
posiNon   and   will   allow   air   to   escape   freely   from   the   pontoons.

Pontoon   InflaNon:   

Changes   in   air   temperature   and   elevaNon   could   cause   the   air   inside   the   Panther   to   expand   which   could   cause   the   tube   

to   burst.      

Never   leave   your   fully   inflated   pontoon   siQng   in   direct   sun   out   of   the   water.   

Always   release   some   air   when   these   condi5ons   occur.

Items   needed:   

1   -­‐   Assembled   Frame   
1   -­‐   Inflated   Panther   Pontoons   
8   -­‐   30”   Cam   Straps   

1. Proper   posiNoning   of   the   Panther   pontoons   should   be   so   that   the   logos   on   the   outside   of   the   pontoons   and   to   the   bow   or   

front   of   the   boat.   

2. Place   the   Panther   frame   on   top   of   the   pontoons   with   the   foot   bars   toward   the   front   of   the   boat.      Center   the   frame   

between   the   D-­‐rings   on   the   side   of   the   boat.         

3. Using   the   (8)   30”   Cam   Straps   (one   for   each   D-­‐ring)   secure   the   frame   to   the   pontoons.      One   simple   way   to   do   this   is   to   begin   

by   running   the   strap   through   the   frame   near   the   D-­‐ring   leaving   the   buckle   near   the   frame.      Next,   run   the   strap   through   the   
D-­‐ring   and   insert   the   free   end   of   the   strap   into   the   jaws   of   the   buckle.      

4. Once   all   cam   straps   are   in   place,   Nghten   all   cam   straps   evenly   so   they   are   snug   against   the   Panther   pontoons.

Securing   the   Frame:   

Summary of Contents for Panther

Page 1: ...inside the Fish Cat Panther to expand which could cause the tube to burst Always release some air when these condiNons occur Never leave your boat siQng in direct sunlight when it is out of the water This owner s manual will help you with iniNal set up of your new raR provide basic safety informaNon review boat maintenance Nps plus cover some simple field repairs Please review this material and fam...

Page 2: ...ails above crossbars 2 The adjustable Foot Bars are to be installed into the ends of the frame located closest to the Oar Stands and secured with 2 Springer Clips 3 Insert the Anchor System Motor Mount into the back of the frame 4 Lay the Mesh Cargo Deck over frame and cam strap into place Velco the ends to Anchor System Motor Mount bar Frame Assembly 2 Foot Bar 1 Mesh Cargo Deck 6 Springer Clips ...

Page 3: ...r replace the split ring and re inflate the pontoons following the steps above InflaNon Pressure A good rule for gauging the proper pressure is to push down with your thumb at the center of the tube If you can deflect about a half an inch from the top plane of the tube it will be close to 2 5 psi To deflate 1 Depress the valve stem and turn it 1 4 turn to the right clockwise This posiNons the valve st...

Page 4: ...e from the end of the oar handle to the oar stops should be same for both oars 5 Once the posiNon has been determined Nghten the bolts using the Phillips screwdriver Oar installaNon Anchor InstallaNon Items needed 1 Assembled Boat 1 12 Pound Anchor Rope Not included 1 Tie one end of the rope onto the anchor using a secure knot Next thread the free end of the rope through pulleys 1 2 located undern...

Page 5: ...nd the life of this craR we recommend transporNng this craR assembled on a trailer or deflated in a bag Do not load other equipment parNcularly heavy or sharp objects on top of the craR If you transport your boat in an open truck bed please make sure all sharp objects are removed because more boats are damaged in transport than on the water VALVE CAP SHOULD AWAYS BE IN PLACE WHENEVER TRANSPORTING Y...

Page 6: ...Patches 6 ARer opening the 2 part adhesive prepare the Stabond glue by pouring the enNre contents of the glass jar into the metal can and sNr using a popsicle sNck or tongue depressor 7 Apply an even coat of glue with a small brush to both the patch and the area to be repaired and let dry completely approximately 10 15 minutes 8 Apply a second coat of glue and let dry 5 minutes or unNl tacky If th...

Reviews: