background image

TXT 

Discovery Set

ROBOTICS

28

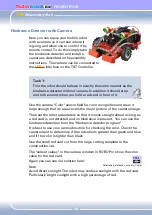
Hindrance Detector with Camera

Now you can equip your mobile robot 
with a camera so it can see where it 
is going and allow you to control it by 
remote control. To do this simply take 
the hindrance detector and install a 
camera as described in the assembly 
instructions. The camera can be connected to 
the 

USB-1

 interface on the TXT Controller.

Task 1:  

First the robot should behave in exactly the same manner as the 
hindrance detector without camera. In addition it should stop 
and turn around when you hold a red card in front of it.

Use the camera "Color" sensor field for color recognition and draw it 
large enough that its area covers the major portion of the camera image.
Then set the robot parameters so that it moves straight ahead as long as 
a red card is not detected and no hindrance is present.  You can use the 
hindrance detection from the "Hindrance detector program".
It is best to use your own subroutine for checking the color. Check the 
camera input to determine if the red value is greater than green and blue 
and if the color is lighter than black. 
Use the small red card cut from the large cutting template in the 
construction set.
The "sensor values" in the camera window in ROBO Pro show the color 
value for the red card.
Again you can see our solution here: 
Note:  
Avoid direct sunlight. The robot may confuse sunlight with the red card. 
Particularly bright sunlight with a high percentage of red.
 

Hindrance_detector_camera_1.rpp

Summary of Contents for ROBOTICS ADVANCED

Page 1: ......

Page 2: ...Humans 6 ROBOTICS Almost Everything Automatic 7 Component Explanations 8 Encoder Motors 8 XS Motor 9 LEDs 9 Lens Tip Lamp 9 Phototransistor 10 Pushbutton 10 Heat Sensor NTC 11 Camera Module 11 ROBOTICS TXT Controller 12 A Few Tips 13 First Steps 14 Starter Models 15 Pedestrian light 15 Hand dryer 16 Temperature Control 18 Barrier 19 Camera Man 20 Swiveling Camera 22 ...

Page 3: ...ctor with Camera 28 Trail Searcher 30 Detection Robot 33 Soccer Robot with Movement Control 35 Soccer Robot 38 Trouble Shooting 43 Interface Test 43 Cables and Wiring 43 Loose Connection 43 Short Circuits 44 Power Supply 44 Errors in the Program 44 Camera Function 44 Last Sources for Help 45 And what else can I do 46 ...

Page 4: ...e ROBOTICS TXT Controller from fischertechnik Learning is a process of building things up from a foundation and it is not possible to start with the most difficult things right away even though they may be a little bit more interesting than the more simple tasks This is why we have structured the experiments and tasks in this booklet so that you learn something different with every new task and ca...

Page 5: ...age the ROBOTICS TXT Controller or the rechargeable battery The subjects of electricity and electronics are just as interesting as robotics which is what this construction set is about and there is a construction set from fischertechnik which deals specifically with these subjects If you are interested in this you will also have just as much fun with our PROFI Electronics construction set as with ...

Page 6: ...and underlined to see a picture showing what is meant in the text The ROBO Pro Icon This is always located in the vicinity of tasks This makes sense because as soon as you click on it a suitable example program opens with a possible solution All example programs are listed under C Programs x86 ROBOPro Example programs ROBO TX Automation Robots Translators note Have these directory names been progr...

Page 7: ...start to learn about this subject This is because the construction set contains everything you need to build and control many different machines You can create the programs for control of the models on a PC with the aid of the ROBO Pro 4 0 or higher software and then transfer them to the ROBOTICS TXT Controller using the USB or Bluetooth connection The controller then controls or operates the mode...

Page 8: ...ntained in the construction set to drive our robots At first glance these are normal electric motors designed for a voltage of 9 volts and maximum current input of 0 5 amperes But the encoder motors can do more In addition to the connection for the power supply for the motor they have another connector for a three pin connection cable which is used in combination with a so called encoder to measur...

Page 9: ...al lights in a traffic light as flashing lights on a robot or for better illumination of an image supplied by the camera also provided in the construction set The LEDs are designed for a voltage of 9 volts and consume approximately 0 01 amperes of current Caution When connecting LEDs to the power supply always pay particular attention to correct polarity Connect the positive pole to the red markin...

Page 10: ...not conduct any electricity Caution When connecting the phototransistor to the power supply pay particular attention to correct polarity Connect the positive pole to the red marking on the phototransistor Pushbutton The pushbutton could also be called a touch sensor Pressing the red button actuates a switch mechanically allowing electricity to flow from contact 1 middle contact to contact 3 At the...

Page 11: ...eaning that each image consists of one million image dots Connect the camera to the large USB port USB1 on your ROBOTICS TXT Controller The images from the camera can be transferred to the PC and viewed on the monitor This allows you to see what your robot is doing at any particular time Moreover the ROBOTICS TXT Controller can process the images thereby recognizing motion colors and tracks allowi...

Page 12: ... describes which components can be connected to which connections and the functions of the connections The color touch screen allows convenient operation of your ROBOTICS TXT Controller The camera contained in the construction set can be connected to the USB host port USB 1 The integrated Bluetooth and WLAN interface is a particularly interesting special feature It allows you to complete a wireles...

Page 13: ...ions for the model If you have to look for an error later this will take much longer Check the movement of all parts When putting models together continually check to see if parts which have to move move easily Use Interface Test Before starting to write a program for a model you should test all parts connected to the ROBOTICS TXT Controller using the interface test feature in ROBO Pro How this wo...

Page 14: ...ro program and create and start your first simple program with ROBO Pro Click here to see the first easy to understand steps Since you will be working particularly with the ROBO Pro Software in addition to the fischertechnik components themselves you should be familiar with the details for writing programs And because this is explained very clearly in Chapters 3 and 4 of the ROBO Pro Help it is be...

Page 15: ...ront of your house Since the technician from the traffic light company doesn t have much time you offer to program the traffic light control for him The man explains to you how the control is supposed to work But first build the model Task Level1 The traffic light should be red initially When pushbutton I1 is pressed by a pedestrian the traffic light should change to yellow three seconds later and...

Page 16: ...d then work properly Then check interrogate the phototransistor at Input I1 If the value is 1 light barrier not interrupted the input should be interrogated continuously in a loop As soon as the value changes to 0 light barrier interrupted switch motor M1 on and then back off after 5 seconds Then return to the loop for interrogating the phototransistor Start the program with the start button and c...

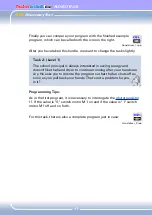
Page 17: ... and doesn t like the hand dryer to continue running after your hands are dry He asks you to rewrite the program so that the fan shuts off as soon as you pull back your hands That s not a problem for you is it Programming Tips As in the first program it is necessary to interrogate the phototransistor I1 If the value is 0 switch motor M1 on and if the value is 1 switch motor M1 off and so forth For...

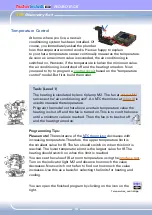
Page 18: ... measure the temperature Program the model so that above a certain temperature value the heating is shut off and the fan is turned on This is to cool the house until a minimum value is reached Then the fan is to be shut off and the heating turned on Programming Tips Please note The resistance of the NTC thermistor decreases with increasing temperature Therefore the upper temperature limit is the s...

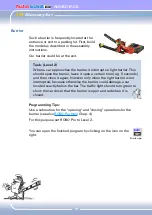
Page 19: ...ertain time e g 5 seconds and then close it again however only when the light barrier is not interrupted because otherwise the barrier could damage a car located exactly below the bar The traffic light should turn green to show the car driver that the barrier is open and red when it is closed Programming Tips Use a subroutine for the opening and closing operations for the barrier see also ROBO Pro...

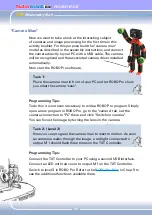
Page 20: ... sees Programming Tips To do this it is not even necessary to write a ROBO Pro program Simply open a new program in ROBO Pro go to the camera tab set the camera connection to PC there and click Switch on camera You can focus the image by turning the lens on the camera Task 2 Level 3 Now you can program the camera man to react to motion As soon as someone walks through the image a red light connect...

Page 21: ...or it to react The best way is to try it with the default values first and then later change the settings to see the reaction Create a routine in ROBO Pro for checking whether the sensor field has recognized a motion To interrogate the sensor field use the camera input element from Level 3 in ROBO Pro and use a loop to check whether motion is present Interrogation of Motion C input Change contrast...

Page 22: ... The camera should first move to its initial position until pushbutton I1 is depressed Then it should repeatedly move a certain number of pulses in the other direction You can easily check how many pulses are practical per rotation with the aid of the interface tests Use the camera Motion sensor element to check whether anything changes in the image If so trigger an alarm on the TXT Controller lou...

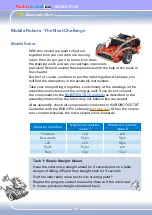
Page 23: ...components to the ROBOTICS TXT Controller as described in the assembly instructions the robot may not behave like you expect After assembly check all components connected to the ROBOTICS TXT Controller with the ROBO Pro software interface test When the motors turn counterclockwise the robot should move forwards Direction of motion Direction of rotation motor 1 Direction of rotation motor 2 Forward...

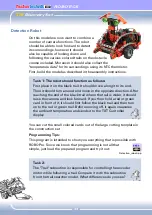
Page 24: ...again for three seconds meaning both motors at the same speed in the same direction Find out how long you have to let the motors run in different directions to make the robot turn 90 Programming Tips For this change the waiting time after the command for changing the direction of the second motor You can open the finished program as usual by clicking on the icon on the right Task 3 Moving through ...

Page 25: ...ther motor And because both motors are operated at the same voltage nine volts this makes one motor rotate slower than the other Since in the past we have controlled our robot using waiting times perhaps one wheel has rotated farther during this time than the other one Thus the solution would be to have both motors rotate at exactly the same speed And this is precisely what encoder motors do Task ...

Page 26: ...o motor M1 M2 is connected to C2 and so forth Note If the model does not move straight ahead in spite of using the encoder motor elements the cause can be the model itself For example if a hub nut which transfers the force from the axle to the wheels is not tight enough the axle slips and the model moves in a curve even though the motors are rotating at the same speed Therefore be sure the hub nut...

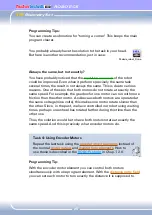
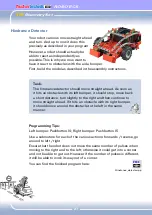
Page 27: ...ld stop move back a short distance turn slightly to the right and then continue to move straight ahead If it hits an obstacle with its right bumper it should move around the obstacle to the left in the same manner Programming Tips Left bumper Pushbutton I6 Right bumper Pushbutton I5 Use a subroutine for each of the various actions forwards reverse go around to left right Ensure that the robot does...

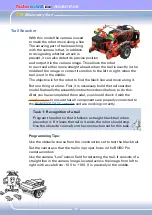
Page 28: ...arge enough that its area covers the major portion of the camera image Then set the robot parameters so that it moves straight ahead as long as a red card is not detected and no hindrance is present You can use the hindrance detection from the Hindrance detector program It is best to use your own subroutine for checking the color Check the camera input to determine if the red value is greater than...

Page 29: ...LAN connection open the appropriate program with the icon Change to the control panel and look for the interface for remote control of the model there Start the program in the online mode Now you can use the various buttons on the remote control to control the robot and you can also see where it is going If you overlook an obstacle it will be detected by the bumper and the model will automatically...

Page 30: ...ally the assembly instructions describe how to do this After you have completed the model you should check it with the interface test to ensure that all components are properly connected to the ROBOTICS TXT Controller and are working correctly Task 1 Recognition of a trail Program the robot so that it follows a straight black trail when placed on it If it loses the trail or it ends the robot shoul...

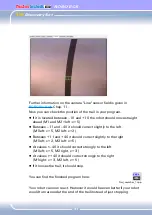
Page 31: ...tly to the left M1left v 5 M2 left v 2 Between 11 and 40 it should correct slightly to the right M1left v 2 M2 left v 5 At values 40 it should correct strongly to the left M1left v 5 M2 right v 3 At values 40 it should correct strongly to the right M1right v 3 M2 left v 5 If it looses the trail it should stop You can find the finished program here Your robot can now react However it would be even ...

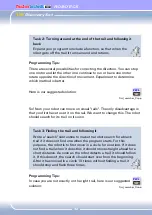
Page 32: ...o set it on the rail We want to change this The robot should search for its trail on its own Task 3 Finding the trail and following it Write a search subroutine to make the robot search for a black trail if it does not find one when the program starts For this purpose the robot is to first move in a circle for one time If it does not find a trail when it does this it should move straight ahead for...

Page 33: ...er reaching the end of the black trail where the trail is wider it should raise the camera and look forward If you then hold a red or green card in front of it it should first follow the black trail and then turn on to the red or green trail Before moving off it again measures the ambient temperature and sends it to the TXT Controller display You can cut the small colored cards out of the large cu...

Page 34: ...mming experience such as our professional programmers have But the control results are also significantly better than with the trail searcher model In the future you can simply use this subroutine for your own programs and be happy that it works so well Task 3 If you have a smartphone with Android operating system you can use it to control the detection robot You can download the app for this from...

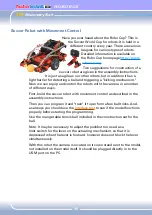
Page 35: ...ots with the camera in a number of different ways First build the soccer robot with movement control as described in the assembly instructions Then you can program it and train it to perform a few ball tricks And as always you should use the interface test to see if the model functions properly before starting the programming Use the orange table tennis ball included in the construction set for th...

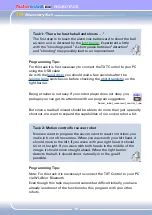
Page 36: ...gram suggestion But since a real ball wizard should be able to do more than just a penalty shootout we want to expand the capabilities of our soccer robot a bit Task 2 Motion control for soccer robot Now we want to program the soccer robot to react to motions you make in front of the camera When you wave with your left hand it should move to the left if you wave with your right hand it should turn...

Page 37: ...the robot accordingly to move to the left right or straight ahead You have already programmed the shooting mechanism in Task 1 You can integrate this into your program Then start the program in the ROBO Pro online mode The camera image is transferred to the PC over the USB interface the robot control is wireless via Bluetooth or WLAN For this model you only need the goal from the soccer stadium in...

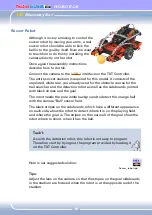
Page 38: ...as well as the sideboards printed with black stripes and the goal The robot needs the pure white background to detect the orange ball with the camera Ball sensor field The black stripes on the sideboards which have a different appearance on each side allow the robot to detect where it is on the playing field and where the goal is The stripes on the rear wall of the goal show the robot where to sho...

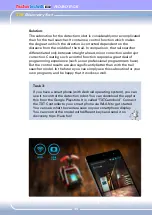
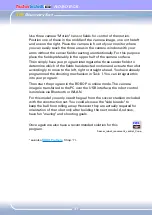
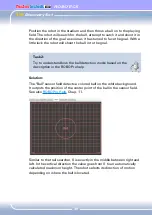
Page 39: ... understand how the ball detection works based on the description in the ROBO Pro help Solution The Ball sensor field detects a colored ball on the white background It outputs the position of the center point of the ball in the sensor field See also ROBO Pro Help Chap 11 Similar to the trail searcher 0 is exactly in the middle between right and left In the vertical direction the value goes from 0 ...

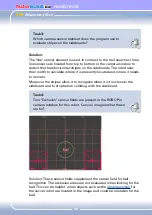
Page 40: ...ently located and where it needs to move to Moreover the stripes allow it to recognize when it is too close to the sideboard and to stop before colliding with the sideboard Task 4 Two Exclusion sensor fields are present in the ROBO Pro camera window for this robot Can you imagine what these are for Solution These sensor fields supplement the sensor field for ball recognition The exclusion areas ar...

Page 41: ...e other stripes This allows the robot to recognize which sideboard is which All totaled there are 5 different sideboard patterns one for each side of the playing field and one for the goal Moreover the robot uses the counting pulses from the encoder motors to calculate the position and angle between triangulation operations This process is known as odometry Odometry is more precise for short times...

Page 42: ...and ensure that the playing field is placed on a level surface In addition you can also place books or other objects along the outsides of the sideboards to help hold them down If the ball continuously rolls toward one corner or frequently stops against one of the sideboards you can level the playing field by placing flat objects such as newspapers school notebooks cardboard etc under the corners ...

Page 43: ...example a green plug on a red cable Also check that and are correctly connected For this purpose compare your model with the illustrations in the assembly instructions Loose Connection A component which works sometimes and doesn t work at other times probably has a loose connection somewhere in the wiring for the component The most frequent causes for this are Loose Plugs When the plugs for the ca...

Page 44: ...rged when the red LED on the charger stops flashing and illuminates continuously Errors in the Program Even if no one likes to admit it Everyone makes mistakes And especially with complex programs an error can creep in quite quickly If your model still doesn t do what you want it to after you have checked everything on the model itself and have remedied any faults you should also check your progra...

Page 45: ... object and adapt it to the surroundings Details are given in ROBO Pro Help Chapter 11 Last Sources for Help If in spite of all this you have not found the error there are still two possibilities for obtaining help Email Help Send an email to fischertechnik describing the problem Our email address is info fischertechnik de Internet Help You can also visit our web site on the Internet at http www f...

Page 46: ...ot so that it can be moved up and down allowing it to write on a large piece of paper while the robot is moving across it Then you can draw the figures the robot moves through This turns your mobile robot in to a drawing machine You can also use a thick felt tip pen to draw your own obstacle course on a piece of paper and have the robot move through it And if your friends have a ROBOTICS TXT Contr...

Page 47: ...your ROBOTICS TXT Controller and PC This is described in the instruction manual for the ROBOTICS TXT Controllers and at http www fischertechnik de So what are you waiting for Get started Invent and experiment And don t be bothered by little setbacks Patience and perseverance are primary factors for experimenting The reward after this is a functioning model We hope you have lots of fun trying out y...

Reviews: