ROBO TX ElectroPneumatic
COMPUTING
16
Task 1 - Pinball control program - ROBO Pro Level 3
A ball is shot into the game field from a launching pad. The ball then runs through
the obstacle course set up. When it passes the light barrier or comes close to the
color sensor, points are given. The points are shown on the TX display. Every
player has three balls. The round is completed when all balls have been
played. The game can be started again by pressing the red button on the
left (OK button).
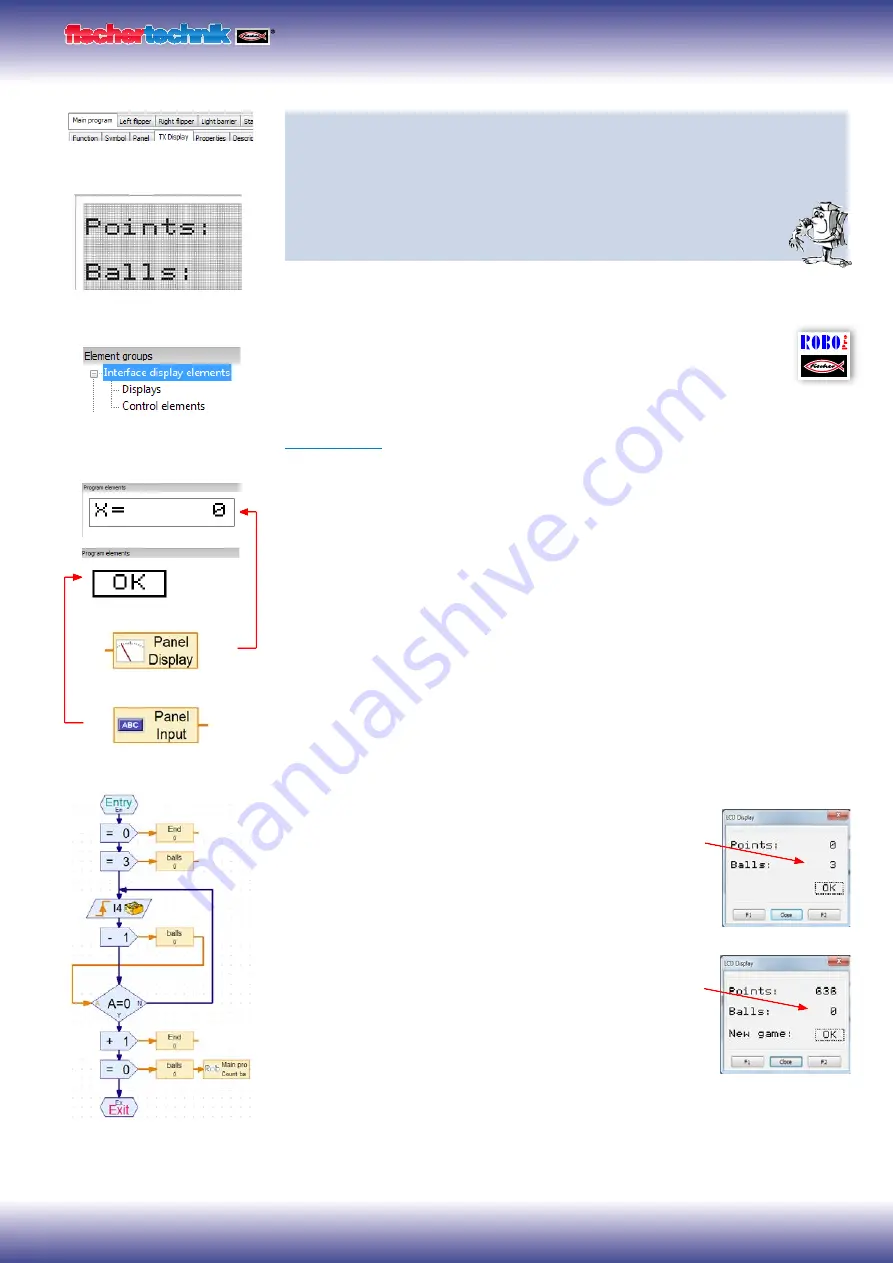
You already know all the commands required for this task. New is the fact that the data
is shown on the ROBO TX Controller display.
You can call a finished example program for this task with the symbol.
Information on the commands and how they can be used is given in the
ROBO Pro help
in Chapters 9 and 11.
Tip:
For programming consider the game sequence. Here is a little help:
Switch on compressor 03 - light outputs O6 and O7 (for light barriers)
▯
Shoot in ball - manually
▯
Check flipper buttons I1 left and I2 right, actuate valves at 04 and 05
▯
Check and evaluate color sensor at I8
▯
Check and evaluate light barriers at I3 and I4
▯
Output points earned and balls played on display
▯
End of game, reset outputs 03, 06, and 07 to zero
▯
Start new game with OK button (right display button)
▯
The "Count balls" subprogram illustrated is intended to show you the interrelationship
between the program and the TX display.
At the start of the game the value 3 appears on the display
indicating that 3 balls are available. When the light barrier at I4
detects a ball, the value shown on the display is reduced by 1.
After all balls have been played, the display indicates zero. The
game is finished.
If you want to stop the program loaded on the TX controller
completely, it is necessary to press both display buttons simulta-
neously.
pinball machine.rpp
TX display program call
Defined TX display
TX display element group
Control panel input
Summary of Contents for COMPUTING ROBO TX ElectroPneumatic
Page 1: ......


