

4
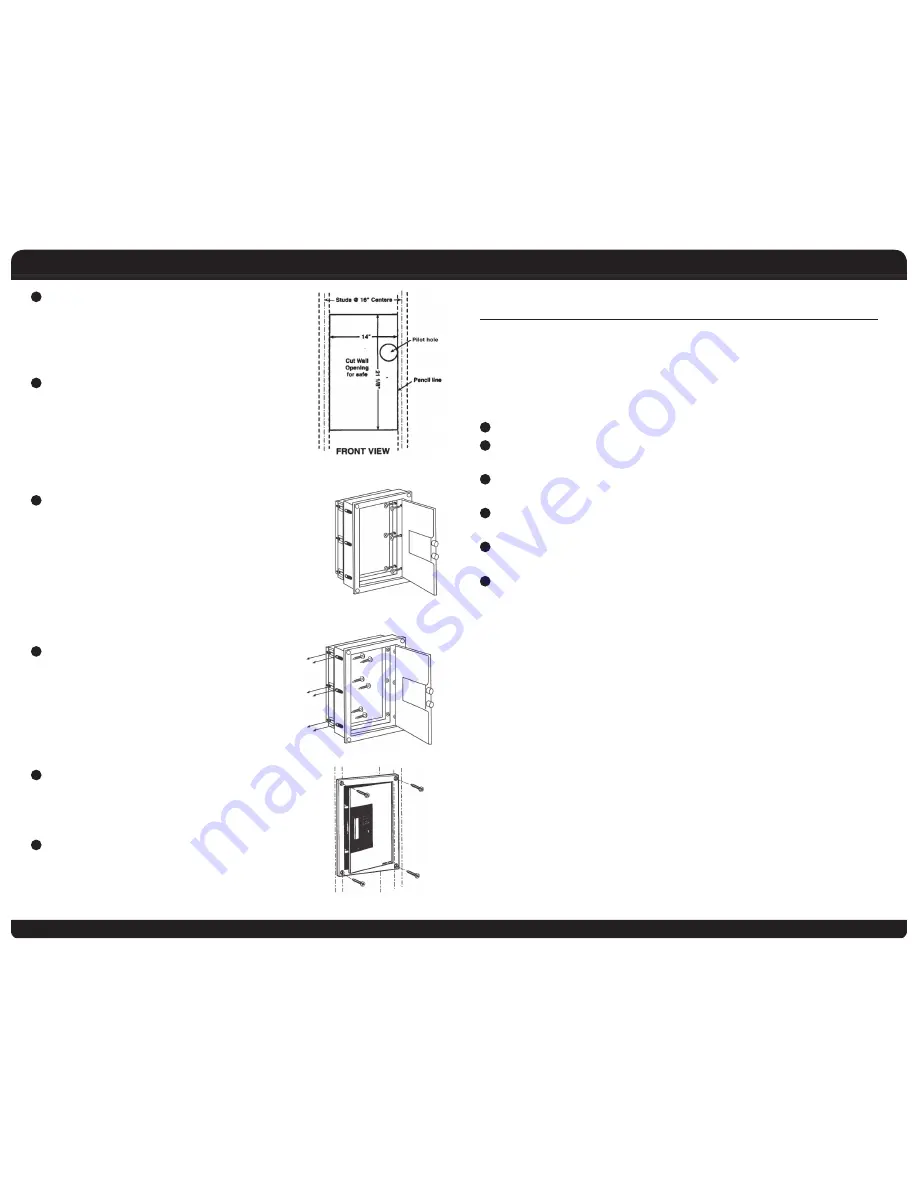
With the square, draw a horizontal line at the
top of the 21 1/8 inch measurement joining the
two vertical lines. Repeat this action at the bottom.
You should now have a 14 inch x 21 1/8 inch rectangle
scribed on the wall between studs.
5
Using a jig saw or equivalent tool and starting at
the pilot hole, cut along the pencil lines and remove
the wall section.
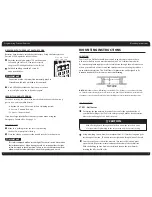
SteP 2 - install Safe
1
Install your wall safe into the wall cutout so that the
hinge side of the safe is flush against the right hand
stud and the front flange is flat against the wall.
With the safe door open, extend the telescoping
back by pushing it from the inside until maximum
possible depth is achieved. Once the back is extended,
install six wood screws (included) through the pre-drilled
holes in right hand side of safe and into stud. Tighten safe
flush to stud. Do not over tighten screws.
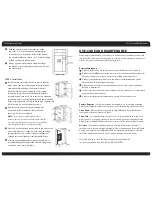
2
Now install six screws (included) through the
pre-drilled holes in left hand side of safe and
into stud. Do not over tighten.
note: There may be a slight amount of space
between the safe side wall and the left hand stud, this
is normal. The right hand hinged side of your wall safe
must be tightened flush to the right hand stud.
3
Once safe has been placed into position in the wall cutout,
secure into place by screwing 4 wood screws (included)
through the four recessed holes in the front flange of
Safe and into studs. Tighten screws flush with flange.
4
Select the expandable shelf extensions that will work
best with the depthof the installed safe and using small
screws and nuts, secure into place.
7
8
uSe, cAre And mAIntenAnce
When properly maintained, your safe will continue to operate and accurately read
the authorized passcode for many years. In order to ensure optimum performance
of your safe, please follow these simple precautions:
Battery maintenance
1
Always purchase and use the batteries as specified by this User’s manual.
2
Always replace all batteries at the same time. It is recommended to replace all
batteries at least once a year or sooner depending on amount of use.
3
Always clean the battery contacts in the battery compartment and on the
batteries before installing new batteries.
4
Always make sure all batteries match the polarity (+ and -) signs in the open
battery compartment.
5
If your safe will not be used for an extended period of time, it is recommended
that you remove the batteries.
6
Always promptly remove and properly discard of all used batteries.
replace Batteries – For best results and performance, we recommend that the
batteries be replaced at least once a year or sooner depending on amount of use.
clean hand – Never attempt to operate the digital keypad if your hands have
excessive dirt, debris or liquids on them.
clean Safe – To clean the surface of your safe, it is recommended that you use a
mild cleaner (e.g., window cleaner) to avoid scratching or discoloring the surface.
Always wipe dry and NEVER use abrasive cleansers on the safe or digital keypad.
moisture – We recommend that you place delicate items such as pictures or
intricate jewelry into an air-tight container before storing them in your safe. Avoid
placing your safe in areas of high humidity. For optimum performance, the safe
should be opened and aired out for at least 20 minutes every two weeks.
For future reference, store this Operation and Installation Guide
in a secure area away from the safe. DO NOT DISCARD!
Mounting Instructions
Use, Care and Maintenance