


RICHPOS-3600
6
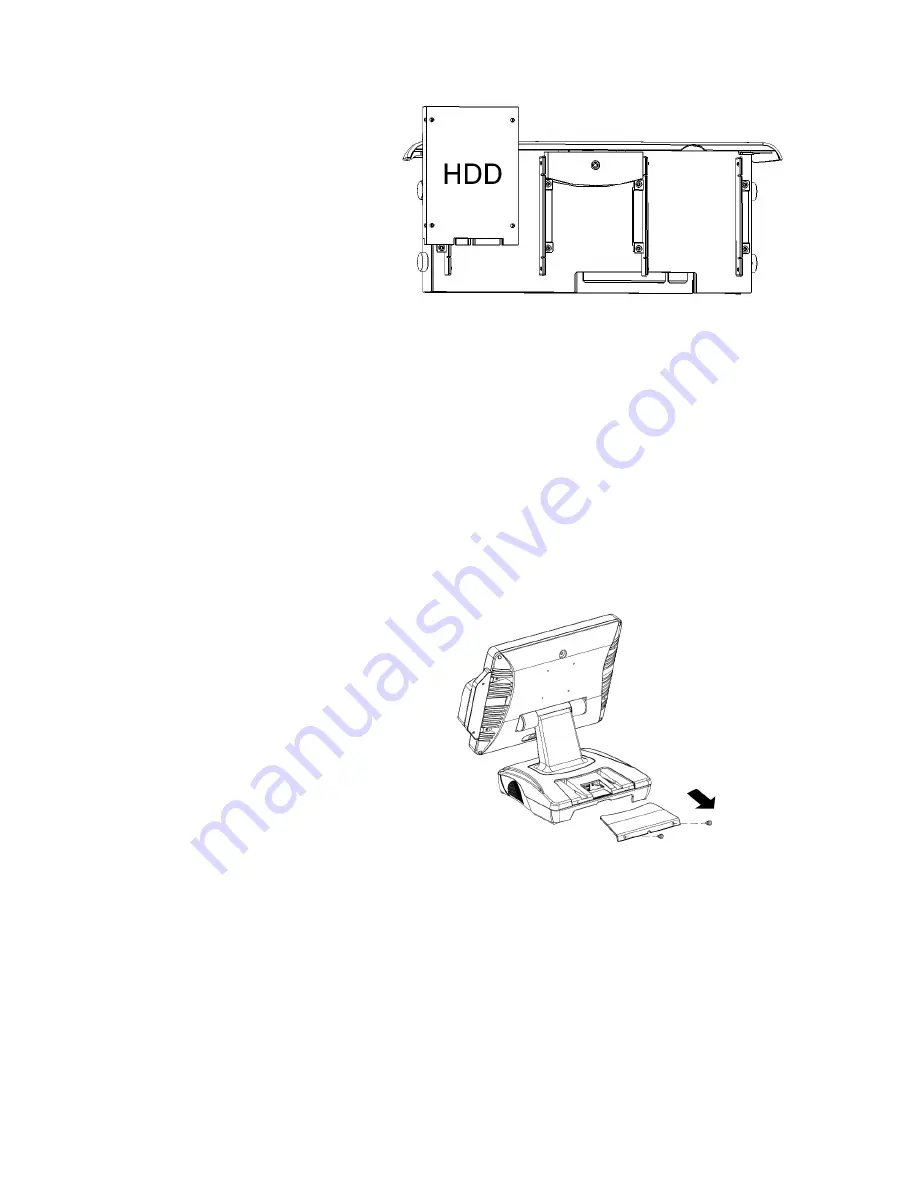
4. Place HDD on the tray
with PCB side upward
(no screw needed).
5. Slide in the HDD tray back to the system (no cabling needed).
7. Fix the HDD tray with the screw.
8. Connect the power cord to the system.
2nd Display (LCD/VFD) Installation
1. Remove the plastic
cover above the rear I/O
panel
1
st
HDD
Position
2
nd
HDD
Position
Summary of Contents for RichPOS 3600
Page 1: ...U Us se er r s s M Ma an nu ua al l RichPOS 3600 12 15 17 P4 High Performance POS system...
Page 8: ...RICHPOS 3600 3 RichPOS 3600 Dimension...
Page 18: ...RICHPOS 3600 13 8 Click Finish to complete the installation procedure and restart the system...
Page 20: ...RICHPOS 3600 15 3 Click Advanced 4 Click Intel R Graphics Media Accelerator Driver for Mobile...
Page 24: ...RICHPOS 3600 19 4 Click Next to continue 5 Click Finish to complete the installation procedure...
Page 26: ...RICHPOS 3600 21 3 Click Finish and restart the system...
Page 34: ...RICHPOS 3600 29 6 Click Next 7 Click Next 8 Click Next...
Page 38: ...RICHPOS 3600 33 5 Select Finish to complete the installation...
Page 44: ...RICHPOS 3600 39 Motherboard Configuration Mother Board Top Mother Board Bottom...
Page 56: ...RICHPOS 3600 51 Figure 5 Integrated Peripherals Screen Figure 6 OnChip IDE Device Screen...


