10
to obtain a response from the detector
during this test. Please note your CO detector
will not detect smoke.
If testing the sensor for the first time after
installation, or replacing the batteries, make
sure that the alarm has completed the initial
3 minute warm up period and the power LED
is flashing green once every minute.
CAUTION:
Sensor testing should only be
performed by a responsible adult.
This test should be performed annually.
NOTE:
Aerosol CO may be used in order
to avoid having to burn incense sticks
or cigarettes. However we recommend that
incense sticks are used as they are cheap and
readily available.
•
Read all steps thoroughly before
attempting to test your the sensor
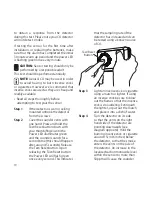
Step 1
If the detector is wall or ceiling
mounted unhook the detector
from the screws.
Step 2
Cover the sounder vents with
one hand. Press and hold the
Test/Reset button down with
your thumb/finger until the
Power LED illuminates green
and the sounder sounds for a
second time (this should happen
after around 5 seconds). Release
the Test/Reset button. Upon
releasing the Test/Reset button
the Power LED will flash green
once every second. This indicates
that the sampling rate of the
detector has increased and can
be tested using a known source
of CO.
Step 3
Light an incense stick or cigarette
using a match or lighter. If using
an incense stick be sure to blow
out the flame so that the incense
stick is smouldering. Extinguish
the lighter, or put out the match
and place it into a dish of water.
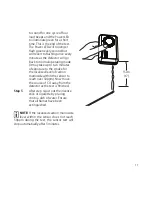
Step 4
Turn the detector on its side
so that the vents on the right
hand side of the detector are
pointing downwards (see
diagram opposite). Hold the
burning incense stick or cigarette
around 15cm (6 inches) below
the detector, so that the smoke
enters the vents on the side of
the detector. An increase in the
localised carbon monoxide level
within the sensor to more than
50ppm will cause the sounder
Test/Reset
Button
Summary of Contents for CO-9B
Page 22: ...20 NOTES ...
Page 23: ......


