Battery Installation/Replacement
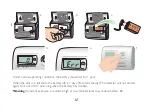
See diagrams on page 11
a. If the detector is wall mounted, flip the detector casing down so that the battery compartment is exposed.
b. Remove the battery cover.
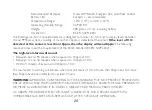
c. Replace the battery with an approved 9 volt alkaline battery (see page 24 for a list of approved batteries),
making sure the battery terminals align properly with the terminals on the battery clip and push the
battery into place.
Replace the battery cover and return the detector to the original position.
d. When the battery is connected, your detector will first display all the icons.The digital readout
will then display a ‘0’, the PPM readout will flash, the LED will flash yellow and the detector will
beep to indicate that the battery is properly connected.
e. Your advanced FireAngel detector requires a short ‘warm-up’ period before it is fully operational.
If you have followed all of the above steps correctly, your unit will begin monitoring for CO in
around 3 minutes.The flashing PPM symbol is your assurance that the unit is receiving power.
When the 3 minute warm-up period is complete, the LED will flash green once per minute as an
additional indication that the alarm is receiving power from the battery and is fully operational. If
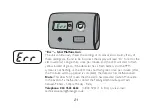
there are problems with your unit the LED will flash yellow instead of green, a single chirp once
per minute will be emitted and the digital display will flash ‘Err’ to indicate that the alarm has malfunctioned
(see page 21).
f. Test the the horn and battery by pressing the Test/Reset button briefly to confirm that the detector is
operating properly.The detector should sound as soon as the button is pressed, indicating that the horn is
working and the battery is providing power to the unit. Release the Test/Reset button to silence the horn.
The horn and battery should be tested on a weekly basis.
Warning: Prolonged exposure to the horn in close proximity will damage your hearing.
11


