R2c
w w w . f i n g e r t e c . c o m
w w w . f i n g e r t e c . c o m
User Guide
Introduction
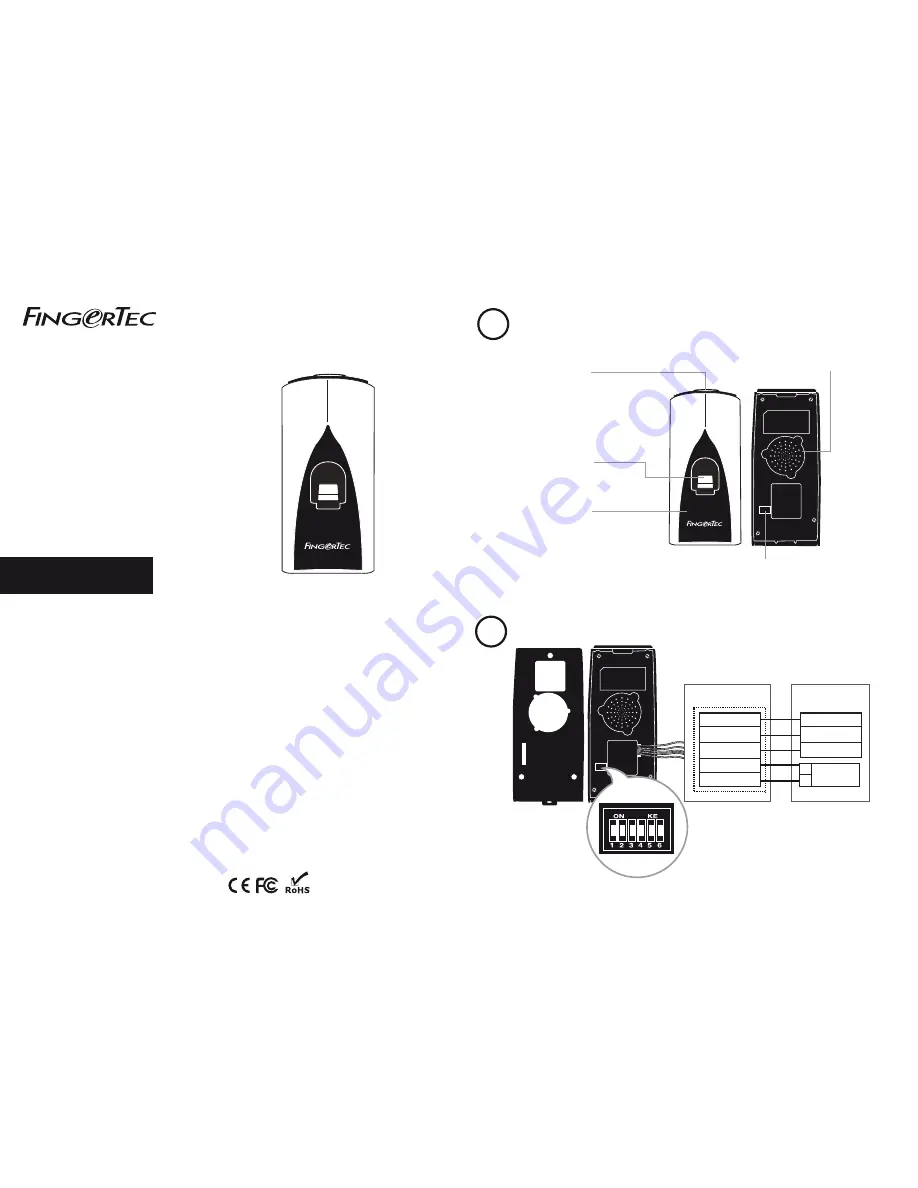
Fingerprint Scanner
Scans and sends fingerprint
templates to the master terminal
for verification.
Connections & Wiring Diagram
LED Light Indicator
The red light indicates either
standby or failed verification.
The green light indicates that the
fingerprint or card information is
being read and sent to the
master terminal for verification.
©
2000-2014 FingerTec Worldwide Limited. All rights reserved • 032014
1
2
Note:
1. The R2c will only work with R2 (FEM 565), AC900, Q2i, i-Kiosk 100 Plus and
H2i master terminals.
2. The R2c can share the 12VDC power supply with the master terminal.
3. It is recommended to use RS485 connection cables with a shielded twisted
pair to achieve an optimum speed of data transfer.
4. Do not adjust the dip switch unless you are connecting the R2c with the
Ingressus controller. If your R2c is unable to send any fingerprint or card
data to the master terminal, please check the dip switch. Make sure it is set
to the default settings as highlighted.
R2c
Slave Fingerprint Access
Control Terminal
R2c
Card Scanning Area
Reads and captures details of cards
and sends it to the master terminal
for verification. The default card
technology is RFID. Mifare and HID
technology are available upon
request.
Dip Switch
To set the device ID of the terminal. Use this only if you
are installing the terminal with an Ingressus controller.
Speaker
Emits audio indication for verification results.
One beep – Successful verification.
Two beeps – Unsuccessfull verification.
Rear of Master
Terminal
Rear of R2c Terminal
*Yellow – RS 485+
*Purple – RS 485 -
Black - GND
Red – +12V
Black – GND
Blue – RS 485+
Yellow – RS 485 -
Black - GND
+
_
12VDC power
supply
Back piece
Dip Switch Setting


