background image

CR-2i Full HD user manual

29

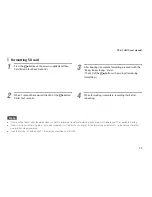
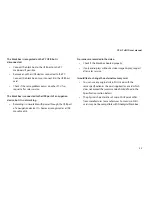
  Formatting SD card

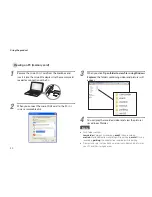
Press the 

 button until power is supplied and then 

hold it down for about 7 seconds.

When 7 seconds have passed the LED of the 

 button 

blinks for 2 seconds.

After booting is complete, formatting proceeds with the 
"Beep~ Beep~ Beep~" alarm.  
(The LED of the 

 button is shown in yellow during 

formatting.)

When formatting is complete, recording starts after 
rebooting.

Note


SD card will be formatted and deleted video will not be recovered. So, before formatting, copy important video to your PC or portable memory.


If your SD card has something other than video recording, it will detect it as an error and start formatting automatically. So, do not use it for other 
purpose than video recording.


If you format your SD card on the PC, then set the allocation unit to 32KB.

Formatting SD card

Summary of Contents for CR-2i Full HD

Page 1: ...User Manual...

Page 2: ...names and trademarks are the properties of their respective companies Copyright 2013 All Rights Reserved UM FINE CR 2iF_HD EN100 Note This equipment has been tested and found to comply with the limits...

Page 3: ...r camera 12 Inserting a micro SDHC card 12 Installation front 13 Installation rear 14 Using the product Recording voice 15 Recording video 15 Viewing recorded videos 19 Finevu Player 21 Settings Memor...

Page 4: ...ht Doing so may result in fire or product failure Ensure that you install the product in a position where it won t obstruct your view Doing so could cause a car accident Plug the USB and video cables...

Page 5: ...ea if touched Do not disassemble or modify this product arbitrarily Doing so may cause breakage of the product or data loss Consult the A S center for inspection and repair of the product Management D...

Page 6: ...nected unexpectedly due to an accident or for any other reason the super capacitor supplies the power to allow the video being recorded to be saved safely Easy installation Always recording in the cor...

Page 7: ...is product are subject to change without notice in order to improve its performance Components and names Double sided tape for the installation of the mount Front camera Cigarette jack cord USB Mount...

Page 8: ...are subject to change without notice in order to improve its performance Components rear Components PC connection Rear camera Rear camera connection cable USB cable USB SD card reader optional Micro S...

Page 9: ...CR 2i Full HD user manual 9 Optional Accessories Note All accessories are available from the store where you purchased the product USB SD card reader Power adapter External USB battery pack GPS...

Page 10: ...he mount connection area Front camera lens Record video from the front Ventilation hole Dissipates heat generated by the product Record button Press Make an emergency recording Press and hold Switch r...

Page 11: ...e rear Security LED Check operation of the blackbox Rear connection port Connect to a front camera Video and power in out Fastener After adjusting the camera angle turn it clockwise to fix it Note If...

Page 12: ...t doesn t prevent you from adjusting the position of the mirror You can also install it on the dashboard Finding an installation location for a rear camera You are recommended to install it in the top...

Page 13: ...in position with the clips Attach the black box to the mount 1 3 Use a cigar jack cord to connect to the power 2 Install the mounting bracket in the vehicle using the double sided tape Install a GPS d...

Page 14: ...he rear camera connection cable Hold the rear camera connection cable in position with the clips 4 Connect a rear camera connection cable to the rear camera 5 1 Using the double sided tape attach the...

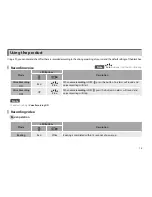
Page 15: ...cording is OFF press the button An alarm will sound and voice recording will start Voice Recording OFF Off Blue When voice recording is ON press the button An alarm will sound and voice recording will...

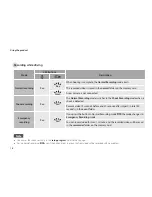
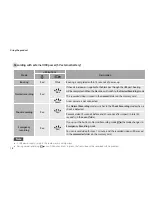
Page 16: ...hen a shock is detected Records video 10 seconds before and 30 seconds after impact in total 40 seconds in the event folder Emergency recording Red Red If you press the button in Normal Recording mode...

Page 17: ...e black box detects a moving object in Parking mode it records video The recorded video will be saved as _motion in the motion folder on the memory card Note When you use Parking mode you need to use...

Page 18: ...ected Shock recording Red Red The Normal Recording mode switches to the Shock Recording mode when a shock is detected Records video 10 seconds before and 30 seconds after impact in total 40 seconds in...

Page 19: ...er booting is complete the black box switches to USB mode and is executed as a removable disk 4 You can play the recorded videos and view the pictures saved in each folder Note Each folder contains ca...

Page 20: ...and pictures will appear 2 When you connect the micro SDHC card to the PC it is run as a removable disk 4 You can play the recorded videos and view the pictures saved in each folder Note Each folder...

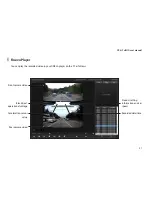
Page 21: ...layer You can play the recorded video in your FINEVu player on the PC as follows Rear camera video Product setting information and car speed Acceleration sensor value Black box s operational voltage R...

Page 22: ...eo Mode Time saved Folder name Resolution 1080p 720p Normal recording 3 minutes in total 3 minutes in total normal Shock recording 1080p 10 sec before 30 sec after a total of 40 sec 720p 10 sec before...

Page 23: ...les for the front 16 files for the rear 72 files for the front 72 files for the rear 10 files for the front 10 files for the rear 32GB 5 hr 46 min Max size 13 32 GB 13 32 GB 2 96 GB Max storage time 1...

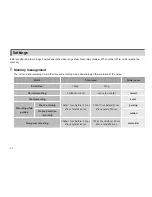
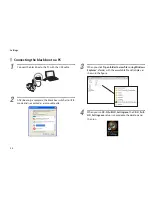
Page 24: ...the black box switches to USB mode and is executed as a removable disk 3 When you click Open folder to view files using Windows Explorer a folder with the executable file will display as shown in the...

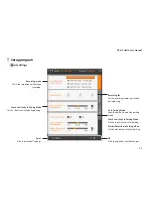
Page 25: ...g Mode Set the shock sensitivity during driving Recording fps Set the recording frames per second during driving Auto Parking Mode Specify whether to enter the parking mode Shock Sensitivity in Parkin...

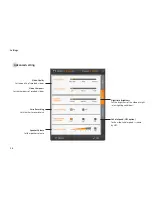
Page 26: ...sharpness of recoded videos Voice Recording Set whether to record voice Vehicle Speed GPS option Set how the vehicle speed is shown by GPS Advanced setting Speaker Volume Set the speaker volume Night...

Page 27: ...on location System Time Set the system time of the PC Security LED Front Specify whether to use the LED for the front camera Video Out Format Select NTSC or PAL as the video output mode Memory Allocat...

Page 28: ...Dong Parking mode Recording in Shock mode Beep USB mode Ding Dong USB mode Finishing sound Dong Ding Enable MIC Mute Ding Disable MIC Mute Ding Dong Status Alarm Reset time Beep Check the time settin...

Page 29: ...tton is shown in yellow during formatting 4 When formatting is complete recording starts after rebooting Note SD card will be formatted and deleted video will not be recovered So before formatting cop...

Page 30: ...hat you format the memory card prior to the firmware upgrade 4 Unzip the downloaded firmware and copy it to the root directory of the memory card 5 Insert the micro SDHC card into the black box When y...

Page 31: ...revent it from degrading while storing the black box Cleaning If there is a foreign object on the lens wipe it down with a soft cloth To obtain high quality video do not touch the lens with your hands...

Page 32: ...y card format is FAT32 NTFS and exFAT are not recognized Check if the external memory card is faulty or not an original component Booting is complete but there is no sound On the Setup Program screen...

Page 33: ...ilable with power through the USB port of a navigation device It is however recognized as a USB movable disk No scenes are recorded in the video Check if the black box booted properly If only audio pl...

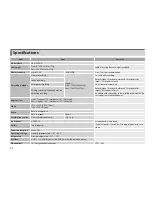
Page 34: ...t 40 seconds in total An additional device needs to be installed in vehicles that do not support uninterrupted power Angle of view Front Diagonal 130 Horizontal 107 Vertical 56 Rear Diagonal 145 Horiz...

Page 35: ...install it 1 The main screen where a recorded video is played 2 The sub screen where the selected part of the main screen is shown enlarged 3 The List screen showing a list of recorded videos 4 The C...

Page 36: ...heck the scenes being played You can move around and check the scenes by time using the buttons in the Control bar Playing and checking recorded videos Recommended PC specifications for FineVu Player...

Page 37: ...s without warranty condition or other liability even though the defect or loss is caused by negligence or other fault Damage resulting from use accident or normal wear and tear is not covered by this...

Page 38: ...www FineVu com...
Reviews: