2
GATEWAY2 INSTALLATION
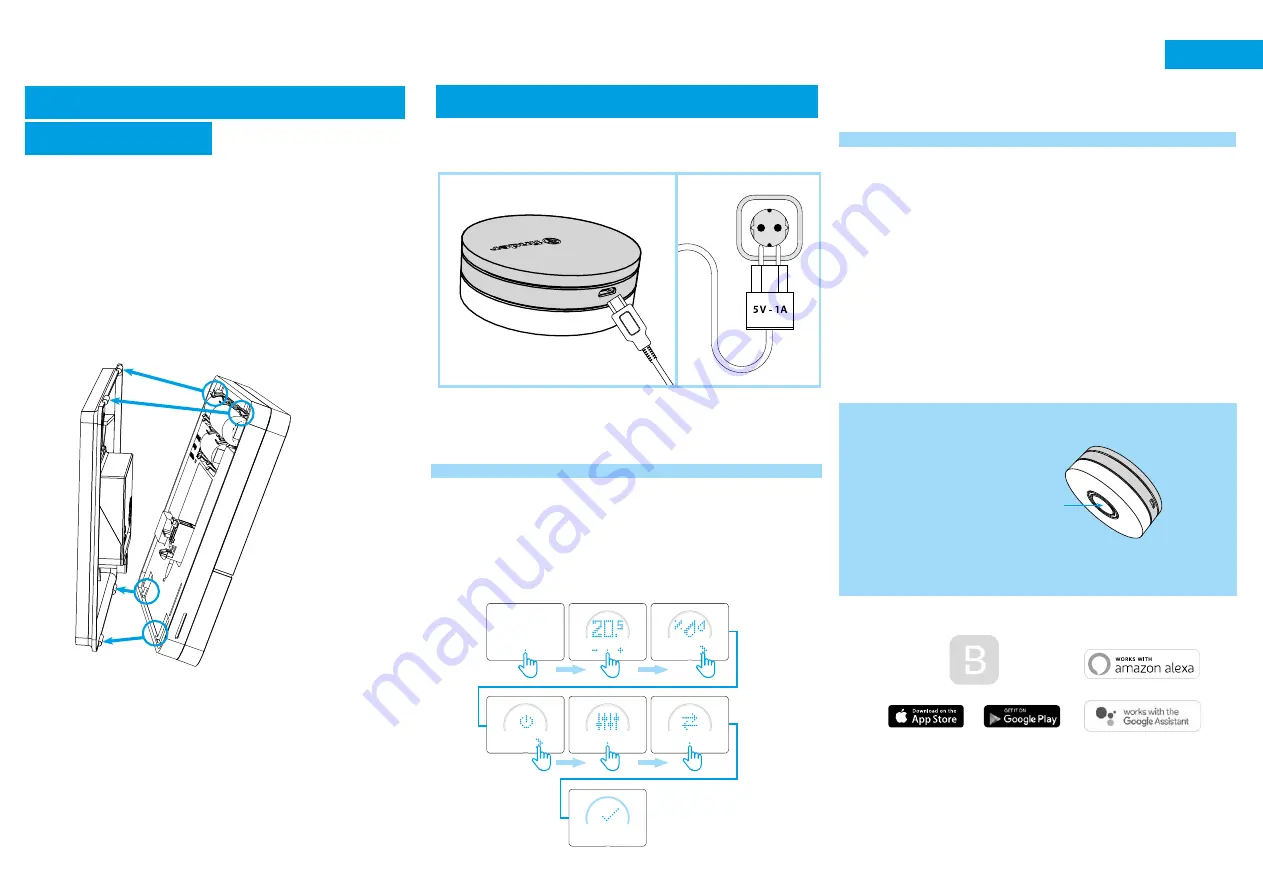
Connect the Micro USB connector to the Gateway2 (1Y.GU.005.1) and
plug the power supply into to the elecrical outlet.
After switching on, the luminous base of the Gateway2 flashes with a
fading white light - which indicates it is awaiting configuration.
CONFIGURATION
To configure the Gateway2 and the Smart Bliss2 Thermostat,
download the Finder Bliss application from the Google Play Store
or the Apple Store and proceed with the configuration following
the tutorial on the App. When requested by the App, activate the
association of the thermostat following the following screens:
When done, the temperature detected by the Smart Bliss2 thermo-
stat will be displayed in the application.
THE LUMINOUS BASE - NOTES
WHITE LED
-
Fading flashing
: waiting for configuration
-
Fixed:
Wi-Fi network and Cloud connection present
-
2 Flashes:
Connected to the Wi-Fi network but no connection to
the Cloud (Check your Internet connection)
-
3 Flashes:
No connection to the Wi-Fi network and no connection
to the Cloud (Check your Wi-Fi network)
BLUE LED
-
Flashing:
sending Bluetooth commands
RED LED
-
Flashing:
sending commands to the Smart Bliss2 Thermostat
To change the light intensity of the GATEWAY2 base, press the button:
- 1 Once: Low brightness
- 2 times: Medium-Low brightness
- 3 times: Medium-High brightness
- 4 times: High brightness
RESET
Press the button for> 10 seconds to restore factory settings
Bliss
Bliss
BATTERY INSERTION AND MOUNTING
THE THERMOSTAT
• Insert 3 x 1.5V alkaline batteries type AAA - LR03, paying attention
to the indicated polarity.
After inserting the batteries, initialization screens will appear.
Wait for this process to finish and the detected temperature will
then appear.
• Mount the thermostat to its base by first engaging the bottom part
of the thermostat with the lower pins of the base plate, then close
the upper part of the thermostat to lock onto the upper pins.
The thermostat is now ready to be configured.
However, the Gateway2 (1Y.GU.005.1) must first be installed.


