8
Technical data
RO 150 FEQ
Power
720 W
Speed
3300 - 6800 rpm
Sanding stroke
5 mm
Weight (excluding cable)
2.3 kg
Degree of protection
/ II
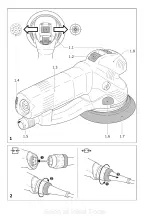
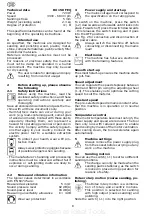
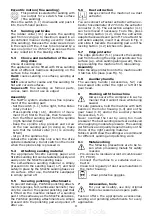
The specifi ed illustrations can be found at the
beginning of the operating instructions.
1 Intended
use
As specifi ed, the machines are designed for
sanding and polishing wood, plastic, metal,
stone, composite materials, paint/varnish, fi ller
and similar materials.
Materials containing asbestos must not be
processed.
For reasons of electrical safety the machine
must not be damp nor operated in a humid
environment. The machine may only be used
for dry sanding.
The user is liable for damage and injury
resulting from incorrect usage!
2
Before starting up, please observe
the following
2.1 Safety
instructions
Before using the machine, read the
enclosed safety instructions and these
operating instructions carefully and
thoroughly.
Save all enclosed documents and pass the ma-
chine with all these documents only.
- Harmful/toxic dusts can occur during your
work (e.g. lead-containing paint, some types
of wood and metal). Contact with these dusts,
especially inhaling them, can represent a
hazard for operating personnel or persons in
the vicinity. Comply with the safety regulati-
ons that apply in your country. Connect the
electric power tool to a suitable extraction
system.
To protect your health, wear a P2 pro-
tective mask.
Always wear protective goggles because
of possible dangers when sanding.
- The manufacturer’s handling and processing
instructions must be observed without fail if
explosive or self-igniting dusts are likely to
occur during sanding.
2.2
Noise and vibration information
The typical values determined in accordance
with EN 60745 are:
Measured acceleration
5 m/s²
Sound pressure level
82 dB(A)
Sound-power level
93 dB(A)
Measuring uncertainty allowance
K = 4 dB
Wear ear protection!
3
Power supply and start-up
The mains voltage must correspond to
the specifi cation on the rating plate.
To switch on the machine, press the switch
(1.2) downwards and forwards until it locks into
place. To switch off, press the switch downwards
- this releases the switch locking and it goes
into the OFF position.
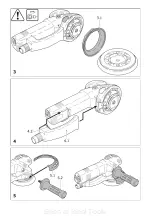
See Fig. 2 for connection and disconnection of
the power cable.
Always switch the machine off before
connecting or disconnecting the mains
lead!
4 Electronics
The machine has full-wave electronics
with the following features:
Smooth start-up
The smooth start-up ensures the machine starts
up jolt-free.
Speed adjustment
You can regulate the speed steplessly between
3300 and 6800 rpm using the adjusting wheel
(1.4). This enables you to optimise the cutting
speed to suit the material.
Constant speed
The pre-selected speed remains constant whe-
ther the machine is in operation or in neutral
position.
Temperature control
If the motor temperature becomes too high, the
power supply and speed are reduced. The tool
then only runs with reduced power to enable
rapid cooling by means of the motor ventilation.
After cooling down, the tool accelerates again
automatically.
5 Machine
settings
Always remove the power supply plug
from the socket before carrying out any
work on the machine.
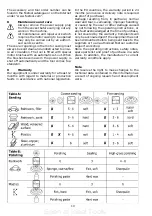
5.1 Sanding
motion
You can use the switch (1.1) to set two different
sanding motions.
The change can only be made when the
sanding pad is stationary, as the switch
is locked in place during operation for
reasons of safety.
Rotex rotary motion (coarse sanding, po-
lishing)
The Rotex rotary motion is a combina-
tion of rotary and eccentric motions.
This position is selected for sanding
with high output (coarse sanding) and
polishing.
Slide the switch (1.1) into the right position.
Seen at Ideal Tools.
Summary of Contents for ROTEX RO 150 FEQ
Page 2: ...Seen at Ideal Tools ...
Page 3: ...Seen at Ideal Tools ...

