FERNO/MAN/1121/226-R3/UK
24
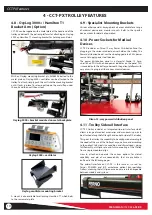
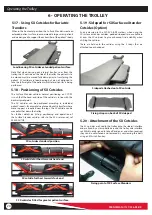
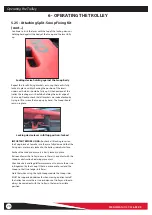
Two halves of Scoop laid on top of fixing brackets
6 - OPERATING THE TROLLEY
Operating the Trolley
Repeat the process at the head-end of the trolley with one of
the shorter fixing brackets with a 'head' label, then repeat the
process both foot-end and head-end on the other side of the
trolley such that all 4 brackets are firmly attached.
Next, make sure that the Scoop length has been extended and
locked in to the first extension position.
Then split the Scoop EXL into 2 halves by opening the TSL locks
at both the head-end and foot-end of the Scoop.
Lay each of the 2 halves of the Scoop over the fixing brackets
attached to the trolley.
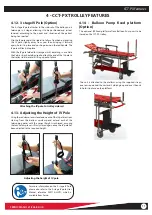
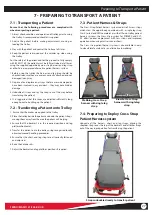
Note the orientation of the Scoop should be such that foot-end
of the Scoop is at the head-end of the trolley and the head-end
of the Scoop at the foot-end of the trolley, as per the below
picture. This ensures maximum usable extended patient surface.
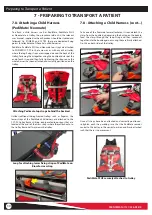
Lock the bracket in place by pressing down on the red
locking handle until it clicks
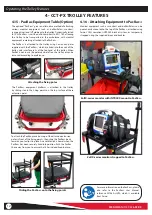
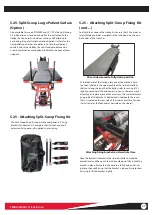
The Split-Scoop half-sections should be positioned along the
length of the trolley such that the lift-up locking arms on the
brackets correctly line up with the hand-hold holes in the sides
of the Scoop as shown below.
5.25 - Attaching Split-Scoop Fixing Kit
(cont...)
Fixing bracket lift-up locking arm
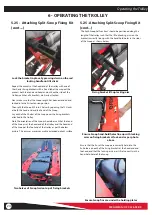
Ensure Scoop hand-hold holes line up with locking
arms on fixing brackets at foot-end as per photo
above
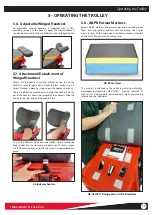
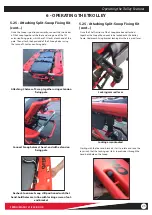
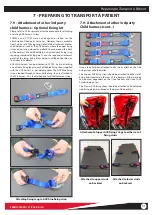
Ensure that the fins of the Scoop are correctly held into the
fin holders on each of the fixing brackets at the head-end and
foot-end and that the locking arms are still sat correctly in the
hand-hold holes of the Scoop.
Ensure Scoop fins are under the holding plates
5.25 - Attaching Split-Scoop Fixing Kit
(cont....)
Summary of Contents for CCT-PX
Page 38: ...FERNO MAN 1121 226 R3 UK 38...
Page 40: ...FERNO MAN 1121 226 R3 UK 40...

