background image

18

ENGLISH

Setup Menu Options

This Player setup is carried out via the 

TV, enabling you to customise the Ariva 

player to suit your particular requirement.

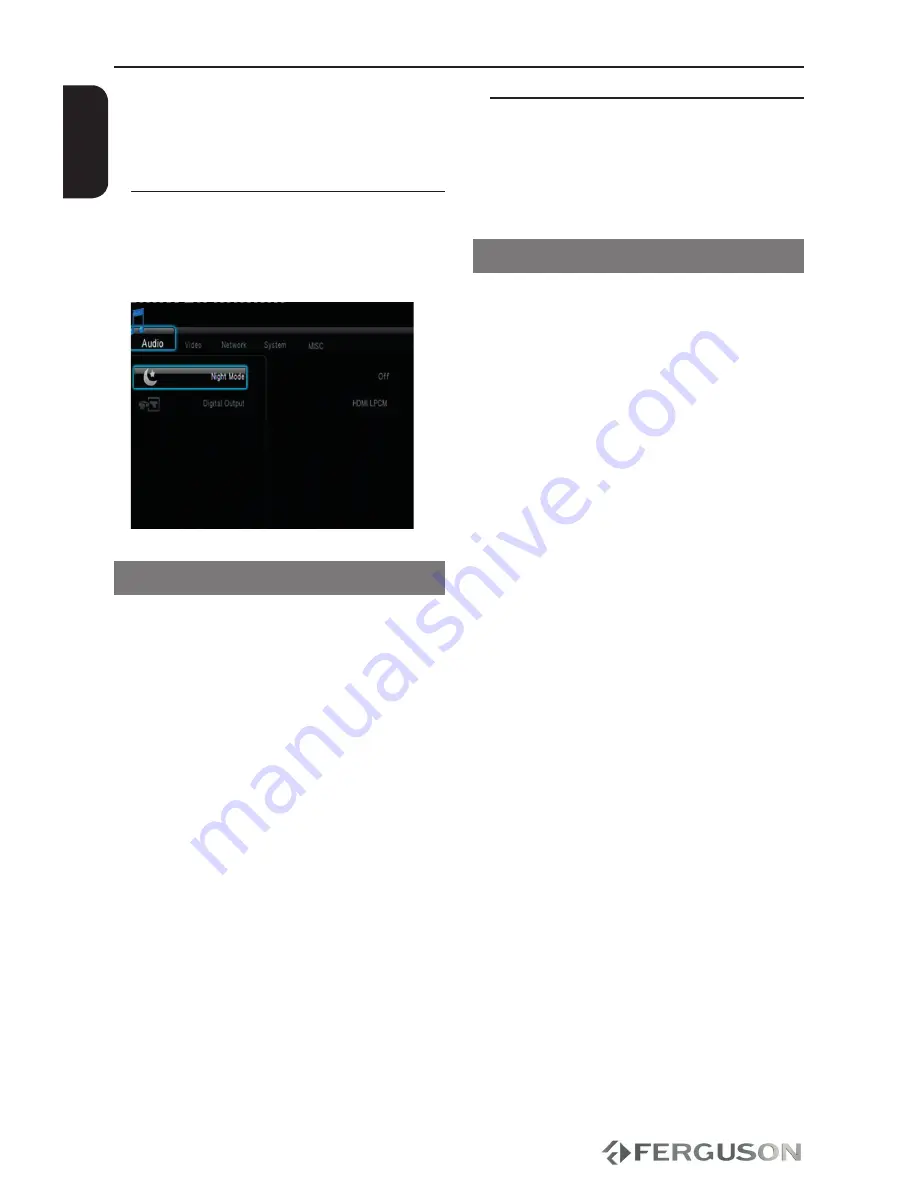
Audio setup menu

A

 Press 

SETUP 

button.

B

 Press 


 to select Audio tab.

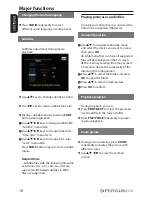
Digital Audio Setup

A

 In Audio setup tab, use 


 keys to 

highlight “Digital Output”, then press 

OK

.

B

 Use 


 keys to select a setting and 

press 

OK

 to confirm.

Helpful Hint:

–  If “Digital Output” is set to one of 

“LPCM“ modes, then Ariva player will 

transcode supported audio tracks.

–  If “Digital Output” is set to one of 

“RAW“ modes, then Ariva player will pass 

untouched audio bitstream to external 

device.

Video setup menu

A

 Press 

SETUP 

button.

B

 Press 


 to select Video tab.

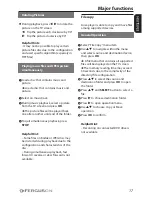
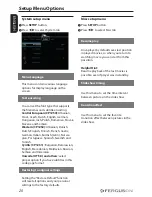
TV System

This menu contains the options for 

selecting the colour system (PAL or NTSC) 

and HDMI resolution that matches the 

connected TV.

A


In Video tab, press 



 to highlight “TV 

system”, then press 

OK

.

B


Press



to select a setting:

480p

: Progressive output in 480 lines for  

NTSC TV.

576p

: Progressive output in 576 lines for 

PAL TV.

720p

: Progressive output 720 lines.

1080i

: Interlaced output 1080 lines.

1080p

: Progressive output 1080 lines.

HDMI Auto

: Output automatically based 

on your display’s supported resolution.

C

   Press 

OK

 to confirm.

Helpful Hint:

- If not display appears on the TV screen 

due to unsupported resolution, use TV-

SYS button on RCU or reconnect any 

available interlace video output to your 

display and re-adjust the resolution 

settings to 576p.

- Select HDMI AUTO to automatically 

display the best resolutions settings.

- 60Hz may not be supported by 

european TVs. It is value specific to TVs for 

USA market.

Summary of Contents for HDplayer 110

Page 1: ...I N I T I O N M U L T I M E D I A User manual Remote Control Unit 2x AAA baterries A V cable AC power adaptor 2 Connect basic audio video connections HDMI Best quality cable not supplied HDMI IN vide...

Page 2: ...irm E Adjust other settings if needed F Press SETUP to exit 4 Use A Copy multimedia files to USB memory B Connect USB memory to USB port in Ariva player C Use keys to navigate in the menu Choose cathe...

Page 3: ...necting Ethernet network Functional Overview 9 Front Side and Rear panels 10 Remote Control Unit Getting Started 11 Step 1 Inserting batteries into the Remote Control 11 Step 2 Setting up the TV 12 St...

Page 4: ...10 ENGLISH...

Page 5: ...manual before using the device To avoid electric shock hazards do not open the cabinet refer servicing to qualified personnel only If cabinet is opened warranty will be invalid Please switch off compl...

Page 6: ...tness for specific purposes The information contained herein provide guidelines allowing the operation and maintenance of the receiver Ferguson reserves the right to make changes corrections or to tra...

Page 7: ...bols used on the device The caution risk of electrical shock do not open symbol This symbol tells you that you are not allowed to open the device Only authorized service technicians are allowed to ope...

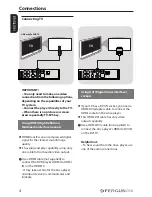
Page 8: ...ble for both audio video output AUse a HDMI cable not supplied to connect the DVD player s HDMI to HDMI IN on the HDMI TV It may take a while for the Ariva player and input device to communicates and...

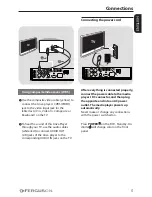
Page 9: ...use the audio cables white red to connect AUDIO OUT L R jacks of the Ariva player to the corresponding AUDIO IN jacks on the TV Connections After everything is connected properly connect the power cab...

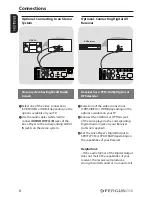
Page 10: ...ng Digital AV Receiver Receiver has a PCM Dolby Digital or DTS decoder ASelect one of the video connections CVBS VIDEO or HDMI depending on the options available on your TV BConnect the COAXIAL or OPT...

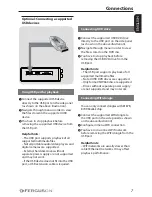
Page 11: ...rive AConnect the supported USB DVD drive directly to the USB port on the side panel as shown on the above illustration BNavigate through menu in order to view the files stored on the DVD disc CYou ha...

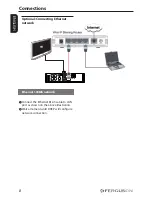
Page 12: ...TV ENGLISH Connections Optional Connecting Ethernet network Ethernet 100Mb network AConnect the Ethernet RJ 45 cable to LAN port as shown on the above illustration BWait a moment unitl DHCP will conf...

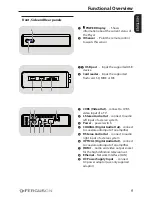
Page 13: ...stem C Power power switch D COAXIAL Digital Audio Out connect to coaxial audio input of an amplifier E R Stereo Audio Out connect to audio right input of a stereo system F OPTICAL Digital Audio Out co...

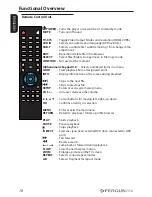
Page 14: ...tart playback from a designated point INFO Display information on the screen during playback Skips to the next file Skips to previous file SETUP Enters or exits system setup menu VOL Increase decrease...

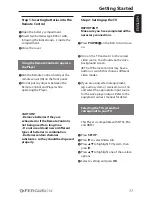
Page 15: ...ical substances so they should be disposed properly Step 2 Setting up the TV IMPORTANT Make sure you have completed all the necessary connections APress POWER on the RCU to turn Ariva on BTurn on the...

Page 16: ...ptions are different depending on your country or region It may not correspond to the illustrations shown on the user manual Setting the OSD language APress SETUP BPress to select System tab CPress to...

Page 17: ...s MPEG1 2 PS MPG MPEG2 Transport Stream TS M2TS VOB ISO with DVD Video to AVI WMV Matroska MKV AVC HD MOV H 264 FLV Flash Video RMVB RM RealVideo Video codecs XVID SD HD except 3 warp point GMC MPEG 1...

Page 18: ...f the directory file configuration BPress to select the folder and press OK to open the folder CPress to select a movie file DPress OK to confirm Basic playback controls All operations described are b...

Page 19: ...normal speed press PLAY Forward Reverse Searching APress during playback to select the required speed 1 5X 2X 4X 8X 16X 32X backward or forward Sound will be muted DVD VCD XviD or intermittent audio f...

Page 20: ...orted Playing pictures or audio files Ariva player is able to access and view the data in the supported USB device General Operation AUse to navigate within the menu and select the device you want to...

Page 21: ...EG disc may be distorted during playback due to the configuration and characteristics of the disc During simultaneous playback fast forward reverse or slow forward is not available File copy Ariva pla...

Page 22: ...u contains the options for selecting the colour system PAL or NTSC and HDMI resolution that matches the connected TV AIn Video tab press to highlight TV system then press OK BPress to select a setting...

Page 23: ...r wide screen TV frame ratio 16 9 Set it for HD ready or FullHD TV C Press OK to confirm Network setup menu APress SETUP button BPress to select Network tab Wired LAN setup This menu display current E...

Page 24: ...Moldavian Russian Serbian and Ukrainian Unicode UTF 8 and others select proper option if you have subtitles in this code page format Restoring to original settings Setting the Restore Default functio...

Page 25: ...B flash drive Big file size or high resolution USB flash drive takes longer time to read and display on the TV screen No sound is ouput from the HDMI out Check the connection between theTV and the HDM...

Page 26: ...11n Realtek RTL8191SU Connections CVBS Output Cinch yellow HDMI Output HDMI 1 3 Audio Output L R 2x Cinch white red Digital Output 1 coaxial 1 optical Port USB 2x USB 2 0 type A Port Ethernet 1x RJ 4...

Page 27: ...x channels of digital audio front left and right surround left and right center and subwoofer JPEG A very common digital still picture format A still picture data compression system proposed by the Jo...

Page 28: ......

Page 29: ......

Page 30: ...www ferguson digital eu v1 33...

Reviews: