FerdY Boracay Series Installation And Care Manual Download Page 6


Wipe surfaces clean and rinse completely with water immediately after applying cleaner.


Rinse and dry any overspray that lands on nearby surfaces.


Do not allow cleaners to soak on surfaces.


Use a soft, dampened sponge or cloth. Never use an abrasive material such as a brush or scrubing 

pad to clean surfaces.


Removing Minor Surface Damage


Your solid surface acrylic bath is strong and durable, and will provide you with years of satisfaction. If 

you observe stains or minor scratches in the acrylic surface, follow these steps to quickly repair your 

bath.


IMPORTANT!  This  repair  procedure  is  not  appropriate  for  deep  scratches,  gouges,  or  chips.  For 

damage of that nature please contact a local solid surface repair professional.


NOTE: We recommend wet sanding to extend the life of the sandpaper, although dry sanding will


produce the same quality repair.


NOTE: Use 600 grit sandpaper to remove scratches and stains.


Apply flat, even pressure with the sandpaper and move the paper in a circular pattern.


Inspect your progress frequently to ensure a quality repair.


Clean or replace the sandpaper as needed during the repair.


When the damage is repaired, polish the area with clean 1000 grit sandpaper. Use a steady circular 

motion to polish the repaired surface and surrounding area to restore the bath to its original finish.


When you are finished, rinse the bath surface with clean water to remove any sanding dust and 

debris. Use a clean cloth to dry the bath surface and then use a microfiber cloth AKA glass cleaning 

cloth to polish the surface.


Summary of Contents for Boracay Series

Page 1: ...oor Before You Begin Observe all local plumbing and building codes Unpack and inspect the bath and components for damage Put the bath and components back to the carton until installation To simplify future maintenance make sure all plumbing connections around the bath are easily accessible Carefully move the bath into the installation area Two persons are needed to install this product This bath i...

Page 2: ...ay down the bath on one side on top of a drop cloth mat in the installation location aside from the drain pipe on the floor Figure 1 Drain pipe on the floor Dry fit the drain assembly to the bath and apply 100 silicone sealant to the connection Usually it needs 24 hours to dry Please follow your plumber s advice accordingly on this part The PVC drain assembly is extendable so it can reach the drai...

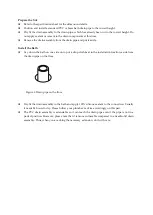
Page 3: ...Figure 2 Pop up drain ...

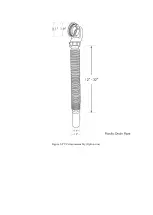
Page 4: ...Figure 3 PVC drain assembly Option one ...

Page 5: ...osition the bath over the drain on the floor Close the bath drain Fill the bath to the overflow and check for leaks If everything is ok apply a thin continuous layer of clear or color matched 100 silicone sealant to the seam between the bath and the finished floor Care and Cleaning For best results keep the following in mind when caring for your FerdY product Always test your cleaning solution on ...

Page 6: ...lease contact a local solid surface repair professional NOTE We recommend wet sanding to extend the life of the sandpaper although dry sanding will produce the same quality repair NOTE Use 600 grit sandpaper to remove scratches and stains Apply flat even pressure with the sandpaper and move the paper in a circular pattern Inspect your progress frequently to ensure a quality repair Clean or replace...

Reviews: