background image


the cooktop. Heat transferred from the cooktop bottom pan during  operation  will overheat an improperly 
ventilated area.    

Allow a 2" minimum clearance between the bottom of the metal pan of the cooktop and any combustible 
surface  located  below,  i.e.:  the  upper  edge  of  a  drawer  installed  below  the  cooktop.  Failure  to  provide 
proper clearances and ventilation may result in a fire hazard.   If the cooktop is installed above an oven, 
keep the 

cooktop’s power cord from contacting the oven. 

Cooktop dimensions and countertop cutout dimensions are shown below: 


20"

16"

18"

21


"

3"


NOTE:

  When  making  the  countertop,  radius  the  corners  of  the  cutout  (1/4"  radius  is  typical).  This  will 

prevent  cracking  of  the  countertop.  Follow  the  countertop  manufacturer's  instructions  regarding  the 
minimum corner radius and reinforcement of corners. 


2. Installing the Cooktop 

There are four mounting brackets supplied with the glass ceramic cooktop. These brackets are designed 
to hold the cooktop firmly in place. The cooktop should be bedded to the countertop using a soft bedding 
compound that will prevent damage if later removal for service is necessary. We recommend a very small 
bead of silicone sealant.   
 
Position the cooktop in the cutout opening and press firmly on all sides to seal the frame into the bedding 
compound.  Secure  the  mounting  brackets  to  the  cooktop  from  underneath  with  the  screws  that  are 
supplied as shown below. 

COUNTER TOP

COOK TOP

MOUNTING BRACKET

SCREW


Summary of Contents for Summit CR2B223G

Page 1: ...FOLLOW ALL SAFETY RULES AND OPERATING INSTRUCTIONS Felix Storch Inc An ISO 9001 2008 registered company 770 Garrison Avenue Bronx NY 10474 www summitappliance com Write Model Serial Nos on bottom of unit here Model No ______________________________ Serial No ______________________________ ...

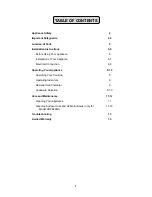
Page 2: ...allation of Your Appliance 6 7 Electrical Connection 8 9 Operating Your Appliance 9 10 Operating Your Cooktop 9 Operating Indicators 9 Residual Heat Indicator 9 Cookware Selection 9 10 Care and Maintenance 11 12 Cleaning Your Appliance 11 Cleaning Surface Units and Reflector Bowls only for Model CR2B224S 11 12 Troubleshooting 13 Limited Warranty 15 ...

Page 3: ...t be properly positioned and installed as described in this manual so read the manual carefully To reduce the risk of fire electrical shock or injury when using the appliance follow basic precautions including the following It is recommended that a separate circuit serving only your appliance be provided Use receptacles that cannot be turned off by a switch or pull chain Never clean appliance part...

Page 4: ...ical Code and local codes and ordinances is required Electrical Grounding Instructions The appliance must be installed and grounded by a qualified technician in accordance with the National Electrical Code ANSI NFPA No 70 Latest Edition and local electrical code requirements Do not kink or pinch the power supply cord of the appliance The size of the fuse or circuit breaker should be 20 amperes Pro...

Page 5: ...tric shock or fire Glazed Cooking Utensils Only certain types of glass glass ceramic ceramic earthenware or other glazed utensils are suitable for range top service without breaking due to the sudden change in temperature Utensil Handles Should Be Turned Inward and Not Extend Over Adjacent Surface Units To reduce the risk of burns ignition of flammable materials and spillage due to unintentional c...

Page 6: ... LOCATION OF PARTS MODEL CR2B223G BURNER 1200W 5 BURNER 1800W 7 RESIDUAL HEAT INDICATOR OPERATING INDICATOR CONTROL KNOB 4 3 MODEL CR2B224S OPERATING INDICATOR BURNER 1800W 8 CONTROL KNOB BURNER 1200W 6 ...

Page 7: ...e bottom of an unprotected wood or metal cabinet or 24 inches minimum clearance when the bottom of wood or metal cabinet is protected by not less than 1 4 inch thick flame retardant millboard covered with not less than No 28 MSG sheet steel 0 015 inch thick stainless steel 0 024 inch thick aluminum or 0 020 inch thick copper E 1 inch minimum from backsplash of countertop to edge of glass refer to ...

Page 8: ...e cutout 1 4 radius is typical This will prevent cracking of the countertop Follow the countertop manufacturer s instructions regarding the minimum corner radius and reinforcement of corners 2 Installing the Cooktop There are four mounting brackets supplied with the glass ceramic cooktop These brackets are designed to hold the cooktop firmly in place The cooktop should be bedded to the countertop ...

Page 9: ...ounded Remove house fuse or open circuit breaker before beginning installation Do not attempt to repair or replace any part of the appliance unless it is specifically recommended in this manual All other servicing should be referred to a qualified technician To minimize the possibility of electric shock disconnect this appliance from the A C power supply before attempting any maintenance NOTE Turn...

Page 10: ... the desired setting To adjust the setting turn the knob without pressing down The burner is turned off by turning the control knob clockwise or counter clockwise to 0FF OPERATING INDICATORS When a burner is turned on the corresponding operating indicator will light up regardless of the setting RESIDUAL HEAT INDICATOR The residual heat indicator will light up when some part of the glass ceramic co...

Page 11: ...k flat smooth bottoms Slightly concave bottoms will also work adequately Pans with convex bottoms will not cook well Using a lid while cooking will minimize the loss of heat and decrease the cooking time Copper bottom and aluminum pans may leave a residue on the cooktop in the form of metallic lines This is normal These lines can be removed using a non abrasive ceramic cooktop cleaner or a shielde...

Page 12: ... ceramic cleaner using a soft cloth or paper towel To remove any lime scale deposits or metallic residue apply a ceramic cleaner using a soft cloth and a shielded scraper blade if necessary After cleaning wipe the ceramic surface with a damp cloth and dry A cleaner with a special additive to prevent water marks and smears on the ceramic surface may be used Any melted solids like sugar plastic or a...

Page 13: ... into the receptacle 2 When the terminal is pushed into the receptacle as far as it will go push down the edge of the surface unit opposite the receptacle NOTE Do not immerse burners in water or any other liquids ...

Page 14: ...not operate Not connected to power supply Circuit breaker has tripped or fuse is blown The heating element cycles on and off frequently The power setting is too low Burners will not maintain a rolling boil or frying rate is not fast enough You must use pans that are absolutely flat Pan bottom should closely match the diameter of the burner selected Foods cook slowly Improper cookware being used Bu...

Page 15: ...14 NOTES ...

Page 16: ...arts or systems resulting from unauthorized modifications made to the appliance 6 The removal and reinstallation of your appliance if it is installed in an inaccessible location or is not installed in accordance with published installation instructions DISCLAIMER OF IMPLIED WARRANTIES LIMITATION OF REMEDIES CUSTOMER S SOLE AND EXCLUSIVE REMEDY UNDER THIS LIMITED WARRANTY SHALL BE PRODUCT REPAIR AS...

Reviews: