4.
Prior to drilling, move the units out of the
way. Drill eight 0.199" (#8 drill) diameter holes at the
previously scribed drill position marks.
5.
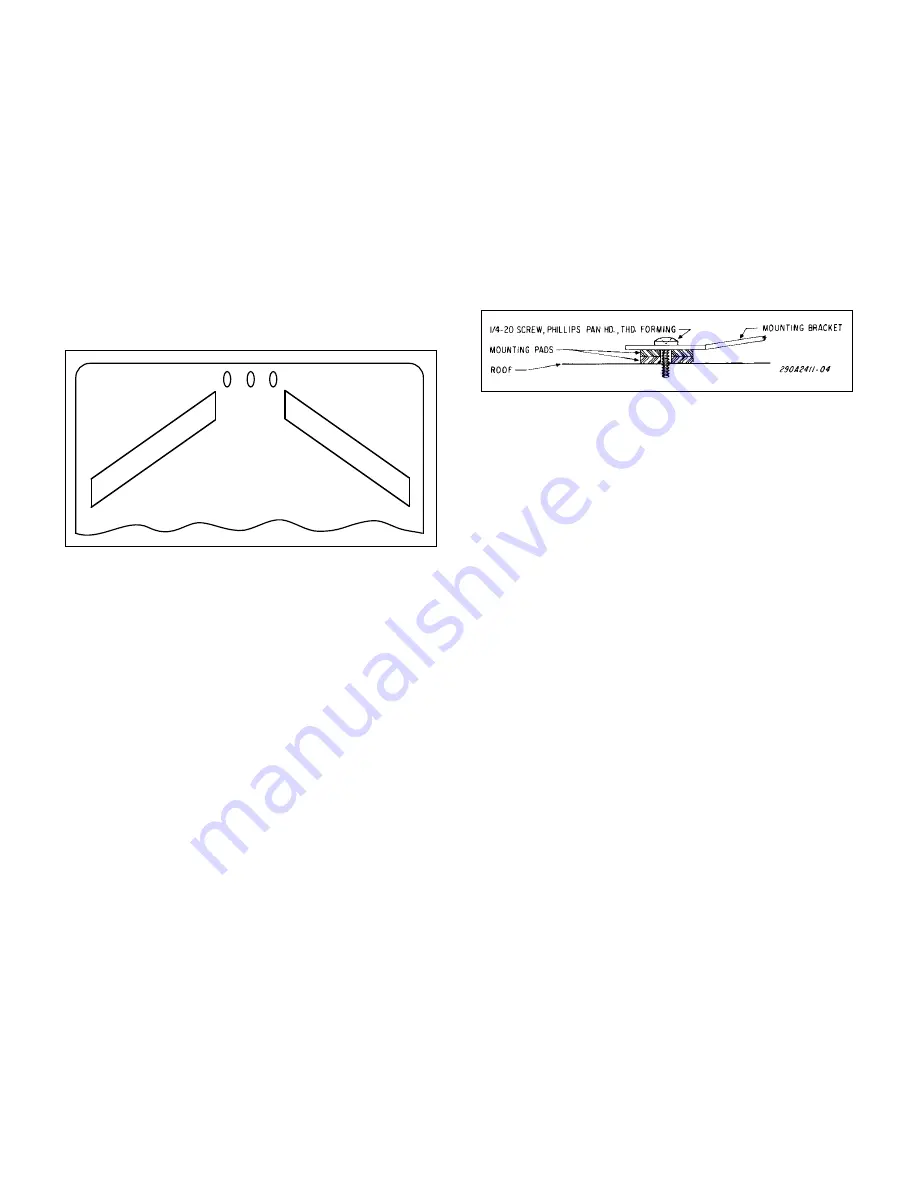
Place the light assembly halves in position on
the roof. Insert two mounting pads between the light
assembly halves and roof for each mounting bracket
leg (see figure 3). Secure the light assembly halves to
the roof using eight 1/4" x 3/4" thread-forming screws
and tighten securely. The ViewPoint should now be
solidly anchored to the roof.
6.
Ensure that all fasteners are properly tight-
ened.
Figure 3.
3.
See figure 2. Position the other ViewPoint
half on the vehicle roof. Using the mounting brackets
as templates, scribe four drill position marks on the
mounting surface.
CAUTION
Avoid damage to electrical wiring and other
parts of vehicle. When drilling or cutting on
ANY part of the vehicle, ensure that both sides
of the surface are clear of parts that could be
damaged.
Also, when drilling mounting holes, ensure
that holes are drilled only through sheet metal
and not through upholstery.
Figure 2.


