


Page 34 of 91
Rev. 4.20
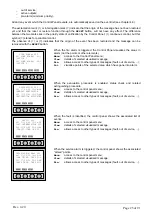
7.1.2 Main menu
After the user has entered the “
Main menu
”, to add some points (detectors,
modules, buttons), it is necessary to select “
POINT
” using the four arrows
placed low on the display.
Confirm the made selection with “
Sel.
”.
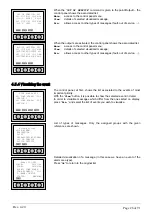
7.1.3 Point menu
After the user has entered the “
Point menu
”, to add further
points (detectors, modules, buttons), it is necessary to select
“
insert
”. Select “
Back
” to return to the “
Main menu
”. Select
“
Esc
”, to go out completely.
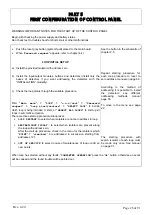
7.1.4 Address assignation
In the address “
Address assignation
” the programming procedure is
decided:
•
Select “
SINGLE POINT
” to programme one only point;
•
Select “
AUTOMATIC INCREASE
” to programme more points in
succession.
Use the four arrows to set oneself on the line that shows the type of address
assignment the user wants to select and confirm with “
Sel.
”. Type in
“
Del.
” to return to the “
Point menu
”.
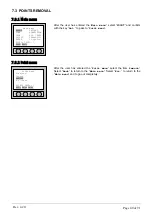
7.1.5 Type of point acquisition
After the user has entered the “
Point acquisition
” menu the acquisition
procedure of the point can be decided:
•
For “
INSTALLATION
”;
•
For “
ACTIVATION
”;
•
For “
SERIAL NUMBER
”;
•
For “
PRESET ADDRESS
”.
Use the four arrows to set oneself on the line that shows the type of address
assignment the user wants to select and confirm with “
Sel.
”. Type in
“
Del.
” to return to “
Point menu
”. Refer to chapter
7.1 for further
description of the items.
Main menu
POINT
SETTING
ZONE CONNECTION
LOOP ACC. LEVEL
OUTPUT DIAGNOSTIC
EVENT 3b option
ACCESS LEVEL: 1
Sel. Esc.
Point menu
view/mod.
insert
remove
d.b.reset
ACCESS LEVEL: 1
Sel. Back Esc.
Address assignation
•SINGLE POINT
AUTOMATIC INCREASE
Sel. Del.
Point acquisition
•INSTALLATION
ACTIVATION
SERIAL NUMBER
PRESET ADDRESS
Sel. Del.