background image

REMOTE CONTROL INSTRUCTIONS

Operated method:

Only guardian can use the remote controller, not allow children to touch it.

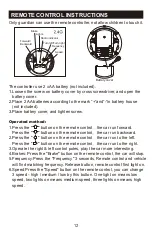
Forward/

Backward

Brake

Lights

Radio indicator

Turn left/Turn right

Frequency

Speed

UM

-3“

AA

”1.5

V

UM

-3“

AA

”1.5

V

Battery cover

The controller use 2 x AA battery (not included).

1.Loosen the screw on battery cover by cross screwdriver, and open the 

   battery cover.

2.Place 2 AA batteries according to the mark “+”and“-”in battery house

   (not included).

3.Place battery cover, and tighten screw.

1.Press the "     " button on the remote control

the car run forward.

   Press the "     " button on the remote control

the car run backward.

2.Press the "     " button on the remote control

the car run to the left.

   Press the "     " button on the remote control

the car run to the right.

3.Operate the right & left control poles, play the car more interesting.

4.Brakes: Press the "Brake" button on the remote control, the car will stop.

5.Frequency:Press the "Frequency" 3 seconds, Remote control and vehicle

   will find matching frequency. Release button, remote control first light on.

6.Speed:Press the "Speed" button on the remote control, you can change 

   3 speed - high / medium / low by this button. One light on means low 

   speed, two lights on means medium speed, three lights on means high 

   speed.

12

Summary of Contents for smart

Page 1: ...ELECTRIC CAR INSTRUCTIONS REAL WORKING DOORS COLOURFUL LIGHTS DUAL DRIVE POWER...

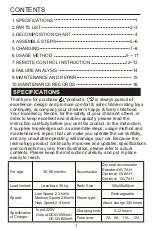
Page 2: ...uct In the instruction it supplies knowledge such as assemble steps usage method and maintenance repair that can make you operate the car skillfully and any unsuitable operating will damage your car B...

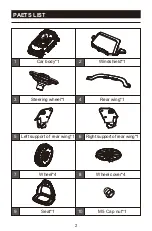
Page 3: ...PAETS LIST 1 2 3 4 5 6 7 8 9 10 Car body 1 Windshield 1 Steering wheel 1 Rear wing 1 Left support of rear wing 1 Right support of rear wing 1 Wheel 4 Wheel cover 4 Seat 1 M5 Cap nut 1 2...

Page 4: ...PAETS LIST 11 12 13 14 15 M5 35mm Machine screw 1 washer 2 Double motors version washer 3 single motor version Charger 1 Remote control 1 Screw 4 12mm 8mm 2 used to lock the seat 3...

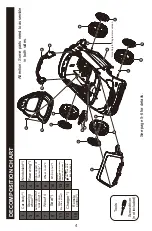
Page 5: ...l 1 Left support of rear wing 1 Wheel cover 4 Charger 1 Remote control 1 Wheel 4 Seat 1 M5x35mm Machine screw 1 Washer 2 Double motors version Washer 3 single motor version M5 Cap nut 1 Right support...

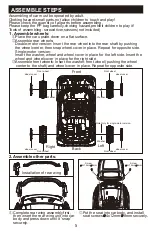
Page 6: ...de Single motor version Insert the washer wheel and wheel cover in place for the left side Insert the wheel and wheel cover in place for the right side Assemble front wheels Insert the washer front wh...

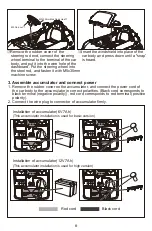
Page 7: ...snap is heard 1 Remove the rubber cover on the accumulator and connect the power cord of the car body to the accumulator in correct polarities Black cord corresponds to black terminal negative polari...

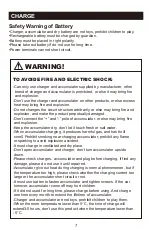
Page 8: ...t water When accumulator charging it produces harmful gas and has thrill smell Prohibit smoking near charging accumulator prohibit any flame or sparking to avoid explosion accident It must charge in v...

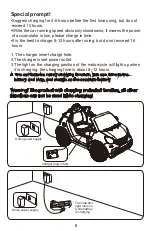
Page 9: ...e charge in time It is the best to charge 8 12 hours after using but do not exceed 16 hours 1 The charger insert charge hole 2 The charger insert power outlet 3 The light on the charging position of t...

Page 10: ...atbelts For age 36 96 months Maximum load is 30 kg Prohibit overage or overload Please ensure the steps below have finished before using Safety Warning Attention Before the first using the accumulator...

Page 11: ...ture and circuit of this product by yourself To avoid accident the guardian must check whether the main parts are in good condition before using Ensure the accumulator plug in unit has inserted and po...

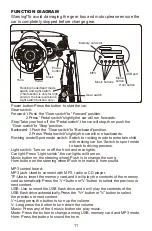
Page 12: ...ge the song Horn button on the steering wheel Push in to make a horn sound MP3 control board MP3 jack Used to connect with MP3 radio or CD player TF Use to insert the memory card and it will play the...

Page 13: ...he remote control the car run forward Press the button on the remote control the car run backward 2 Press the button on the remote control the car run to the left Press the button on the remote contro...

Page 14: ...AA batteries in right polarity and then fit on cover Safety Warning of Usage Charger accumulator and dry battery are not toys prohibit children to play Non rechargeable battery can not be charged if...

Page 15: ...turn on Reason The charger can not work Is the charger a little heat while charging If it is not may be the charger has already damaged please contact agent or manufacturer Problem The car can only r...

Page 16: ...e and heat booster and etc or else the plastic part may be melt When charging please keep away from combustible to avoid conflagration Please charge in time after using it must be charged by adult Ple...

Page 17: ...MAINTENANCE RECORDS Purchase date Customer Name Tel Address Purchase time Invoice NO Remarks Shop bill Date 16...

Page 18: ...Fengyuan Toys Industry Commerce Co Ltd Manufacturer Fengda Toys Industry Commerce Co Ltd Address Development Avenue Economic Development Zone Hubei Province Website https www fdtoys cn Customer Servi...

Reviews: