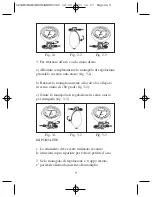
How to put on the cufis
Cuffs
Place the cuff 2-3 cm above the bend of the elbow on the naked left upper
arm; make sure that the symbol "ø" is above the artery. Close the cuff by
means of the velcro closure.
In units intended for home use, the diaphragm of the chestpiece integrated
into the cuff must be placed above the artery.
To put on the cuff, pull the free end of the cuff through the metal D-shaped
ring and close the cuff by means of the velcro closure.
How to measure blood pressure
After you have put on the cuff, pump it up by pressing the bulb until the
pressure in the cuff is about 20 mm/Hg above the expected systolic blood
pressure (upper value).
It is very important that the person whose blood pressure is being taken is
relaxed and sitting comfortably. Furthermore, the lower arm should be
placed at the level of the heart with the inside of the arm facing upwards.
Place the chestpiece of the stethoscope on the artery under the cuff.
To be able to measure blood pressure, open the air-release screw on the
bulb by turning it counter-clockwise. Ideally, the rate of air release should
be 2 - 3 mm Hg/s. This rate can be adjusted by turning the screw very
carefully. Perform a visual check of the air-release rate by looking at the
scale: the pointer must move 1 - 1.5 graduations on the the scale per
second.
Once the upper blood pressure value i.e. (systolic pressure) has been
reached, a rhythmic thumping sound is heard.
When the lower blood pressure value (diastolic pressure) is reached, the
thumping sound stops.
Now open the air-release valve completely so that air can escape from the
cuff immediately.
The blood pressure measurement procedure has now been completed.
14
SFIGMOMANOMETRIANEROIDI 18-09-2003 12:07 Pagina 14


