background image

Advanced settings

Adjusting the tempo of the metronome or song

Press the Tempo button to adjust the tempo of the metronome or song. Then use the rotary knob or '+' / '-' 
buttons to change the tempo as desired.

Selecting an instrument

If you want to assign a different instrument or sound to a specific trigger, make sure
you're in the main menu by pressing the Home button. 
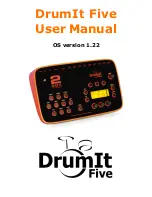
Press the F2 button and open INST in the menu to access a list of different sounds
that can be used for different trigger pads. 

Hit the trigger you'd like to assign a sound to and it will appear on the display. A Head
and Rim indicator enables you to choose if the sound should be assigned to the head or the rim. 

You can also use the cursor buttons (arrow keys) to browse through the various trigger pads (left to right) or 
the various sounds (up and down).

The mixer can be used to adjust volume and panning for each sound.

You can create a custom drum kit using specific sounds of your choice or adjust the volume and panning of 
the sounds themselves so that when a sound comes from a left-sided trigger, it will be audible on the left side
of your headphones, for instance.

Press F1 (MIX) in the instrument menu. 
In the new menu, you can fine-tune the main volume level and panning for the other trigger pads. The 
panning determines whether the sound comes from the left, the middle, or the right when played on a stereo 
source like a speaker system or a set of headphones.

Naming the drum kit

Name any drum kit that you configure yourself using a maximum of ten characters. 
To do this, press the Home button to return to the main menu and press F1 to view the function list.

Use the F4 function button to create a name for your drum kit. Use the cursor to scroll through the characters
and press Enter (F2) to select the character you want to use. Use F3 to erase a character and F4 to save the
name. The name should now appear in the list. 

Playing along with songs

The basic functionality of the songs has already been described earlier in this
manual, but there are more possibilities available. Each song consists of drum,
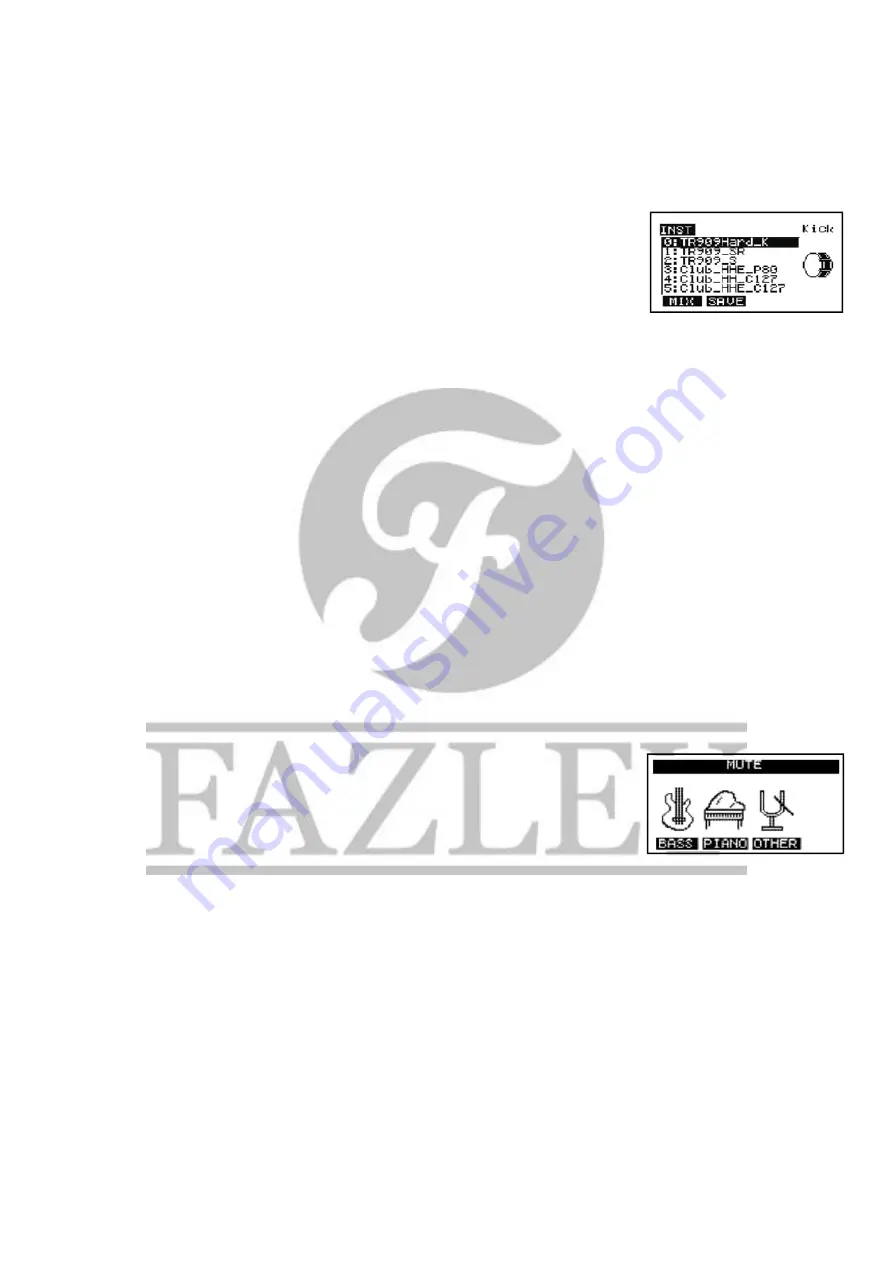
piano, bass and miscellaneous sounds that can be turned on or off as desired.

To mute certain sounds, press F2 to open the Mute menu. Here, you will see a list of
the sounds that are present in the selected song. 
Use the F1 - F3 buttons to turn the selected sound on or off. 

Press Return to save the settings and go back to the song. 

Using the loop function during the song

If you want to follow the rhythm of a selected song, it is possible to play it as a continuous loop that will keep 
playing until you stop it. While the song is playing, press the F3 (Repeat) function to mark the beginning of 
the loop and press it again to mark the end of the loop. This section of the song will then keep repeating itself
endlessly. To stop the loop, press F3 (repeat) again.

Using the internal metronome

All information and illustrations shown in this user manual are subject to change without further notice.

User manual version: 1.0

Creation date + author initials: 05-05-2015 RV Revision date + author initials: 

Summary of Contents for DDK-100

Page 1: ...um kit user manual All information and illustrations shown in this user manual are subject to change without further notice User manual version 1 0 Creation date author initials 05 05 2015 RV Revision...

Page 2: ...ck drum pedal with mesh head trigger 1 x hi hat pedal 1x drum key 1x quick start guide 1x assembly instruction book Please inspect the device and the included accessories Should you discover that eith...

Page 3: ...ed for a longer period of time if maintenance is necessary or if the device needs to be cleaned Do not pull on the cable to remove a connector as this could cause damage Do not use any cables other th...

Page 4: ...not be present on this device Contact your dealer or a qualified technician if you find any corrosion on the screws Every power and signal connector should be securely mounted Do not use the device if...

Page 5: ...volume level of external playback equipment such as a computer smartphone tablet MP3 player or other device so you can play along with your favourite music Headphones The volume level of the headphon...

Page 6: ...F1 F4 function keys Depending on what the display is showing the F1 F4 function keys can be used to call up certain functions parameters or settings The name of each function is shown on the display 1...

Page 7: ...electronic drum module can be triggered by an external MIDI device such as a pad controller or MIDI keyboard You can find more information about this later on in this manual Equipped with a 5 pin DIN...

Page 8: ...iting adapter The editing adapter ensures that the drum module is optimally positioned on the frame All information and illustrations shown in this user manual are subject to change without further no...

Page 9: ...e Because the functions differ per menu item the display will always show which function is under which button in any given menu The buttons and the rotary knob The buttons and the rotary knob are bas...

Page 10: ...aming the drum kit Name any drum kit that you configure yourself using a maximum of ten characters To do this press the Home button to return to the main menu and press F1 to view the function list Us...

Page 11: ...ave function after recording Give your recording a name using the character window and press F4 to save Playing back a MIDI recording Press the REC button to open the MIDI recorder Browse through the...

Page 12: ...r it will be to play fast rhythms Anti Cross 1 10 Anti Cross ensures that a trigger pad only receives the signal when hit above a specified velocity level This can prevent pads from getting triggered...

Page 13: ...to open a window with firmware information Factory settings reset PLEASE NOTE by resetting the drum module to the factory settings all your personal preferences will be erased and reset to default val...

Page 14: ...module specifications 38 songs for accompaniment with individually mutable instruments 25 preset kits sound data base with 423 versatile sounds for personal user presets group faders for adjustable vo...

Page 15: ...LCD connection voltage 100 240V AC 50 60 Hz operating voltage 12V DC 2A by power adapter included net weight 23 5 kgs gross weight 28 kgs floor surface when set up ca 130 x 75 cm excl throne 130 x 10...

Page 16: ...set drum kit list All information and illustrations shown in this user manual are subject to change without further notice User manual version 1 0 Creation date author initials 05 05 2015 RV Revision...

Page 17: ...CE list All information and illustrations shown in this user manual are subject to change without further notice User manual version 1 0 Creation date author initials 05 05 2015 RV Revision date autho...

Page 18: ...ll information and illustrations shown in this user manual are subject to change without further notice User manual version 1 0 Creation date author initials 05 05 2015 RV Revision date author initial...

Page 19: ...ll information and illustrations shown in this user manual are subject to change without further notice User manual version 1 0 Creation date author initials 05 05 2015 RV Revision date author initial...

Page 20: ...ll information and illustrations shown in this user manual are subject to change without further notice User manual version 1 0 Creation date author initials 05 05 2015 RV Revision date author initial...

Reviews: