background image

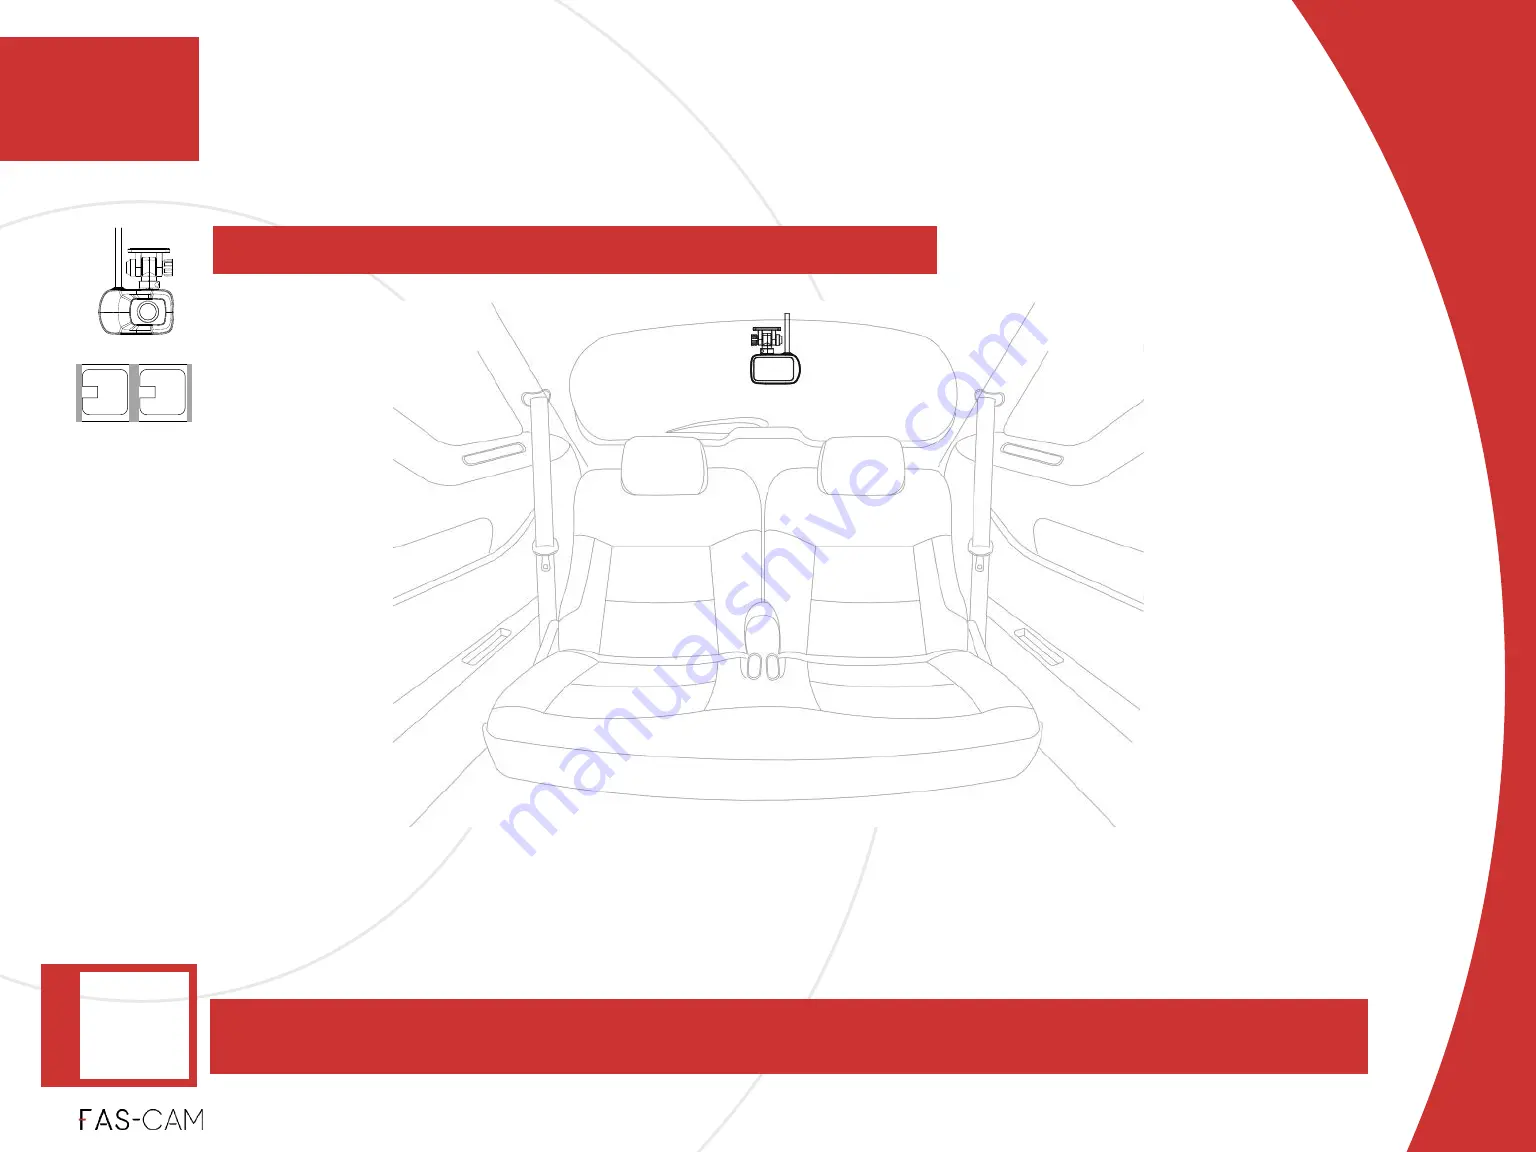
Rear camera can also be used as an internal camera to view the inside of the vehicle and can be 
attached anywhere the user sees fit. Rear camera installation guide is only a suggestion. 

Place the rear camera on the back windshield to find the desired placement location.

Before attaching the mount, use the alcohol pads to wipe down the area on the windshield 
and use the cleaning cloth to dry the area. 

*Skip this step if you only purchased the F701- DR front camera.

Installation

4.2.1  Rear Camera Pre-Alignment & Surface Preparation

4.2  F201-IR Rear Camera Installation

4

4. Installation

3M

Wet

1

2

Dry

Alcohol Wipes

Alcohol Wipes

Camera: 
OFF

INDICA

TOR LIGHT

Summary of Contents for F701

Page 1: ...F701 F201 Optional User Manual www fasalliance com English V22 05 12...

Page 2: ...3 Front Camera Pre Alignment 4 1 4 Surface Preparation 4 1 5 Optional Electrostatic Film 4 1 6 Power Cord Wiring Placement Cigarette Lighter 4 2 Rear Camera F201 IR Installation 4 2 1 Rear Camera Pre...

Page 3: ...ce Sound 7 3 7 System Info 7 3 8 Default Restore 8 Video Playback App 8 1 Request for Registration Code 8 2 Installing DVPlayer 8 3 Video Playback 8 4 Understanding Video Information 9 Cabin View 10 F...

Page 4: ...If connecting to our rear cam we advise using a 64GB U3 or 128GB U3 card for best results The F701 DR series supports up to 256GB max microSD cards For those looking to use FAS CAPTURE FAS MODE or Par...

Page 5: ...the terminals of the power cord clean Use the correct input voltage Do NOT cover the product with any material Do NOT adjust the product while driving Do NOT operate the product while driving Do NOT...

Page 6: ...o NOT remove or insert TF Card SD Card Micro SD Card while the camera is powered on Do NOT apply excessive force when pressing the buttons Do NOT spray cleaning products directly onto the product Do N...

Page 7: ...is day or night presence of street lighting entering exiting tunnels and the surrounding temperature FAS CAM is NOT responsible for the loss of any recorded video during operation Although the device...

Page 8: ...stalled and used in accordance with the instructions may cause harmful interference to radio communications However there is no guarantee that interference will not occur in a particular installation...

Page 9: ...pes Alcohol Wipes 3M Wet 1 2 Dry Alcohol Wipes Alcohol Wipes Stickers alliance 4K UHD WIDE ANGLE LENS 701 DR 3M 3M 3M 3M F701 DR Installation Guide alliance F701 DR Quick Start Guide Insert Memory Ins...

Page 10: ...ion sounds and playback audio recording during video playback Front Camera Lens Provides users a 4K full view recording of 5 road lanes Magnetic Front Camera Mount Bracket Slot Connects the Front Came...

Page 11: ...he power connection status FAS CAPTURE Button Unique FAS CAPTURE FAS MODE for recording in emergency urgent scenarios See Chapter 5 FAS CAPTURE FAS MODE for more details Direction Menu Selector Split...

Page 12: ...o reset the Front Camera when needed Length 90 mm 3 54 inch Width 22 97 mm 0 90 inch 3 Product Overview 3 2 Part Names 3 2 3 F701 DR Front Camera Bottom View and Dimension 3 Product Overview F701 DR D...

Page 13: ...Battery Icon Name Graph Front Camera Recording Indicator Loop Recording WDR Exposure G Sensor Sensitivity Level Date and Time TF Card SD Card Microphone Rear Cam Exposure 3 Product Overview Product O...

Page 14: ...Loop Recording 1 Minute Length Constant Power Source Connected Loop Recording 2 Minute Length Front Rear Cam Exposure 3 Loop Recording 3 Minute Length Front Rear Cam Exposure 2 Parking Mode Disabled F...

Page 15: ...e Dash Cam to a designated location Pin Connecter Side Attach the connecter pins into the F701 DR Front Camera Bracket Slot Length 47 mm 1 85 inch F201 IR Dimension Length Width Height Connector Milli...

Page 16: ...e Tape Side Place a 3M Tape on the top and mount the bracket to a designated location Camera Lens Records in 2K Angle Adjustment Modify the F201 IR Rear Camera view angle F201 IR Dimension Length Widt...

Page 17: ...ory card into the memory card slot in the front camera Memory card not included Installation 4 Lexar Professional 1066x microSDXC UHS I Cards SILVER Series Best option for long term use Lexar microSDH...

Page 18: ...k attaches Be careful not to snap off the hook by forcing an incorrect angle The angle of attachment detachment is about 35 Unit test helps users ensure that camera functions are working properly befo...

Page 19: ...Connect the front camera and the rear camera using the rear camera USB C Extension Cable Skip this step if you only purchased the F701 DR front camera 4 Installation Installation 4 1 F701 DR Front Cam...

Page 20: ...ct the power cable to the car cigarette lighter socket and the other end of the power cable to the front camera mount 4 Installation Installation 4 1 F701 DR Front Camera Installation 4 Camera OFF 4 1...

Page 21: ...move protective covering on camera screen and lens 4 Installation Installation 4 1 F701 DR Front Camera Installation 4 Power ON Recording WHITE ON Power Indicator ON Recording Indicator ON RED while r...

Page 22: ...ill be the default setting We recommend to select Standard Mode during this setup Refer to Chapters 7 1 1 2 Presets Mode 7 1 1 2 7 2 3 Audio Recording 7 3 1 Date Time settings in this User Manual for...

Page 23: ...d rear views Check Front View and Rear View to confirm they are being displayed If any of the views fails to show or if you experience any malfunction Please review chapter 10 Troubleshoot in this Use...

Page 24: ...ed Available TF Card SD Card Recording Time Minutes info will be displayed at the bottom of the page Press the Power Button Once We recommend formatting the TF Card SD Card using the camera s internal...

Page 25: ...ble Disconnect the rear camera cable from both the rear camera and front camera Keep the mount attached to the front camera Power off the vehicle ignition 4 Installation Installation 4 1 F701 DR Front...

Page 26: ...tate and municipal laws before mounting the product to the windshield This step helps users find their desired front camera placement before using 3M adhesive tape to attach the mount to the windshiel...

Page 27: ...n the windshield Recommended Attach Area After using the alcohol pads use the cleaning cloth to dry the area Installation 4 1 4 Surface Preparation 4 1 F701 DR Front Camera Installation 4 4 Installati...

Page 28: ...box and adjust the view angle accordingly IMPORTANT Please ensure that the camera s field of view lens is NOT overlapping the electrostatic film Otherwise the video will appear blurry The electronic...

Page 29: ...under the glove compartment to clip and hold the cable Installation 4 1 6 Power Cord Wiring Placement Cigarette Lighter 4 1 F701 DR Front Camera Installation 4 4 Installation Ceiling head liner Door...

Page 30: ...Follow along with our installation video for a smoother installation Video Tutorials...

Page 31: ...eld to find the desired placement location Before attaching the mount use the alcohol pads to wipe down the area on the windshield and use the cleaning cloth to dry the area Skip this step if you only...

Page 32: ...camera Attach the rear camera to the desired location on the back windshield Installation Skip this step if you only purchased the F701 DR front camera 4 2 1 Rear Camera Installation 4 2 F201 IR Rear...

Page 33: ...2 F201 IR Rear Camera Installation 4 4 Installation Ceiling Trim Driver s Interior Trim Back Trim Interior Trim START Trunk Trim Depending on the either the driver side or the passenger side that you...

Page 34: ...old the cable For SUVs position the rear camera wire between the vehicle ceiling and trunk door This will account for the extended distance between the ceiling and trunk when the trunk door is fully o...

Page 35: ...View the displayed front view and adjust the front camera to the desired angle It is recommended to keep a portion of the vehicle engine hood in the front view of the camera Installation 4 3 Power On...

Page 36: ...e Use the or button to switch between views Make sure to close the trunk door before reviewing the displayed rear camera view on the front camera Full View Selector Split View Selector Installation 4...

Page 37: ...eos will be under Menu Files Protected Screenshot Photos will be under Menu Files Photos Press once FAS CAPTURE FAS MODE 5 1 FAS CAPTURE 5 Power ON Recording RED ON while recording during protected mo...

Page 38: ...al exit loop videos Protected Videos will be under Menu Files Protected Press and hold FAS CAPTURE FAS MODE 5 2 FAS MODE 5 FAS MODE Continuous FAS MODE will continuously record the scenes on the road...

Page 39: ...res strong evidence is preserved for police investigations and insurance claims if you encounter emergencies accidents collisions etc FAS CAPTURE FAS MODE 5 FAS CAPTURE FAS MODE 5 5 2 1 When to Use 5...

Page 40: ...etach from the vehicle for handheld use to record wherever the evidence is located CONTINUOUSLY RECORD WHEN THE ENGINE IS OFF FAS CAPTURE FAS MODE 5 FAS CAPTURE FAS MODE 5 5 2 FAS MODE 5 2 1 When to U...

Page 41: ...to call emergency responders FAS MODE will continue to record events while the driver can get out of the car to check on the actual situation or call for help FAS CAPTURE FAS MODE 5 FAS CAPTURE FAS MO...

Page 42: ...OK Move Left Previous Menu Move Right No Assigned Feature How to Read Side Bar FILES Main Menu VIDEO Return Button Menu Exit Power Indicator Direction Menu Selector Recording Indicator Enter Menu Conf...

Page 43: ...l NOT turn on if there is no external power source Never take out TF Card SD Card when recording Startup View Recording View Connect the power cable to the camera and the car s power source Start the...

Page 44: ...u Move Right 6 2 Playback 6 2 1 Browse File To playback past video recording on the camera To playback on the computer see Chapter 8 Video Playback App Operation 6 FUNCTION DEFINITION Power ON Recordi...

Page 45: ...y press key see next page to continue with this option FILE NAME FILE TYPE Key Function Description VIDEO MOV video file PROTECTED Protected MOV video file PHOTO JPG image file Date Time View source E...

Page 46: ...folder press to delete the selected video WARNING MESSAGE Delete File option 1 Select option and press key to confirm 2 or select option and press key to exit 6 2 Playback 6 2 2 Delete Files 6 6 Oper...

Page 47: ...6 6 Operation In VIDEO folder select a video and press key to enter player Press key to PLAY current video Press key again to PAUSE the video Exit Player Press key to exit file player Protect File Pr...

Page 48: ...essage FILE PROTECTION Protect or Unprotect File 1 Select option and press key to PROTECT FILE on Warning Message window Then this file will be moved into PROTECTED folder 2 Select option and press ke...

Page 49: ...2 Warning Message FILE PROTECTION Protect or Unprotect File Select option to PROTECT FILE Select option to UNPROTECT FILE Play Video Press key to enter player see next page to continue with this opti...

Page 50: ...otect File During Video Playback 1 Press key 2 Warning Message FILE PROTECTION Protect or Unprotect File Select option to PROTECT FILE Select option to UNPROTECT FILE Operation 6 2 4 Protect and Unpro...

Page 51: ...AGE FORMAT TF Card SD Card SPEED UNITS SCREEN SAVER DEVICE SOUND SYSTEM INFO DEFAULT RESTORE FILES VIDEO PROTECTED PHOTO INDICATOR LIGHT PRESETS G SENSOR LOOP RECORDING SCREEN BRIGHTNESS PARKING MODE...

Page 52: ...on light ACC wire connection required activate cabin view EXPOSURE STAMP DISPLAY AUDIO RECORDING REFRESH RATE EXPOSURE REAR CAM VIDEO SETTINGS ROTATE REAR CAM 50 HZ 60 HZ 3 2 1 0 1 2 3 DATE TIME GPS L...

Page 53: ...on the market to offer presets for easy user setup Using Presets will overwrite any custom settings You can easily change your settings for a more personalized user experience 7 1 1 Presets FUNCTION D...

Page 54: ...GH Light Accident Crash Triggered Triggered Triggered Rough Road NOT Triggered Triggered Triggered Close Door or Tailgate NOT Triggered NOT Triggered Triggered To detect a sudden change while driving...

Page 55: ...Default Setting Depending on Preset Selection To control video clip time length when the file is saved or overwritten Loop Recording automatically overwrites the oldest UNLOCKED file when your TF card...

Page 56: ...according to the recording environment NORMAL Screen brightness will be standard SUNNY Screen brightness will be dimmer than normal Default Setting AUTO To adjust the brightness level of the camera s...

Page 57: ...be on when the camera is receiving power OFF to record videos without the Indicator Light Default Setting ON Indicator Light Settings When the indicator light is switched on the light will be RED when...

Page 58: ...detection It is required to CONNECT ACC WIRE TO ENABLE MOTION DETECTION ACC Wire is sold separately Default Setting Depending on Preset Selection Settings Parking mode allows you to record from your...

Page 59: ...d NOT Triggered Triggered Triggered NOT Supported Light Hit from a Vehicle Triggered Triggered Triggered Triggered NOT Supported Someone Walking In Front of Your Vehicle NOT Triggered Triggered Trigge...

Page 60: ...fault Setting AUTO Connect RearCam to activate this option AUTO NightVision is activated when the environment brightness is lower than 60 illuminance and the exposure is lower than 400 Light Value for...

Page 61: ...Exposure level option Default Setting 0 Settings 7 2 1 Exposure VIDEO SETTINGS Main Menu 7 2 Video Settings 7 7 Settings EXPOSURE Exposure is the amount of light that reaches your camera s sensor Adju...

Page 62: ...nu 7 2 Video Settings 7 7 Settings REFRESH RATE To set Refresh Rate base on the requirement of your Country Region See Chapter 12 Troubleshoot to find your country s refresh rate FUNCTION DEFINITION F...

Page 63: ...o with audio recording OFF record video without audio Default Setting The default option is Automatically set based on user s location Settings 7 2 3 Audio Recording VIDEO SETTINGS Main Menu 7 2 Video...

Page 64: ...SS GPS LOCATION Latitude and Longitude coordinates SPEED Recorded in MPH or KPH depending on your settings Default Setting All settings are ON Settings 7 2 4 Stamp Display VIDEO SETTINGS Main Menu 7 2...

Page 65: ...E Rear Camera Display screen will be rotated 180 if user decides to mount the F201 on the vehicle s dashboard Default Setting STANDARD Connect RearCam to activate this option Settings 7 2 5 Rotate Rea...

Page 66: ...ttings 7 7 Settings EXPOSURE REAR CAM Exposure is the amount of light that reaches your camera s sensor Adjust the Exposure level in order to reach a better image quality for the F201 camera FUNCTION...

Page 67: ...ings 7 3 1 Date Time SYSTEM SETTINGS Main Menu 7 3 System Settings 7 7 Settings DATE TIME To set Date and Time setting for the camera using the camera s internal GPS FUNCTION DEFINITION FUNCTION OPTIO...

Page 68: ...No Assigned Feature Settings Press or key to find your time zone Default Setting Time zone selection will automatically popup during initial setup 7 3 1 Date Time 7 3 System Settings 7 7 Settings To s...

Page 69: ...rving daylight savings time OFF If your current location is observing standard time Default Setting Daylight savings selection will automatically popup during initial setup Settings 7 3 1 Date Time 7...

Page 70: ...m Settings 7 7 Settings To set Date and Time manually if ENABLE GPS DATE AND TIME CALIBRATION is not selected FUNCTION DEFINITION DATE FORMAT 7 3 1 4 Date Time SYSTEM SETTINGS Main Menu DATE TIME DATE...

Page 71: ...enu Move Right No Assigned Feature Settings ENGLISH ESPA OL Spanish Default Setting English Language selection will automatically popup during initial setup 7 3 2 Language SYSTEM SETTINGS Main Menu 7...

Page 72: ...y to confirm select option and press key to exit NO Cancel FORMAT TF CARD NOTE The estimated Available TF Card SD Card Recording Time Minutes info will be displayed at the bottom of the page 7 3 3 For...

Page 73: ...OK Move Left Previous Menu Move Right No Assigned Feature 7 3 4 Speed Unit Settings KM Kilometer MI Miles Default Setting MI 7 3 4 Speed Units SYSTEM SETTINGS Main Menu 7 3 System Settings 7 SPEED UN...

Page 74: ...MIN 5 MIN OFF Screen display ON all the time Default Setting 3 MIN Settings 7 3 5 Screen Saver SYSTEM SETTINGS Main Menu 7 3 System Settings 7 SCREEN SAVER To set a preferred Screen Saver time length...

Page 75: ...n OK Move Left Previous Menu Move Right No Assigned Feature Settings LOW MEDIUM HIGH OFF Default Setting MEDIUM 7 3 6 Device Sound SYSTEM SETTINGS Main Menu 7 3 System Settings 7 DEVICE SOUND To set t...

Page 76: ...ight No Assigned Feature MODEL NUMBER manufacturer name of device F701 FIRMWARE VER software installed on F701 F201 FIRMWARE VER software installed on F201 Settings 7 3 7 System Info SYSTEM SETTINGS M...

Page 77: ...ncel DEFAULT RESTORE NOTE system will reboot and restore itself back to the initial stage After reboot is completed user will see the initial startup and setup page see Chapter 4 1 2 Unit Test for det...

Page 78: ...is 4k dash cam has a built in GPS to seamlessly record your driving route driving speed and other information that can become important evidence in traffic incidents To watch the GPS videos simply con...

Page 79: ...8 GPS Video Playback Download APP from https www dvplayer net setup html and install onto your computer 8 2 Installing DVPlayer STEP 1 Support Both PC and Mac 8 GPS Video Playback...

Page 80: ...ayer Go to About 8 2 Installing DVPlayer STEP 2 STEP 3 Product registration Each Code can only register on 1 Mac and 1 PC once Click Enter Registration Code STEP 4 Enter your registration code and Ema...

Page 81: ...8 GPS Video Playback Go to File Open your Clip s 8 3 Video Playback STEP 1 STEP 3 VIDEO Open your SD Card folder STEP 4 Play your Clip s STEP 5 Open Folder CARDV 8 GPS Video Playback...

Page 82: ...eo Information Files File Name View Type Map of Travel GPS Video Playback Date MM DD YYYY Camera Name Time HH MM SS Latitude Longitude View Type Audio Recording Speed G Sensor Movement Rewind Speed Av...

Page 83: ...View Our F201 IR camera is interchangeable to record either the interior OR exterior of your vehicle Simply by changing the wiring and placement of the camera you can easily choose the view that would...

Page 84: ...cam It s important to keep the firmware on your dash cam up to date so it can operate to its full capacity and functionality The latest firmware version is always available at FAS Alliance official w...

Page 85: ...ct the TF Card SD Card on your PC or laptop and insert it back into dash cam s TF Card slot The dash cam will be turned on when power is supplied and the latest Firmware will automatically begin updat...

Page 86: ...before each firmware releases it is still impossible to catch them all We rely on user inputs to make sure that our dash cam runs as smoothly as possible We would also love to hear from you Please sen...

Page 87: ...mage Format JPG Audio Built in Microphone and Speaker GPS Built in USB Port USB Type C Data and Power Battery Lithium Working Temperature 15 C 65 C 5 F 149 F Storage Temperature 25 C 75 C 13 F 167 F C...

Page 88: ...ge Format JPG Audio Built in Microphone and Speaker GPS Built in Working Temperature 15 C 65 C 5 F 149 F Storage Temperature 25 C 75 C 13 F 167 F Compatible Operating System Windows IOS 9 Specificatio...

Page 89: ...act our customer service representative Recording Light Failed N A Ensure the original power cable is used This issue might be caused by the low voltage from the power supply No Responses When Pressin...

Page 90: ...50Hz Nicaragua 120V 60Hz Taiwan 110V 60Hz Belgium 230V 50Hz Estonia 230V 50Hz Kenya 240V 50Hz Niger 220V 50Hz Tanzania 230V 50Hz Belize 110 220V 60Hz Ethiopia 220V 50Hz Kazakhstan 220V 50Hz Nigeria 2...

Page 91: ...urchased If the store fails to resolve the issue s and if you believe your dash cam meets the criteria for a warranty exchange or refund please contact us by email at support fasalliance com This limi...

Page 92: ...rvicing is provided on the basis that the user has backed up all necessary files and data before requesting service Therefore FAS Alliance will NOT be responsible for the loss of any files or data You...

Page 93: ...Thank you for choosing FAS ALLIANCE...

Reviews: