background image

Extension.

Activate

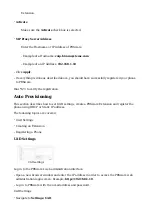
Make sure the Activate check box is selected.

SIP Proxy Server Address

Enter the Hostname or IP Address of PBXware.

- Example of a Hostname: voip.bicomsystems.com

- Example of an IP Address: 192.168.1.10

Click Apply.

If everything is done as described above, you should have successfully registered your phone

to PBXware.

Dial *123 to verify the registration.

Auto Provisioning

This section describes how to set UAD settings, create a PBXware Extension and register the
phone using DHCP or Static IP address.

The following topics are covered:

UAD Settings

Creating an Extension

Registering a Phone

UAD Settings

UAD settings

Log in to the PBXware's web administration interface.

Open a new browser window and enter the IP address in order to access the PBXware web

administration login screen. Example: http://192.168.1.10.

Log in to PBXware with the e-mail address and password.

UAD Settings

Navigate to Settings: UAD.

Summary of Contents for X4U

Page 1: ...Requirements 3 1 Identifying Phone Model 3 2 Phone Firmware 3 3 DHCP Server 3 4 PBXware Version 4 Installation 4 1 Power Adapter 4 2 Power over Ethernet PoE 4 3 Find the Phone s IP Address 4 4 Reset to factory settings 5 Registering Phone 5 1 Manual Configuration 5 2 Auto Provisioning 6 Configure BLF 6 1 Extension Settings 6 2 Phone Settings Introduction ...

Page 2: ...phone model to set up On the back of each Fanvil phone there is model information that you should check Although various phone models can have exactly the same requirements and installation procedures they can also have significantly different requirements and installation procedures so that is why it is important to know the model you own which results in you setting up the device successfully Ph...

Page 3: ...tes the current version of your PBXware Installation This section describes how to install and connect the phone to the electrical power and data network as well as how to apply factory settings The following topics are covered Power Adapter Power over Ethernet PoE Factory Settings Power Adapter Connect the Network and Power Connect the DC plug on the power adapter to the DC port on the phone and ...

Page 4: ...administration interface login screen Example http 192 168 1 22 Log in to the phone s web administration interface with the username and password Please note that factory default login details are as follows username is admin and password is admin Click the Configurations tab Click the Reset button in order to reset the phone to factory settings The phone will reset to the factory settings and reb...

Page 5: ...click the Edit icon corresponding to the Fanvil phone Make sure Status is set to Active Auto provisioning is set to No and DHCP is set to Yes Click Save Creating an Extension Creating Extension Add an Extension Navigate to Extensions Click Add Extension The standard options window will be shown below Select a Fanvil phone model from the UAD select box Select Location Local or Remote Local is for a...

Page 6: ...enter the phone s IP address in order to access the phone s web administration interface login screen Example http 192 168 1 22 Log in to the phone s web administration interface with the username and password Please note that factory default login details are as follows username is admin and password is admin Click Line in the left hand navigation menu Enter or set the following details into the ...

Page 7: ...gistration Auto Provisioning This section describes how to set UAD settings create a PBXware Extension and register the phone using DHCP or Static IP address The following topics are covered UAD Settings Creating an Extension Registering a Phone UAD Settings UAD settings Log in to the PBXware s web administration interface Open a new browser window and enter the IP address in order to access the P...

Page 8: ...il phone model from the UAD select box Select Location Local or Remote Local is for all Extensions registered on the LAN and Remote is for all Extensions registered from remote networks WAN Internet etc Click Next step Extension Values Enter values into the required field text boxes REQUIRED FIELDS Name Enter a name for the Extension being created Example John Smith E mail Enter the e mail address...

Page 9: ...rovision in the navigation tab Enter the Auto Provisioning username and password into the Authentication Name and Authentication Password fields Make sure the Download CommonConfig enabled check box is NOT selected Click Static Provisioning Server Choose what Protocol Type you intend to use HTTP or Trivial FTP NOTE Our recommendation is to use HTTP If you choose to use Protocol Type HTTP enter htt...

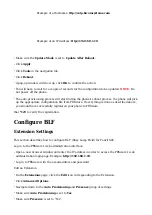
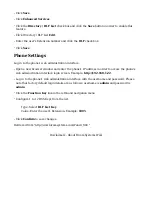
Page 10: ... is done as described above you should have successfully registered your phone to PBXware Dial 123 to verify the registration Configure BLF Extension Settings This section describes how to configure BLF Busy Lamp Field for Fanvil X4U Log in to the PBXware s web administration interface Open a new browser window and enter the IP address in order to access the PBXware s web administration login page...

Page 11: ...r to access the phone s web administration interface login screen Example http 192 168 1 22 Log in to the phone s web administration interface with the username and password Please note that factory default login details are as follows username is admin and password is admin Click the Function Key link in the left hand navigation menu Configure 1 to 12 DSS Keys from the list Type Select BLF List K...

Reviews: