12
9
How to Safely Dismount
and Turn Off the
External Hard drive
What do 'mounting' and 'dismounting' mean? When a device
such as a hard drive is mounted, that means the computer
‘sees’ the device and is able to communicate with it. When you
dismount a device, the computer no longer sees it. The device
may still be running but the computer cannot access it, as
though the device no longer exists.
Never turn off or unplug a hard drive without dismounting it first.
Doing so could cause data on the drive to be lost or damaged.
How to safely dismount and turn off the
drive with the computer running
Mac Users
Drag the icon for the External Hard drive to the Trash. The drive will
dismount and you can then safely turn if off. You may then unplug the
power cord and data cable if you want to disconnect the drive.
PC Users
1. Locate the System Tray. The System Tray includes the time
display in the bottom right, and icons to the left of the time. One
of the icons will be an hot plug icon ( ).
2. Left-click on ( ). You will receive the alert message “Safely
Remove..” followed by the drive description and drive letter for
the device.
3. Left-click on the appropriate device (with the drive letter
matching the one used by the External Hard drive). After a few
seconds, Windows will give you a message that it is safe to
remove the device.
Formatting Your Drive
The GreenDrive II comes preformatted at the factory with the NTFS
file system, which will mount on Windows computers as well as on
most modern operating systems for read-only access. If you are not
using Microsoft Windows primarily, we recommend you reformat the
volume to a file system format more compatible with your particular
computer and operating system environment.
Formatting a hard drive erases all data contained on it. Please
be sure to create a copy of the files you wish to keep to another
location before reformatting.
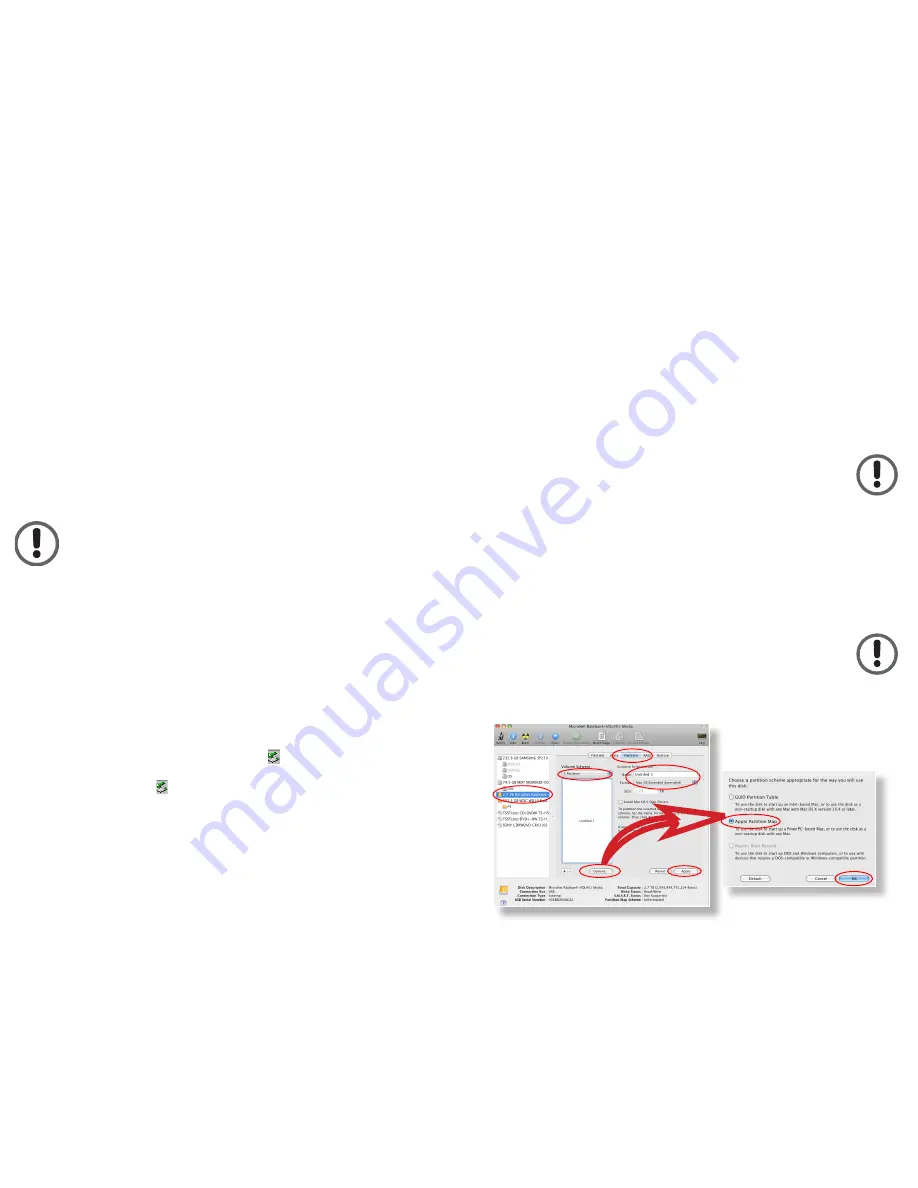
Formatting the drive in Mac OS X
1. Launch the “Disk Utility” application located under Applications/
Utilities folder.
2. Highlight your new drive and select the “Partition” tab
3. Select the new partition map type.
4. For each partition in the volume scheme, select the desired
file system format and volume name (optional)
The recommended file system is "MacOS Extended"
5. Click the “Options” button. Select “Apple Partition Map” in the
dialog box and click “OK”.
6. Click “Apply.” Your Fantom Drives GreenDrive II is ready to use!
2
3
3
4
6
5


