background image


 ENGLISH 


18 / 54


1080P 24FPS 

Choose this option to enable or disable 1080P 24HZ support. A TV set with 1080P 24HZ 

(24P) mode is needed. 


Screen Size 

Choose this option to change the display size. 

Seamless Playback 

Uninterrupted playback of video and audio files   

(the naming of the files should be alike “abc01.AVI” and “abc02.AVI”, etc) 


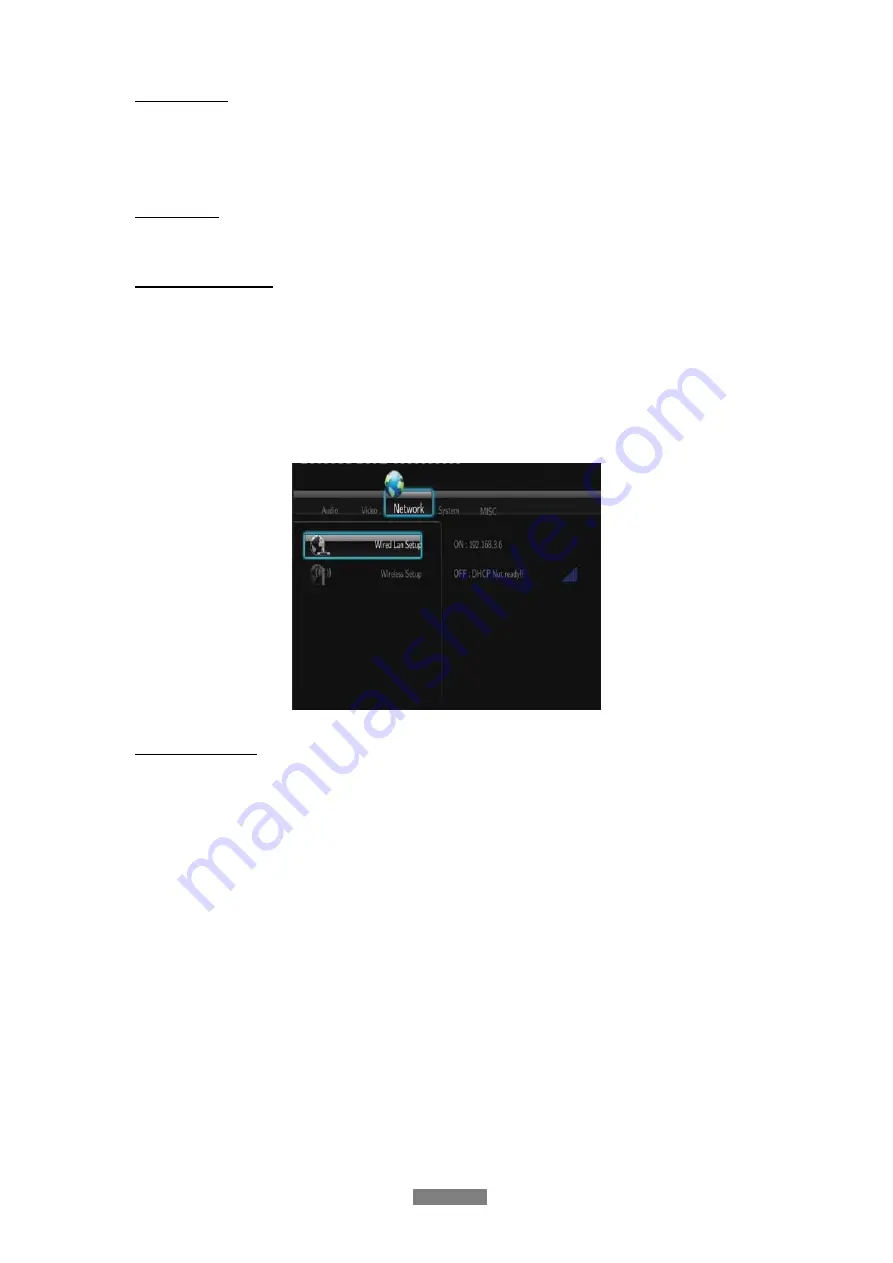
3.3 Changing Network Settings 

Use this menu to configure Ethernet and WLAN (Wireless Local Area Network) settings. 


Wired LAN Setup 

DHCP IP (AUTO) 

Select to obtain IP address automatically.   

FIX IP (MANUAL) 

Select to manually input the IP Address, Subnet Mask, Default Gateway, and DNS Server 

IP Address.   


Summary of Contents for XMP600 + WiFi

Page 1: ...ENGLISH ...

Page 2: ...4 Browser Menu 24 4 1 Browsing All 25 4 2 Browsing Music 25 4 3 Browsing Photos 26 4 4 Browsing Movies 26 4 5 DVD playback 27 4 6 A V Streaming via Network 28 4 7 A V Streaming via UPnP server 30 4 8 Renaming Deleting Files 31 4 9 Managing the Playlist 32 5 File Copy Menu 33 6 Media Library 33 6 1 Music Library 34 6 2 Photo Library 36 6 3 Movie Library 38 7 Internet Radio 41 8 Downloads 42 9 NAS F...

Page 3: ...TS downmix Photo format HD JPEG BMP GIF TIF PNG Photo slide show with background music Network Feature A V streaming transmission via Ethernet 10M 100M Wi Fi 802 11b g n optional File sharing via Samba server A V streaming via UPnP Media Server BitTorrent download Internet Radio Please visit www shoutcast com for available stations File Copy Supports copying moving files among Card USB HDD and Net...

Page 4: ... 1 3 2 Power The player s power voltage AC 100V 240V When using this player please connect the supplied AC adapter or AC adapter cable to the player s power jack When placing the adapter cable make sure it can not get damaged or be subject to pressure To reduce the risk of electric shock unplug the adapter first before cleaning it Never connect the adapter to the player in a humid or dusty area Do...

Page 5: ... suggested to do defragment after a long period of usage Regularly backup the data in the hard disk so that it can be recovered in the event of data corruption or loss Our company takes no responsibility for loss of data stored on the hard disk 1 3 7 Others When using this player please do not let the player come into contact with water or other liquid if water is accidentally spilled on the playe...

Page 6: ... picture and plug in the AC adaptor to the power outlet 1 4 2 Connecting to a PC 1 Make sure the player is powered on 2 Plug in the squarish connector of the USB cable to this player s USB DEVICE port 3 Plug in the rectangular connector of the USB cable to computer In this way you can manage content on the built in HDD of the player on your local PC ...

Page 7: ... this player In this way you can browse contents on the USB device 1 4 4 Connecting a Memory Card Memory card can be used by inserting to the card slot 1 Follow the picture to insert the memory card to the card slot properly 2 Insert the card by following the arrow pointer in the picture In this way you can browse contents on the memory card ...

Page 8: ...picture and plug in the 3 color connector to the TV s A V IN jack In this way you can enjoy the content in the player on TV or other display devices 1 4 5 2 SCART OUT 1 Follow the picture and plug one connector on the SCART cable to the player s SCART socket 2 Follow the picture and plug the other connector on the SCART cable to the TV s SCART socket ...

Page 9: ...method use the audio output from the A V OUT jack Second method use the audio output from the S PDIF Coaxial or Optical jack 1 4 5 3 HDMI OUT 1 Follow the picture and plug one connector on your HDMI cable to the player s HDMI jack 2 Follow the picture and plug the other connector on your HDMI cable to the TV s HDMI jack Note The HDMI cable is an optional accessory sold separately In this way you c...

Page 10: ...r or decoder Note Optical fiber cable is not supplied In this way you can enjoy powerful Dolby Digital DTS or MPEG sound Please refer to 3 1 Changing Audio Settings for configuration 1 4 7 Connecting to a LAN To connect to a LAN Local Area Network you require a cat5 cat5e or cat6 network cable not supplied 1 Connect one of the crystal plugs on the cable to the player s RJ45 LAN socket 2 Connect th...

Page 11: ...ower On After connecting the AC IN jack and press the power button on the front panel the player will soon enter the home screen and the Display will turn blue Power Off Press the power button on the front panel the player will soon enter standby mode and the power indicator will turn red Then unplug the power cord to cut off the power supply 1 6 Menu Language The system language of this player ca...

Page 12: ... accessed via Setup System HDD Format menu Step 1 Select OK on the Warning page press ENTER to confirm Step 2 Select Format press ENTER and then hard disk format will start The formatting procedure will be finished within a few minutes And then you can use the hard disk properly on the player Note HDD format will remove all data stored on the hard disk drive Please take care and backup your data i...

Page 13: ...OPY 20 SELECT 21 MUSIC 22 SETUP 23 INFO 24 NEXT 25 PREV 26 STOP 27 RETURN 28 GOTO 29 SUBTITLE 30 REPEAT 31 CM SKIP 32 INS REPLAY 33 ZOOM 34 CONFIRM 35 EJECT No Button Function 1 STANDBY Press to enter standby mode or wake up 2 MUTE Press to mute audio output and press again to resume 3 DVD Press to play the inserted disc 4 BROWSER Press to enter the browser menu 5 Numeric buttons Press to enter nu...

Page 14: ...8 AUDIO Press to select an audio track 19 COPY Press to enter the file copy menu 20 SELECT Press to select files in browser and file copy menu 21 MUSIC Press to start playing music in the music playlist 22 SETUP Press to enter the setup menu 23 INFO Press to hide or display the information bar during playback 24 NEXT Press to view the next file page down 25 PREV Press to view the previous file pag...

Page 15: ...REV STOP NEXT 2 DVD ROM tray 4 Display 6 USB Host port A Type 2 3 Rear Panel 1 Y Pb Pr OUT jack 2 A V OUT jack 3 HDMI jack 4 RJ45 LAN socket 5 S PDIF COAXIAL jack 6 S PDIF OPTICAL jack 7 USB HOST port A Type x 2 8 USB DEVICE port B Type 9 Scart out 10 DC IN jack 11 Power Switch 2 4 Side Panel 1 HDD mobile rack ...

Page 16: ...ng Audio Video Network System and MISC Use the UP DOWN navigational buttons to select a menu Press ENTER to confirm Press RETURN to cancel and display the previous menu screen 3 1 Changing Audio Settings Use this menu to configure audio settings Night Mode Choose between Off On Comfort If the option is turned on the audio output volume will be decreased to make you more comfortable Digital Output ...

Page 17: ...f 4 3 screen Select when a standard 4 3 TV is connected 16 9 Compress the image to convert the whole image Select when a 16 9 TV is connected Zoom Out Turned on the player will auto zoom out the video resolution to fix the TV screen Brightness Adjust the level of brightness Contrast Adjust the level of contrast Hue Adjust the level of hue Saturation Adjust the level of saturation Video System Sele...

Page 18: ...Uninterrupted playback of video and audio files the naming of the files should be alike abc01 AVI and abc02 AVI etc 3 3 Changing Network Settings Use this menu to configure Ethernet and WLAN Wireless Local Area Network settings Wired LAN Setup DHCP IP AUTO Select to obtain IP address automatically FIX IP MANUAL Select to manually input the IP Address Subnet Mask Default Gateway and DNS Server IP A...

Page 19: ...ncel and press PLAY to connect Get Connection Mode Choose between Infrastructure AP and Peer to Peer Ad Hoc Press ENTER to go to next step and press RETURN to cancel Infrastructure AP Infrastructure mode is used to connect computers with wireless network adapters also known as wireless clients to an existing wired network with the help from wireless router or access point ...

Page 20: ...Access means the network is encrypted i e an encryption key is needed to access the network NONE means it is an open system network Input WEP WPA Key Encryption keys can be inputted via the virtual keyboard Press the navigational buttons to select ENTER to input CAPS to switch between uppercase and lowercase to delete a character to insert a space shift to make more symbols available and OK to con...

Page 21: ...e screen Peer to Peer Ad Hoc Peer to Peer mode which is also called Ad Hoc mode or computer to computer mode is used to connect wireless clients directly together without the need for a wireless router or access point Ad Hoc Setup Press ENTER to go to next step press RETURN to cancel and press PLAY to connect Host Name Choose the network name of the player BitTorrent and SAMBA Turn on off BitTorre...

Page 22: ... download NAS and Web server Select system upgrade to update the firmware via a USB stick 1 Copy install img to the root directory of a USB stick and connect it to the USB HOST port of the player 2 Press ENTER to confirm Time Select to set the system time Parental Control Select to set the TV parental control options A password will be needed for the modification The password one is 0000 Press the...

Page 23: ...information firmware version HDD info Mac address etc Restore Default Select to restore factory defaults 3 5 Miscellaneous Use this menu to adjust miscellaneous settings Resume Play Select to turn on off resume playback auto bookmarking feature for movies Slide Show Timing Select to set the interval time for photo slide show Transition Effect Select to set the transition effect for photo slide sho...

Page 24: ...Local HDD Network DVD UPnP server and Playlist To enter the menu select the Browser icon on the home screen or press the BROWSER button on the remote control The following buttons can be used while navigating the browser menu Button Function UP DOWN Move cursor up down to select devices folders or files LEFT RIGHT Select filter options All Music Photos and Movies PREV NEXT Go to previous next page...

Page 25: ...ll filter please switch to the Music filter instead 4 2 Browsing Music In this mode all folders and supported audio files in current directory will be displayed The following buttons can be used to control music playback Button Function PLAY Begin playback PAUSE STEP Pause playback FR FF Fast rewind or fast forward Press repeatedly to select the speed REPEAT Set repeat options One All and Shuffle ...

Page 26: ...ground music When it is enabled the slide show starts automatically once you press PLAY button Please refer to Slide Show Timing Transition Effect and Background Music in chapter 3 5 Miscellaneous for more details 4 4 Browsing Movies In this mode all folders and supported video files in current directory will be displayed The following buttons can be used to control video playback Button Function ...

Page 27: ...ck The DVD ROM drive supports DVD Mini BD AVCHD VCD and Audio CD The following buttons can be used to control DVD playback Button Function PLAY PAUSE Pause and resume the playback FR FF Fast rewind or fast forward Press repeatedly to select the speed PREV NEXT Press to move to the previous next chapter GOTO Display playback search menu LEFT RIGHT Display the time information bar then use the left ...

Page 28: ...group which your PC belongs to from the workgroup list find your PC name and press the ENTER button to confirm Then you can select and play the shared media files that you want to browse Note While browsing high definition video files resolution up to 720p 1080i 1080p via Ethernet or WLAN the video might be buffering or stagnate This is normal due to the limit of network speed or signal strength I...

Page 29: ...Add to open a popup menu where you can input Net User ID Username Net Password Domain Host Name and Specific File Server IP of destination PC Select OK to confirm Cancel to cancel and Simple Detail to switch between simple and advanced options Select the shortcut you added and press the ENTER button to confirm Then you can select and play the shared media files on the destination computer ...

Page 30: ...dia Center Linux Mac Windows MediaTomb Linux etc Please install one of them on you computer In the following chapters we will take Windows Media Player 11 on Microsoft Windows XP SP2 for an example 4 7 2 Sharing Media on your PC The Media Sharing feature of Windows Media Player 11 lets you enjoy the contents of your Windows Media Player library from anywhere in your home Open Windows Media Player ...

Page 31: ...omputer are on the same local area network and subnet Firewalls may prevent your player to communicating with your computer Please open the ports manually and add your player to the trusted list or disable the firewall temporarily 4 8 Renaming Deleting Files When navigating in the browser menu you can press the MENU button to activate a popup menu where you can rename and delete files or folders P...

Page 32: ... will be marked Press the CONFIRM button to confirm and then an on screen message Add selects to list will be shown Multiple selections are allowed See photo below 4 9 2 Browsing the playlist Press the UP DOWN buttons to select Play List in the browser menu Press the LEFT RIGHT buttons to select between All Music Photos and Movies And press the ENTER button to confirm Then you will enter the playl...

Page 33: ...he selected items will be ticked STOP Cancel all selections ENTER Confirm the selected options Please refer to the following operations to copy move folders files between devices Step 1 Select the source device and destination device Step 2 Select the source files you want to copy Step 3 Select the destination folder to store the above files Step 4 Select Copy or Move to proceed 6 Media Library Th...

Page 34: ...ter button to confirm Update Select to update and synchronize all the music stored on the internal HDD to the library Search Select to search for music files by their names Use the navigational buttons to select and press the enter button to confirm Select OK and press the enter button and then the files you desired will be displayed on the screen All Select to list all the music files in the libr...

Page 35: ...tist and press the enter button to confirm Genre Select to list all the music files by genre Press the up down button to select the genre and press the enter button to confirm Album Select to list all the music files by album Press the up down button to select the album and press the enter button to confirm ...

Page 36: ...button to confirm The music files with the specific characters will be displayed Press the left button to delete characters and press the return button to close the Quick Search bar Finally press the enter button to start playback 6 2 Photo Library Use the left right button on the remote control to select the Photos tab Press the up down button to select from Update Search All and Date And press t...

Page 37: ...names Use the navigational buttons to select and press the enter button to confirm Select OK and press the enter button and then the files you desired will be displayed on the screen All Select to list all the photos in the library Date Select to list all the photos by date Press the up down button to select the date and press the enter button to confirm ...

Page 38: ...acters will be displayed Press the left button to delete characters and press the return button to close the Quick Search bar Finally press the enter button to start playback 6 3 Movie Library Use the left right button on the remote control to select the Movies tab Press the up down button to select from Update Search All Actor Genre and Year And press the enter button to confirm Update Select to ...

Page 39: ...utton and then the files you desired will be displayed on the screen All Select to list all the movies in the library Actor Select to list all the movies by actor Press the up down button to select the actor and press the enter button to confirm Genre Select to list all the movies by genre Press the up down button to select the genre and press the enter button to confirm ...

Page 40: ...ress the enter button to confirm The movie files with the specific characters will be displayed Press the left button to delete characters and press the return button to close the Quick Search bar Finally press the enter button to start playback Note In order to use the search function more efficiently you are encouraged to use the following rules to name the movies stored on the internal HDD Synt...

Page 41: ...er to the website www shoutcast com The following buttons can be used under this menu Button Function UP DOWN Move cursor up down to select station channel and genre PREV NEXT Page up down ENTER Confirm and enter the selected menu MENU Add delete a station to from Favorite while it is highlighted PLAY Begin playback after a channel has been selected STOP Stop playback RETURN Return to the previous...

Page 42: ...r into download menu and BT setup menu Add a new torrent Locate your torrent file in Browser menu then press MENU button to add the torrent to start downloading Download Menu After add the BT torrent files the download progress can be displayed in this menu The following buttons can be used under this menu Button Function UP DOWN Move cursor up down MENU press to adjust the priority of the downloa...

Page 43: ...n the BT Setup menu you can configure the following settings Use UP DOWN and ENTER to change the settings Set the maximum download rate Set the maximum upload rate Set the idle hours to start the next download automatically Set the seeding hours Set to delete the finished torrent files automatically or not Set the maximum number of simultaneous download tasks ...

Page 44: ...ore details and then type IP Address in the Run window click Run in the start menu or the address bar of Internet Explorer on your PC For example if the IP address of the player is 192 168 0 9 please type 192 168 0 9 and click OK or press the Enter button on the keyboard Under windows vista and windows 7 please type 192 168 0 9 on search bar then press the Enter button on the keyboard Then you can...

Page 45: ...se contact our customer service or visit our company website to obtain the relevant information 11 Upgrading the Firmware The firmware is the operating system OS installed on the device Firmware upgrades can bring new features improvements and bug fixes Please refer to System Update in chapter 3 4 Changing System Settings for more details You can also use the following method to upgrade the firmwa...

Page 46: ...OB ISO IFO DAT WMV ASF RM RMVB FLV DVD MENU Playback H 264 z MP3 OGG WMA WAV AAC FLAC DOLBY DIGITAL DTS DTS Downmix z HD JPEG JPG BMP GIF TIF PNG VIDEO CODECS SURPORTED z MPEG 1 z HD MPEG 2 z HD MPEG 4 SP ASP AVC H 264 z WMV9 VC 1 z RealNetworks RM RMVB 8 9 10 up to 720p AUDIO CODECS SURPORTED z MP2 3 OGG Vorbis WMA DRM and Advanced Profile not supported PCM LPCM MS ADPCM LC AAC HE AAC COOK RA Los...

Page 47: ...gmenting the player hard disk may be useful after having transferred many files to and from the player It is never harmful to use the defragment on the player Make sure no other programs are running while using the Windows defragment utility Make sure you have connected the player with the external power adapter during this procedure Question 4 My files have disappeared from the player Answer Make...

Page 48: ...orton Internet Security McAfee Personal Firewall Zone Alarm etc or even the built in firewall of Windows XP Don t forget that Service Pack 2 for Windows XP automatically upgrades your firewall and turn it on by default If you have a firewall it may need to be configured or have exceptions created to allow you to see and communicate with the player on the network To test if your firewall is prevent...

Page 49: ...on 12 5 GPL Statement This product contains free software which is licensed under the GNU General Public License After you purchase this product you may procure modify or distribute the source code of the GPL LGPL software that is used in this product To obtain a copy of our open source software please contact our support center and we will provide you with a CD ROM of the source code that is used...

Page 50: ...the software or use pieces of it in new free programs and that you know you can do these things To protect your rights we need to make restrictions that forbid anyone to deny you these rights or to ask you to surrender the rights These restrictions translate to certain responsibilities for you if you distribute copies of the software or if you modify it For example if you distribute copies of such...

Page 51: ...right notice and disclaimer of warranty keep intact all the notices that refer to this License and to the absence of any warranty and give any other recipients of the Program a copy of this License along with the Program You may charge a fee for the physical act of transferring a copy and you may at your option offer warranty protection in exchange for a fee 2 You may modify your copy or copies of...

Page 52: ...valid for at least three years to give any third party for a charge no more than your cost of physically performing source distribution a complete machine readable copy of the corresponding source code to be distributed under the terms of Sections 1 and 2 above on a medium customarily used for software interchange or c Accompany it with the information you received as to the offer to distribute co...

Page 53: ...cannot distribute so as to satisfy simultaneously your obligations under this License and any other pertinent obligations then as a consequence you may not distribute the Program at all For example if a patent license would not permit royalty free redistribution of the Program by all those who receive copies directly or indirectly through you then the only way you could satisfy both it and this Li...

Page 54: ...o goals of preserving the free status of all derivatives of our free software and of promoting the sharing and reuse of software generally NO WARRANTY 11 BECAUSE THE PROGRAM IS LICENSED FREE OF CHARGE THERE IS NO WARRANTY FOR THE PROGRAM TO THE EXTENT PERMITTED BY APPLICABLE LAW EXCEPT WHEN OTHERWISE STATED IN WRITING THE COPYRIGHT HOLDERS AND OR OTHER PARTIES PROVIDE THE PROGRAM AS IS WITHOUT WAR...

Reviews: