


Milan-Touch
Structure of the ESF application
5
The ESF application is build up in three layers:
Section-screens
Animal-lists
Animal-cards / FaroTek-cards
You can elect the “section-screen” of a specific section by different ways as described below:
1.
Read the “location-transponder” of the wanted location by pressing the RFID-Button
and hold the
Transponder reader close to location-
transponder of this section. (how to create a “location-transponder” see
appendix 1)
2.
Click the button “section list…” at the ESF main menu and choose the wanted section.
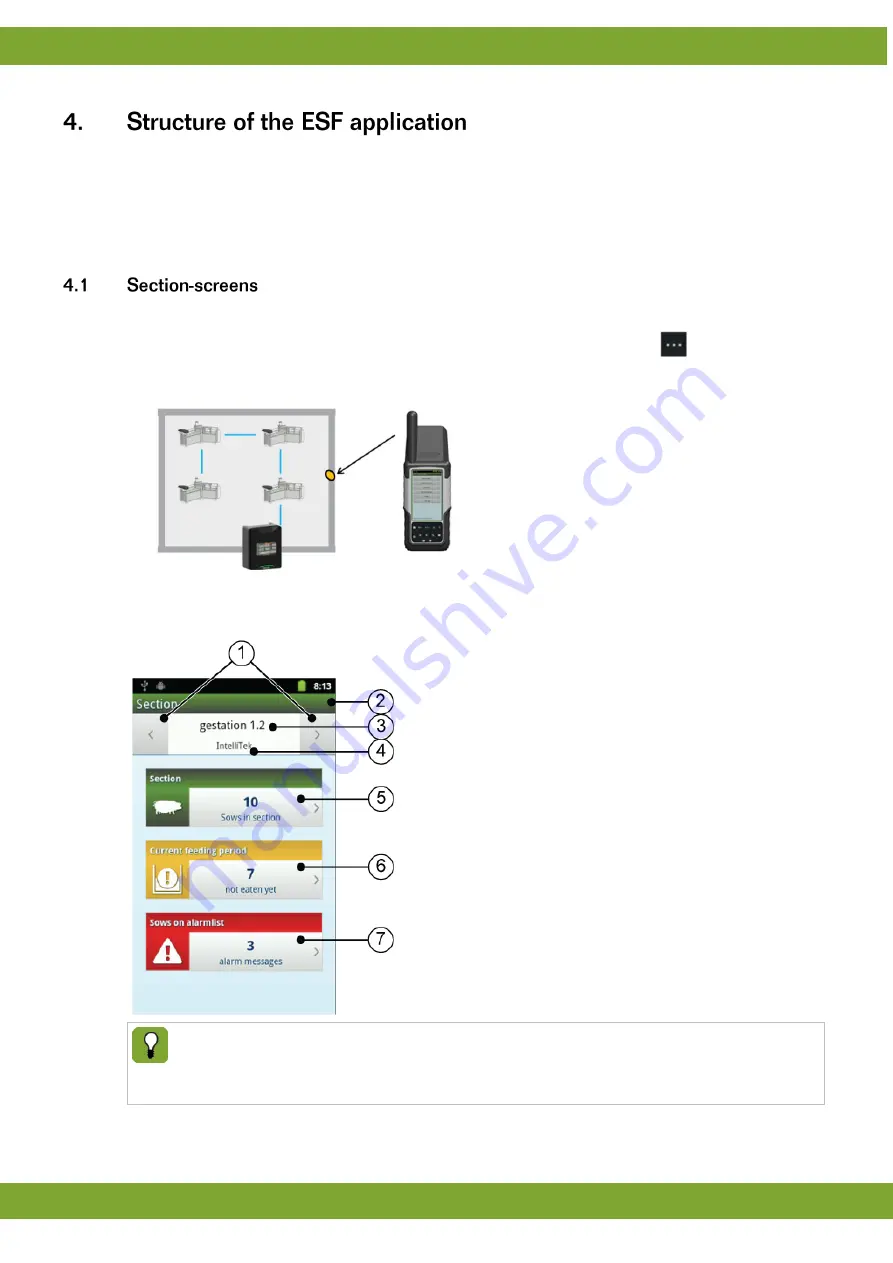
After electing a section-screen, following screen appears:
1.
Navigation-buttons
: move to former/next section
2.
Headline
(turns color to red if data’s were
changed that are not synchronized with the
TouchTek server)
3.
Location
of the section <barn-area> <barn-no.> .
<section-no.)
4.
Feeding system
of the section
5.
All Animal-list
: How many sows are located at
this section.
6.
Not eaten-list
: How many sows at this section
haven’t eaten during the current feeding period
7.
Alarm-list
: How many sows at this section are on
the alarm-list.
These buttons are similar to the Buttons you can see at the screen of the TouchTek Box of this section.
If the numbers of sows shown at the MILAN-Touch are different from the numbers shown at the
TouchTek Box you might synchronize the MILAN-Touch with the TouchTek Server to get the latest
data’s. The TouchTek Box is always up to date.
By pressing one of these buttons the corresponding animal-list will be shown.
Summary of Contents for Milan-Touch
Page 1: ...g...


