FAULT FINDER:
• Always check the “Trouble Shooting Checklist” included in this booklet before seeking warranty claim.
• Mechanical noise may be noticed on installation. Allow at least 8 hours settling-in period.
• Some fans may wobble more than others, even if identical. This does not necessarily indicate a fault.
PREPARATION:
1. Unpack your ceiling fan carefully, then remove all parts and components, and lay on a cloth or soft surface
to avoid damage. DO NOT lay the motor housing on its side, the housing may get damaged.
2. Before commencing installation, check that all parts are included.
NB: You may need to remove all foam packaging material to ensure there are no missing components.
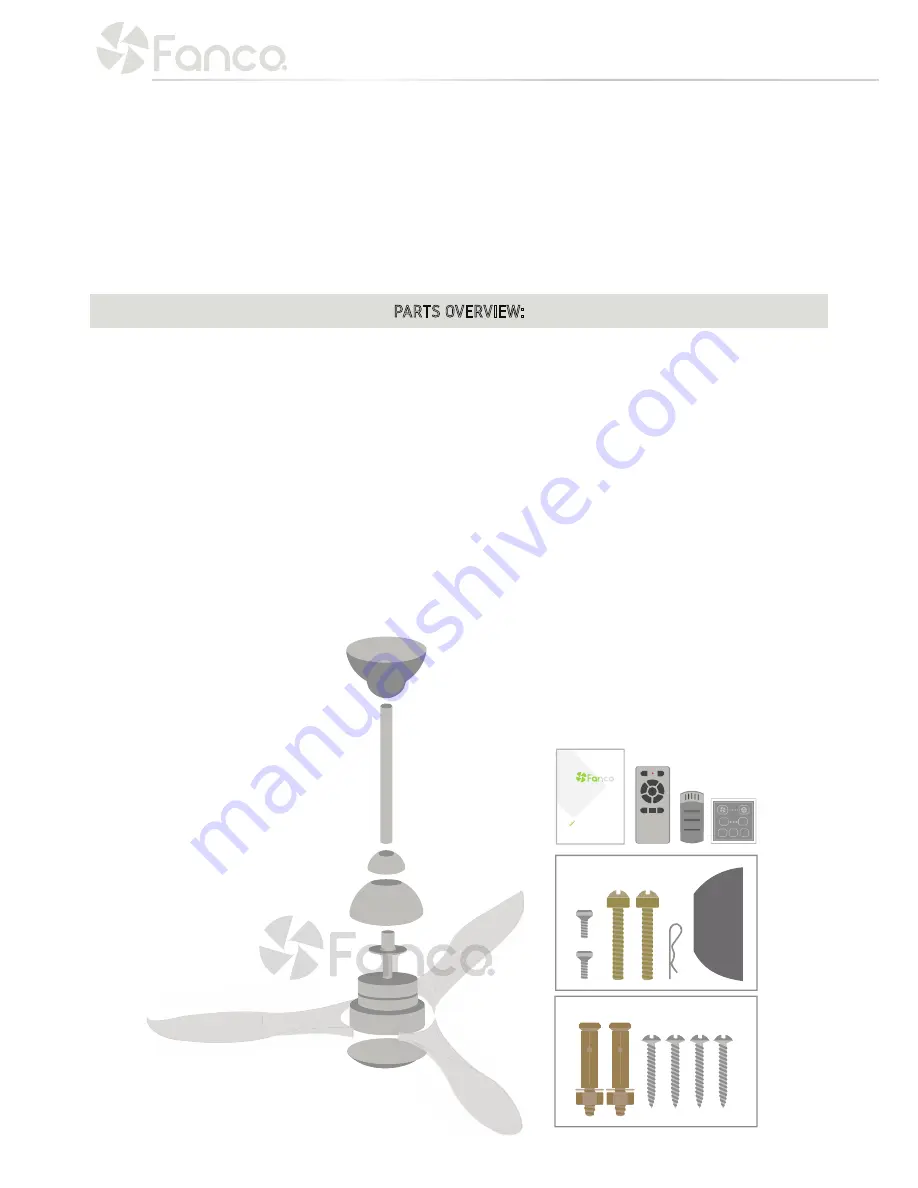
1. 1 x Installation and Warranty manual
2. 1 x Finished Motor
3. 1 x Mounting Bracket
4. 1 x Motor Housing cover
5. 3 x Blades
6. 1 x Downrod Screws and Rod Package; 2 small screws, ball-pin and Cross-pin, Cotter Pin, Canopy Drop Ball
7. 1 x Screws Package for Hanger Bracket
8. 1 x 12.5cm Downrod
9. 1 x 25cm Downrod
10. 1 x Balancing Kit
11. 1 x Canopy cover
12. 1 x Small Cover for top of motor housing cover (York)
13. 1 x Bottom Plate
14. 1 x Remote Transmitter and Receiver Kit
OR 1 x Wall control Transmitter and Receiver Kit (Depending on model)
PARTS OVERVIEW:
HANGER BRACKET SCREWS PACKAGE
CEILING FAN
INSTALLA
TI
ON MANUA
L
FANCO
H
ORIZO
N D
C
Summary of Contents for CFFCHZ3BRR
Page 16: ...WWW FANCO COM AU...


