Fanaway Corbelle Installation Instructions
5 |
P a g e V E I L
V e r s i o n 1 . 0 0 4 / 2 0 2 1
INSTALLING THE FAN
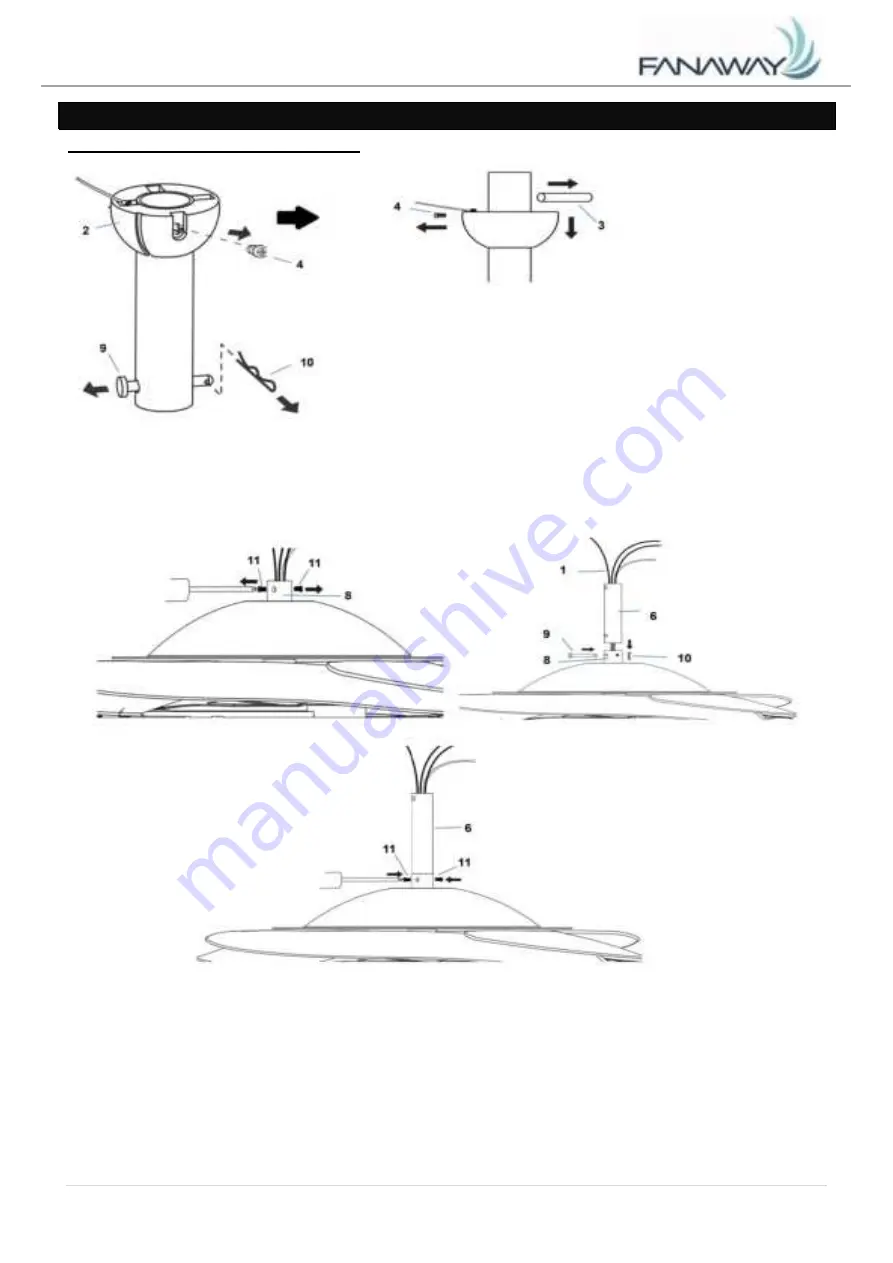
INSTALLING THE DOWN ROD (Fig. 6)
1. Remove the ball joint (2) and dowel pin (3) by loosening the set screws (4) from the down rod (6). Remove
the hitch pin (9) by removing the lock clip (10).
NOTE: Do not discard keep these parts, they are required
to reassemble later. (Fig. 6.1)
Fig. 6.1
2. Loosen the set screws (11) on the down rod coupling housing (8). (Fig. 6.2)
3. Carefully feed the fan wires (1) up through the down rod (6). (Fig. 6.3)
4. Assemble the down rod (6) into the down rod coupling housing (8), by inserting and line up the down rod
coupling housing holes with the down rod holes and insert the hitch pin (9) and secure with the lock clip (10).
(Fig. 6.3)
5. Secure the down rod (6) by tightening the set screws (11). (Fig. 6.4)
5. Secure the down rod (6) by tightening the set screws (11). (Fig. 4.4)
Fig. 6.2
Fig. 6.3
Fig. 6.4


