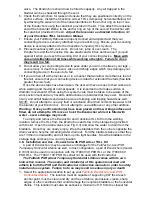
hazard and must have a pitch or grade of no more than 10°. The horizontal lifeline
should run parallel to the prevailing fall hazard(s). (Note: Do not select an area
where water accumulates).
2.
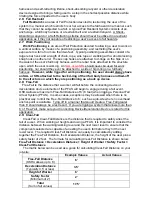
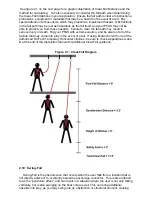
Use Appendix B of this manual to ensure that there is enough Clear Fall Distance to
safely use this system. Also be sure to check the fall path for obstructions or objects
that may cause injury to the user or may damage the system in the event of a fall. If
you are not sure that you have enough Clear Fall Distance or have concerns about
objects in the fall path – stop immediately and seek the guidance of a competent
person or contact FallTech for Technical Support.
3.
Carefully inspect the
EcoAnchors
to ensure that they are undamaged and in
serviceable condition (see Section 8 of this manual for complete inspection details.
4.
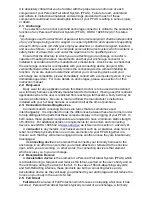
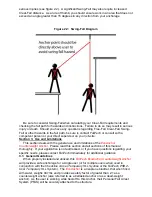
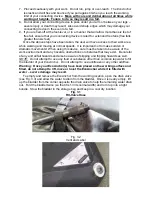
Spread the
EcoAnchor
bladders out flat, maximizing surface contact. They should
be spaced apart so that the distance between the anchor rings is equal to the
working span of the PSR horizontal lifeline. Ensure they are positioned as indicated
on the labels with the vents at the highest corner and with the drains at the lowest
point (see Fig. 3.2). The vents allow air to escape and prevents over-pressurizing.
Incorrect positioning can result in trapped air and under-filling, making the
anchor unsafe
.
5.
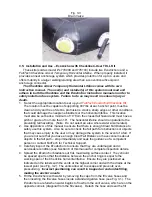
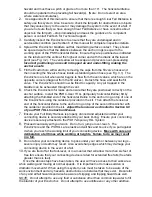
Fill the
EcoAnchors
with water by removing the caps from the fill valve hoses and
then inserting the fill-valve hoses
inside
a standard garden hose (see Fig. 3.1). The
EcoAnchors
are full when water begins to flow from the vent valves, which are on the
opposite corners (diagonal from the fill valves). Detach the hose and seal the fill
valve. The
EcoAnchors
should now be filled to capacity. Any air trapped in the
bladder can be exhausted through the vent.
6.
Check the
EcoAnchors
for leaks and ensure that they are positioned correctly on the
anchor surface. Install the PSR 4-User THLL (temporary horizontal lifeline) Kit by
attaching the thimbled end of the horizontal lifeline to the anchor ring on top of one of
the EcoAnchors using the carabiner provided in the kit. Then attach the tensioner
end of the horizontal lifeline to the anchor ring on top of the second EcoAnchor with
the carabiner provided in the kit.
Adjust the tensioner as directed in Section 6.0
of your PSR THLL Instruction Manual.
7.
Ensure your Full Body Harness is properly donned and adjusted and that your
connecting device is securely attached to your back D-ring. Ensure your connecting
device is securely attached to the
PSR Temporary HLL System.
8.
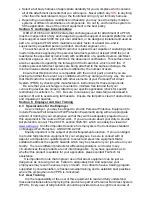
Proceed cautiously with your work. Do not run, jump or over-reach. The
EcoAnchors
and the
PSR HLL
are elastic and will flex and bounce if you pull against
it when you reach the working limit of your connecting device.
Move with care and
deliberation at all times while working at heights. Failure to do so may result
in a fall.
9.
Do not allow your connecting device to pass under your arm or between your legs –
severe injury or death may result. Also avoid sharp edges which may damage your
connecting device in the event of a fall.
10.
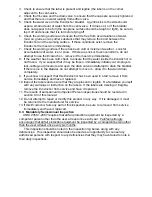
If you are tied-off at the foot-level, or in a manner that will allow more than six feet of
free fall, ensure that your connecting device is rated for extended free falls (free falls
greater than six feet).
Once the above steps have been taken, the user will have access to their work area
while walking and moving at normal speeds. It is important not to make sudden or
dramatic movements! When using this system, care must be taken to be aware of the
work environment and any hazards, obstructions or obstacles that may exist. Be careful
of any and all fall hazards and also be aware of slipping and tripping hazards as well.
NOTE: Do not attempt to use any fluid or substance other than common tap water to fill
the bladder of your EcoAnchor. Do not attempt to use antifreeze or any other additive.

