


27
Australia
Do not use the door handles or control knobs to
manoeuvre the cooker. Use the hotplate and griddle
bowl areas.
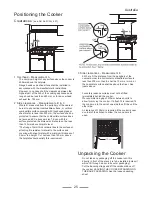
Levelling
You are recommended to use a spirit level on a shelf in
one of the ovens to check for level.
Place the cooker in its intended position taking care not
to twist it within the gap between the kitchen units as
damage may occur to the cooker or the units.
The front feet and rear rollers can be adjusted to level
the cooker. To adjust the height of the rear of the
cooker use the levelling tool supplied to turn the
adjusting nuts at the front bottom corners of the cooker.
To set the front feet turn the bases to raise or lower.
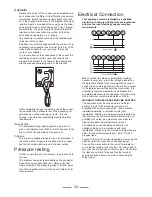
Fitting the stability bracket
A stability bracket and chain should be fitted when the
cooker is connected to a flexible gas supply.
When fitting a stability bracket read these instructions
together with the leaflet supplied with the bracket.
1. Place the cooker in its intended position and level
the cooker.
2. Draw a pencil line 100mm from the front edge of the
levelling feet.
3. Mark the centre line for the bracket by measuring
450mm from the left hand side of the cooker.
4. Lower the front roller and move the cooker forward.
5. Measure back from the pencil line 550mm to locate
the front edge of the bracket. Fix the bracket to the
floor.
6. Measure the height from floor level to engagement
edge in back of cooker. Add 3mm to this dimension
and assemble the stability bracket to this height. (i.e.
from floor level to underside of the top member) and
ensure the bracket does not foul the oven burner
assembly.
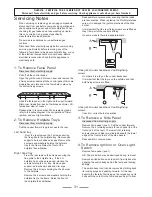
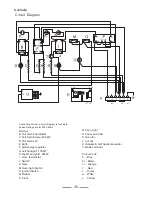
Gas Connection
The Gas supply needs to terminate with a down facing
connection. The rear cover boxes limit the position of
the supply point.
view from the rear
A
position for gas supply connector
B
appliance gas inlet


