8
The Ovens
The clock must be set to the time of day before the right-
hand oven will work. See the following section on ‘
The
Clock
’ for instructions on setting the time of day.
References to ‘left-hand’ and ‘right-hand’ ovens apply as viewed
from the front of the appliance.
The left-hand oven is a conventional oven, while the right-
hand oven is a fan oven.
The Conventional Oven
A conventional oven has two heating elements – one visible
in the top of the oven and the other under the oven base.
Note:
Be careful to avoid touching the top element and
element deflector when placing or removing items from the
oven.
The exposed top element may cook some foods too quickly,
so we recommend that the food be positioned in the lower
half of the oven to cook. The oven temperature may also need
to be lowered.
Similar items being cooked will need to be swapped around
for even cooking.
The Fan Oven
The right-hand oven is a fan oven that circulates hot air
continuously, which means faster, more even cooking.
The recommended cooking temperatures for a fan oven are
generally lower than a conventional oven.
Note:
Please remember that all cookers vary so temperatures
in your new ovens may differ to those in your previous
cooker.
Operating the Ovens
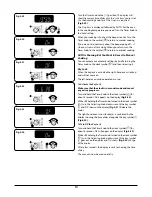
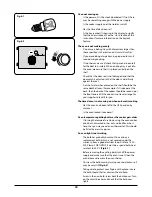
Turn the oven knob to the desired temperature
(Fig.2-19)
.
The oven indicator light will glow until the oven has reached
the temperature selected. It will then cycle on and off during
cooking
(Fig.2-20)
.
The Browning Element
The Browning Element is positioned in the top of the left-
hand oven. It can be used at the end of a normal cooking
period to give extra browning to au gratin dishes or give a
crisper finish to meat.
After the normal cooking is finished turn the left-hand
oven thermostat knob clockwise to the browning position,
indicated by (
) on the fascia panel.
Only the Browning Element will operate when the thermostat
is turned to this position. The top and base cooking elements
will switch off automatically.
Fascia Illumination
To turn on the fascia illumination panel simply push the
button in
(Fig.2-21)
. To turn this feature off, push the button
once more.
Fig.2-20
220
180
140
100
Fig.2-19
Fig.2-21
Summary of Contents for Hi-LITE 110
Page 1: ...Hi LITE 110 Dual Fuel USER GUIDE INSTALLATION INSTRUCTIONS ...
Page 4: ...ii ...
Page 36: ...32 Notes ...
Page 37: ...33 Notes ...
Page 38: ...34 Notes ...


