INSTALLING YOUR DUAL ZONE WINE STORAGE UNIT
2
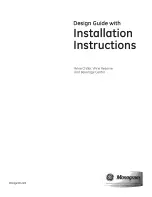
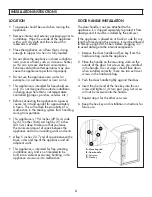
Figure 1
Select Location
The proper location will ensure peak performance of your
appliance. Choose a location where the unit will be out of
direct sunlight and away from heat sources. Best perfor-
mance will be maintained when installed within the follow-
ing parameters:
Ideal Ambient Temperature Range
Built-In
18-22
°
C
Free-Standing
18-32
°
C
Cabinet Clearance
Ventilation is required from the bottom front section of the
unit. Keep this area open and clear of any obstructions.
Adjacent cabinets and countertop can be installed on top,
back and sides of the unit as long as the grille and door
access remain unobstructed.
Leveling Legs
Adjustable legs at the front corners of the unit should be set
so the unit is firmly positioned on the floor and the front is
raised just enough so the door closes easily when opened
about halfway.
Turn leveling legs clockwise to raise unit, counterclockwise
to lower it.
Green/Yellow
(Earth)
Fuse (13A.)
Blue (Neutral)
Brown (Live)
Electrical Connection
Use nominal 230 VAC, 50 Hz only. DO NOT USE AN
EXTENSION CORD.
WARNING! THIS APPLIANCE MUST BE EARTHED. All
external wiring must comply with the IEE Regulations for
the Electrical Equipment of Buildings. Connections to the
electrical supply can be made with either a plug and socket
or be permanently wired via a double-pole switch.
The appliance is supplied with a 250VAC PVC (85 degrees
C) core cable (0.5mm=x2.5 metres long). Any replace-
ment cable fitted must follow this specification. The unit
may be supplied with either a moulded or rewirable plug.
Should the plug not fit the socket at the installation site, it
should be removed and replaced with the correct type of
plug.
If a moulded plug is fitted which is not suitable, it must be
removed and disposed of. To avoid the risk of electrocu-
tion, a plug must not be left where a child may plug it into
a supply socket. It must not be used for any other appli-
ance. A three pin plug to BS 1363 with a capacity of not
less than 13A must be used and fitted with a 13A fuse
“ASTA” approved to BS 1363.
If you replace the fuse, the cover must be refitted. If the
cover is lost, the plug must not be used until a replacement
has been obtained from your supplier. The color of the
fuse cover is that of the insert in the base of the fuse recess
or elsewhere on the plug. Always state this color when
ordering a replacement cover.
If your appliance has a moulded plug, you do NOT have
to do the following assembly as shown in Figure 1. Appli-
ances with moulded plugs are ready to use as is.
IMPORTANT: The wires should be connected to the ter-
minals of the plug as follows:
Earth to the terminal marked E or coloured Green or
•
Green/Yellow.
Neutral to the terminal marked N or coloured Black or
•
Brown.
Live to the terminal marked L or coloured Red or
•
Brown.
When wiring the plug, ensure that all strands of wire are re-
tained in each terminal. The flexible main cable, plug and
socket must not be exposed to flue products or be allowed
to come in contact with a hot surface. The cable must not
be trapped or pulled taut when the appliance is pushed into
position.
THIS UNIT SHOULD NOT, UNDER ANY CIRCUMSTANCES,
BE USED WITHOUT ADEQUATE EARTHING.
Summary of Contents for FDZ60
Page 10: ...NOTES...
Page 11: ...NOTES...