


27
Australia
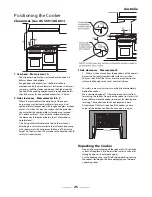
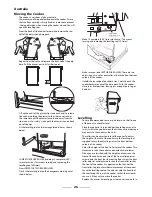
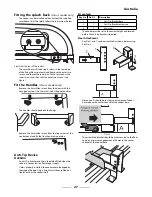
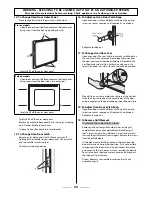
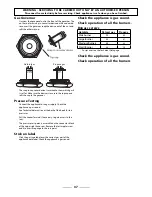
Fitting the splash back
(Classic model only)
The cooker can be installed with or without the supplied
splashback. To fi t the splash follow the instructions below.
view from the rear of the cooker
The splash back is fi tted using 4 screws in the rear edge
of the fl ue grille, two at each end. Remove the outer two
screws and loosen the inner pair. Fit the splash over the
inner screws and then refi t the outer two screws. (see
fi gure).
Fit the Handles
(Classic model only)
Remove the 4mm Allen screws from the doors with the
hexagon key tool. Use the screws to fi t the door handles.
The handles should be above the fi xings.
Remove the 4mm Allen screws from the top corners of the
control panel and fi x the front handrail in position.
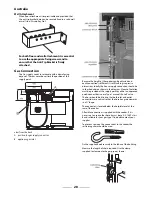
Anti-Tip Device
WARNING
An anti-Tip bracket and chain should be fi tted when the
cooker is connected to a fl exible gas supply.
Unless properly installed, the cooker could be tipped by
leaning on the door. Injury might result from spilled hot
liquids or from the cooker itself.
Kit contents
Key No
No Of
Description
1
1
Anti-Tip Bracket Base
2
1
Anti-Tip Bracket extension
3
2
M5 screw
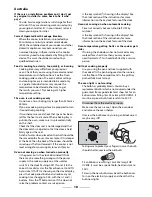
The cooker must be set to the correct height and leveled
before the anti-tip bracket is installed.
Floor Attachment
Key No’s 1 and 2 can be assembled as shown below using
Key No. 3.
Dimension ‘A’ should be set to give a clearance of about
6 mm above the center channel of the cooker base.
The assembled bracket should be fi rmly secured to the fl oor
to give a minimum engagement of 50 mm in the center
channel of the cooker base.