background image

10

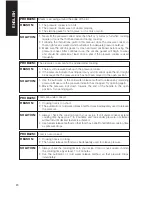
USERS –SEE BELOW). When the 
pressure indicator has risen and 
steam starts to come out of the 
operating valve for first time, lower 
the heat to maintain a gentle, steady 
stream of steam. At this moment, 
the COOKING TIME STARTS and 
you have to start timing you recipe. 
It is recommended that a kitchen 
timer be used to monitor the exact 
cooking time.

5.  If at any time during cooking an 

excessive amount of steam is 
released by the operating valve, 
lower the burner heat to adjust and 
maintain the proper level of pressure. 
The steam should come out in a 
gentle, steady flow. If the steam is 
gushing or very forceful, lower the 
heat.

6.  If the pressure drops or there is no 

steam coming out of the operating 
valve, raise the burner heat just until 
a gentle, steady stream of steam is 
released and can be maintained.

7.  While cooking, never inadvertently 

shake the pressure cooker. This can 
cause the automatic valve to release 
steam, which will create a drop in 
pressure.

NOTE TO ELECTRIC STOVE USERS
 

Since the coils on an electric stove retain 
heat for a long time, food often becomes 
overcooked when the burner is turned 
down for simmering (when cooking time 
is started). To compensate for that, you 
have two options:

1. 

Two Burner Method:

 Turn on two 

electric stove burners, one on high 
and other on low. Place your pressure 
cooker on the burner set to high, and 
bring to pressure. Once pressure has 
been achieved, move your cooker 
over to the burner set on low and 
start your pressure cooking time. 
Make sure the burner is not too low; 
there should always be some steam 
coming out of the operating valve. If 

there is no more steam coming out 
of the operating valve and/or the 
pressure indicator drops, raise the 
heat until steam starts coming out of 
the operating valve, and adjust the 
cooking time by 1 or 2 minutes.

2. 

One Burner Method:

 Turn on one 

burner to medium heat and bring 
your cooker to pressure. Once 
pressure has been achieved and 
steam starts to come out of the 
operating valve, turn your burner to 
low and start your pressure cooking 
time. Make sure you don’t lower your 
heat too much; there should always 
be some steam coming out of the 
operating valve. If there is no more 
steam coming out of the operating 
valve and/or the pressure indicator 
drops, raise the heat until steam 
starts coming out of the operating 
valve, and adjust the cooking time 
by 1 or 2 minutes.

Releasing Pressure After 
Cooking

Always check your recipe to determine 
if the pressure cooker should be cooled 
down naturally or whether the quick 
release method should be used. The 
Fagor SPLENDID pressure cooker also 
features an automatic release position 
on the automatic valve that can be used 
for releasing pressure automatically when 
cooking foods such as stews, meats, 
poultry, soups. Do not use for vegetables 
or tender foods as this will result in 
overcooking.
1. 

Natural Release Method:

 To use 

this method, remove the pressure 
cooker from the hot burner and let 
the pressure drop and cool down 
naturally. Depending on the amount 
of food and liquid in the cooker, 
this method can take from 10 to 
15 minutes. Once the pressure has 
been released completely and the 
pressure indicator has dropped, go 
to step # 4 in this section.

ENGLISH

Summary of Contents for Splendid

Page 1: ...1 FAGOR SPLENDID PRESSURE COOKER USER S MANUAL ENGLISH...

Page 2: ...Pressure After Cooking Care and Cleaning 11 Cleaning the operating valve Basic instructions for cooking 13 Fresh and frozen vegetables Fresh and dried fruits Dried beans and other legumes Grains Meat...

Page 3: ...ware that certain foods such as applesauce cranberries pearl barley oatmeal or other cereals split peas noodles macaroni rhubarb or spaghetti can foam froth and sputter and clog the pressures release...

Page 4: ...f the unit is too full with food and liquid 6 Before cooking make sure that the gasket is in good condition and in place and that the operating valve is free of food particles that could clog it up Se...

Page 5: ...In addition to being manufactured in a more environmentally respectful way pressure cookers save you energy in the kitchen too Compared to traditional cooking methods cooking with a pressure cooker sa...

Page 6: ...ontains important components vital to the use of the pressure cooker To reduce the risk of burns or spills the lid and pot handle should be positioned so that it is turned inward towards the back of t...

Page 7: ...om of the pressure cooker pot has a thermo heat conductive base comprised of three layers of metal The first layer is stainless steel which is safe for contact with food In view of the fact that alumi...

Page 8: ...cooker pot is dishwasher safe Fagor America recommends hand washing the pressure cooker lid and all its components Always remove the gasket when washing the lid Wash the gasket with warm soapy water r...

Page 9: ...f the lid to lock it Fig 7 If you don t push the lock to the closed position the cooker will not build any pressure This is a safety measure designed to prevent accidental opening of the cooker while...

Page 10: ...rner is not too low there should always be some steam coming out of the operating valve If there is no more steam coming out of the operating valve and or the pressure indicator drops raise the heat u...

Page 11: ...ld the pot handle with your left hand and slide the lid handle to the right with your right hand Even though you have already released the pressure never open the pressure cooker towards your face sin...

Page 12: ...r pot This will avoid the risk of a vacuum forming inside the cooker during storage which would make the opening of the lid difficult It will also prevent stale odors from forming inside the cooker 7...

Page 13: ...cratching the bottom For soups and stocks do not fill pressure cooker over 1 2 full Remember to ALWAYS use some cooking liquid Operating the cooker without any cooking liquid or allowing the cooker to...

Page 14: ...orn half 7 minutes Zucchini Summer 1 inch slices 8 minutes Fresh and dried fruit Fresh fruit Wash and pit or core fruit If you prefer peel and slice it Cook fruit in a steamer or pasta basket when pos...

Page 15: ...PPROXIMATE COOKING TIME Azuki beans 4 5 minutes Beans white 5 7 minutes Beans scarlet red 10 12 minutes Beans black 8 10 minutes Beans colored 4 6 minutes Pigeon peas 7 9 minutes Chick peas 10 12 minu...

Page 16: ...y with vegetables begin by cooking the meat in stock or another liquid Subtract from the cooking time recommended for the meat the cooking time of the vegetable ingredient which takes longest to cook...

Page 17: ...to Use in the Pressure Cooker It is easy to adapt your favorite recipe for use in a pressure cooker For the most part soups stews braised and slow roasted meats and poultry and slow simmered recipes...

Page 18: ...e has been reached it might be for one of the following reasons 1 The nuts and screws on the handle have loosened 2 The gasket has not been oiled 1 Make sure the lower handle is screwed tight to the p...

Page 19: ...any remaining food particles Remove with a toothpick 3 The safety valve must be replaced Contact the Fagor Customer Service Department at 1 800 207 0806 or email at info fagoramerica com PROBLEM REAS...

Page 20: ...it might be because the the pressure lock has not been moved to the open position 1 Use the automatic or the cold water release method to release any remaining pressure Make sure the pressure indicato...

Page 21: ...ly grab the hot jars 3 Ladle to scoop food into the jars 4 Bubble freer to prevent bubbles of air from remaining trapped in the jar and causing contamination 5 Jar Wrench to close the lids safely 6 Ma...

Page 22: ...g lid firmly against the jar to form a high vacuum Screw bands are not needed on stored jars They can be removed easily after jars are cooled When removed washed dried and stored in a dry area screw b...

Page 23: ...ase method for pressure canning Never use the automatic release method to hasten the reduction in pressure when canning foods When the pressure cooker is depressurized unlock the lid and tilt the far...

Page 24: ...e for tiny nicks If necessary change the jar Always use a new properly prepared lid and reprocess using the same processing time The quality of reprocessed food is poor Instead of reprocessing unseale...

Page 25: ...f information about home canning is The National Center for Home Food Preservation www uga edu nchfp index html HOME CANNING RECIPES Pasta Sauce Servings 4 pints Headspace 1 inch Time 20 minutes high...

Page 26: ...and lower into pressure cooker with 2 3 inches of hot water Process for 90 minutes high pressure setting Cucumber Soup Servings 4 pints Headspace 1 inch Time 40 minutes high pressure setting Ingredien...

Reviews: