


P a g e
|
3
STEP 5
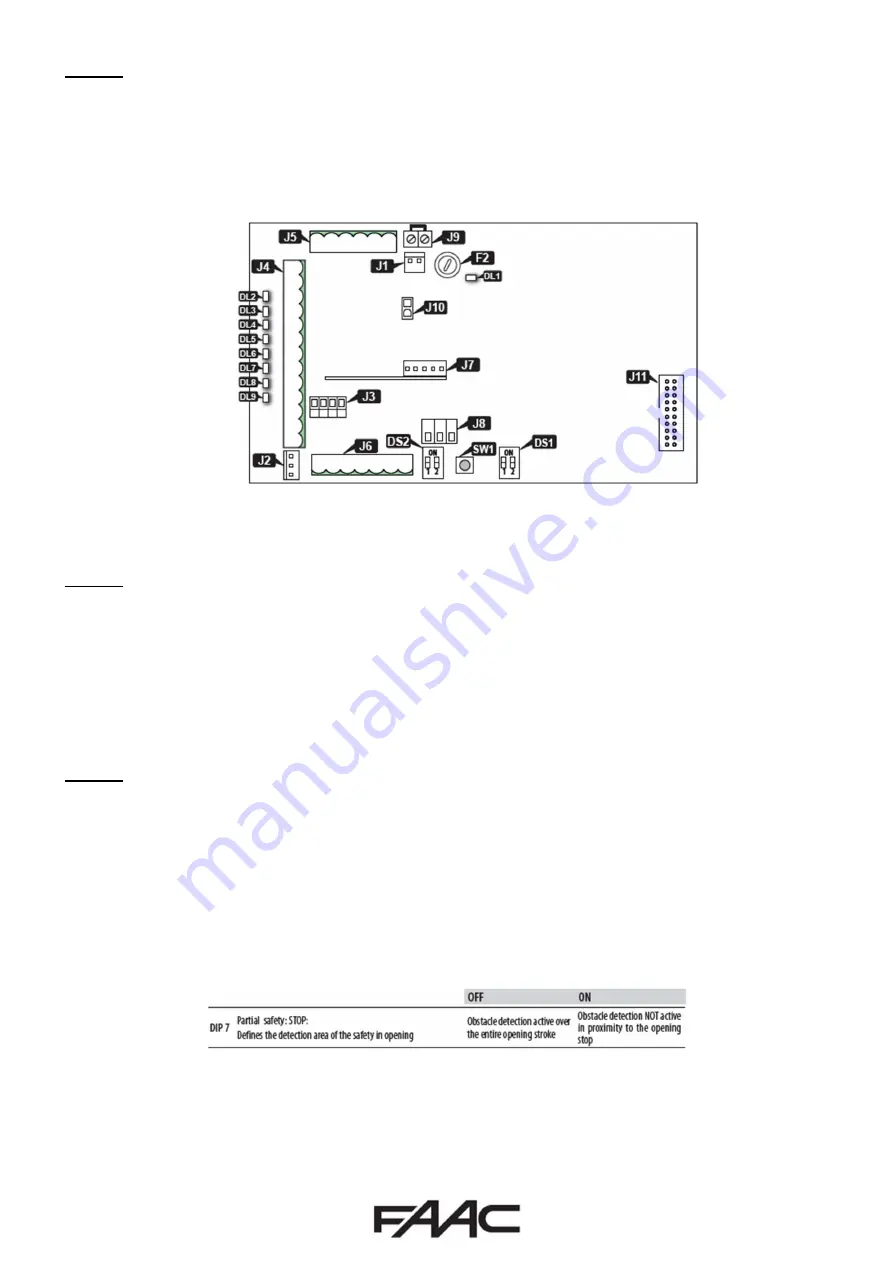
Now perform a Setup on the 950N2 by holding SW1 on the I/O Board (See below). Hold the button
until DL2 above starts flashing repeatedly. Please note that a SETUP can only be complete if the unit
is in Automatic Mode (toggle switch on the side in the “0” position or main screen on KP Evo displaying
“Auto Bi Dir” before proceeding into the menu structure) and DL4, DL5 and DL6 are illuminated
“GREEN” (See below) as the 950N2 comes with pre-wired links across terminals 12, 13 and 14 back
to COM (such as terminal 7, 8, 18 or 19), as these are the default N/C inputs.
Setup will only need to be carried out once if NOT opening against a wall or a barrier and XPB ON’s
are used (please see Step 7 for further details). For full DIPSWITCH and TRIMMER details, please
refer to page 27 in the manual.
STEP 6
Adjust Opening Speed, Closing Speed and Pause Time trimmers as required (TR1, TR2 and TR3
respectively if using the on-board programming, refer to pages 37 and 38 on the manual if using the
KP Evo). Please note that typical minimum opening time is 3.5 Secs for fully closed to fully open. If
using the trimmers, please press SW1 on Logic board as in Step 4.
At this point the door should be operational and a short across Terminals 10, 11, 15 or 17 and COM
should trigger the automation of the door (This should also illuminate DL2, DL3, DL7 or DL9
respectively).
STEP 7
Nearly all installations will require the use of On Door Safety Sensors, be it the more basic XPB ON’s
(XPB 34, XPB 90-1 or XPB 90-2) or the more advanced XPB SCAN’s (also known as FLATSCAN’s).
Please use the wiring instructions as per page 29 of the manual.
If you are using XPB Scan’s, please follow the instruction manual provided with them to run their own
configuration setup to determine the width of the door and any objects that may or may not be in
the detection range of the laser curtain such as walls or barriers.
If using the XPB ON’s and opening against a wall or barrier, you will need to enable DIPSWITCH “7”
(see below) or if using the KP Evo – Spanner, Programming, Installation, Partial Stop Sec, Enable.
If using DIPSWITCH, please ensure to press SW1 on Logic as in Step 4.
Following either option using the XPB ON’s, you will need to re-run Setup so that the 950N2 can
identify where Opening Stop Safety will be triggered to allow it to switch to Low Energy Creep Mode.