background image

Page | 10 

U.S. Patent 7,418,8000 


4.


LEVER ARM ADJUSTMENT 

4.1.


Attaching the Adjustment Arm to the Shoe 

4.1.1.


Loosen nut on adjustment arm. 

4.1.2.


Loosen the set screws in the clutch arm hub. 

4.1.3.


Adjust length of adjustment arm so when door is shut and arm is engaged in shoe, the clutch arm 
makes a 90-degree angle to wall. 

4.1.4.


Bolt the adjustment arm in the center hole of the shoe bracket. 

4.1.5.


Tighten the adjustment arm nut and the set screws in the clutch arm hub. 

4.1.6.


Verify doughnut magnet is mounted to the side of clutch arm that faces the velcroed sensor 1/8” from 
the clutch arm hub, centered on the arm. This triggers the motor to shut off when in operation. 


Summary of Contents for CONCIERGE 23DR

Page 1: ...l rights reserved All text and images contained in this document are proprietary and may not be shared modified distributed reproduced or reused without the express written permission of EZ ACCESS a division of Homecare Products Inc 14900 REV 03 24 17 Installation Manual CONCIERGE Power Door Opener Model No CONCIERGE 23DR ...

Page 2: ... are recommended to help prevent unsafe conditions Regularly check that all parts are in good condition and verify all nuts bolts screws and other fasteners are undamaged and secure If any part of the system is damaged or loose DO NOT USE until repairs can be made by a qualified technician Do not use CONCIERGE for anything other than its intended purpose Do not route power cords where they may bec...

Page 3: ...hipping damage before use In case of damage DO NOT USE the CONCIERGE Please call 1 800 451 1903 for further instructions TOOLS NEEDED FOR MAIN UNIT ELECTRIC DRILL AND STANDARD BIT KIT EXTENDED DRILL BIT MINIMUM 5 LONG SAFETY GOGGLES TAPE MEASURE PHILLIPS SCREWDRIVER 1 8 HEX KEY ...

Page 4: ...RD 1 DOUGHNUT MAGNET USED IN CONJUNCTION WITH VELCROED SENSOR TO SET DOOR OPENING DISTANCE 1 10 1 1 2 WOOD SCREWS 4 ATTACHING MOTOR UNIT TO DOOR 2 ATTACHING ARM SHOE TO JAMB 6 BINDING BOLTS FOR ATTACHING UNIT TO DOOR WITH THROUGH HOLES IN DOOR THESE ARE USED IN PLACE OF THE WOOD SCREWS 4 BLANK LATCH PLATE USED IN PLACE OF ELECTRIC STRIKE 1 BALL CATCH SATIN NICKEL FINISH ALTERNATE TO BLANK LATCH PL...

Page 5: ...ONCIERGE ESPAR 24VDC ELECTRIC STRIKE AND FACE PLATE LARGE STATIC STRENGTH AND MAX PRE LOAD CONCIERGE PIM WALL MOUNTED 4 5 SQUARE PUSH PAD CONCIERGE KEM WIRELESS PROGRAMMABLE KEYLESS ENTRY SYSTEM GARAGE DOOR STYLE TRANSMITTER CONCIERGE RGD1 SINGLE CHANNEL CONCIERGE RGD2 TWO CHANNEL CONCIERGE RGD4 FOUR CHANNEL CONCIERGE RP1 SINGLE CHANNEL PENDANT STYLE TRANSMITTER ...

Page 6: ...TOP 8 MOUNTING THE MOTOR AND LEVER ARM SHOE 9 LEVER ARM ADJUSTMENT 10 STRIKE AND BALL CATCH INSTALLATION 11 14 PROGRAMMING THE RECEIVER 15 OPERATION 16 ADJUSTMENTS 17 18 CHANGING HAND ROTATION OF THE MOTOR 19 MAIN CIRCUIT BOARD FEATURES 20 TROUBLESHOOTING 21 AVAILABLE CONFIGURATIONS 22 ...

Page 7: ...s Flimsy or improperly installed hinges may prevent the door opener from operating properly 1 2 Power Requirements 1 2 1 This model is supplied with a 9 ft power cord that plugs into a 110VAC AC outlet When the optional electric strike is provided it is supplied with 12 ft of low voltage wire to connect the electric strike plate to the strike terminals on the main circuit board The terminals are u...

Page 8: ... A hinge mounted standard duty door stop is included in the CONCIERGE 23DR package To install this door stop first remove the hinge pin from the top door hinge reinsert the pin with the door stop in place then adjust the threaded post so the door stops at 90 degrees when open see DIAGRAM below A heavy duty door stop not included is recommended for heavier doors ...

Page 9: ...termost rows to follow best practice technique Screw into door surfaces that are flush to the back side of the motor mount plate It is important the screws achieve a solid mount 3 2 Mounting the Shoe First remove the shoe from the upper lever arm With the center line of the shoe 1 75 inches above the top of the narrow edge of the motor mount plate and 16 inches from the hinge side edge of the door...

Page 10: ...oor is shut and arm is engaged in shoe the clutch arm makes a 90 degree angle to wall 4 1 4 Bolt the adjustment arm in the center hole of the shoe bracket 4 1 5 Tighten the adjustment arm nut and the set screws in the clutch arm hub 4 1 6 Verify doughnut magnet is mounted to the side of clutch arm that faces the velcroed sensor 1 8 from the clutch arm hub centered on the arm This triggers the moto...

Page 11: ...CH PLATE 5 1 2 Adjustable Ball Catch If mechanical hold is required the supplied adjustable ball catch is ideal for latching doors when not in operation Adjustable ball compensates for the door gap and latch tension 5 1 2 1 Mark center for catch on door edge and drill 13 16 hole 1 5 8 deep for catch 5 1 2 2 Slide catch into drilled hole and mark screw locations drill 5 64 pilot hole for screws 5 1...

Page 12: ...sired mode fail safe or fail secure Fail safe mode means that if the strike were to fail its latch will swing freely If in fail secure mode and the strike were to fail the latch will stay locked Therefore a person would be required to turn the door knob to open the door The models CONCIERGE ESP and CONCIERGE ESPAR are provided in the fail secure mode which is recommended ELECTRIC STRIKE AND FACE P...

Page 13: ...hen installing the electric strike and face plate position it in the door frame front to back so that when the door is closed there is minimal gap between the strike plate latching surface and the door latch When closed the door should have little to no wiggle room ...

Page 14: ...the door opener is activated it will send a single shot 24VDC pulse to the strike to release tension and allow the door to open Once connected route the wires in the door jamb so they do not obstruct any door movement Do not allow wires to become pinched or damaged Both optional strikes Model CONCIERGE ESP and CONCIERGE ESPAR have universal polarity It does not matter which wire is connected to wh...

Page 15: ...s Your remote transmitter and the receiver on the door opener need to have matching dip switch configurations Follow the instructions provided with the remote transmitter to properly set the switches Single button remote shown here but same process holds true for any remote transmitter ...

Page 16: ...hould open smoothly to 90 degrees pause and then close To adjust the open dwell time and or the close activation time refer to Adjustments DOOR SHOULD NEVER OPEN BEYOND 90 DEGREES BEYOND 90 DEGREES THE CLUTCH ARM AND THE LEVER ARM WILL SCISSOR CAUSING THE OPENER TO MALFUNCTION 7 1 3 Refer to Troubleshooting for any issues you are encountering 7 1 4 After adjustments have been made secure the motor...

Page 17: ...sted from 0 30 seconds 8 2 Closing Activation Time To adjust how long the motor continues to rotate when closing the door use a screwdriver to adjust close adj on the control board It is recommended that you adjust this to have the motor continue to operate for two seconds after the door is completely closed This will ensure consistent repeatability The clutch of the lever arm ensures that even if...

Page 18: ... to the motor The motor is turned off when the magnet passes the sensor The doughnut magnet and velcroed sensor should be positioned so that the motor shuts off when the door is 75 80 degrees open and the door will coast to a soft stop at about 90 degrees A DOOR STOP MUST BE USED TO PREVENT THE DOOR FROM TRAVELING BEYOND 90 DEGREES ...

Page 19: ...essary carefully remove the lead wires and reroute the blue wire to the motor lead position closest the hinge side of door This also positions the blue wire in the motor lead position closest to the motor The black wire then positions to the other lead 9 1 3 When converting from door mount to jamb mount refer to Lever Arm Adjustment and perform the following steps 9 1 3 1 Use any commonly availabl...

Page 20: ...gin timing when contact is released This could be used with a safety mat applications where the only concern is on the closing cycle as it does not prevent an opening MOCT Dip Switch 1 Manually open close timer When switch is ON and door is opened manually to full open door will time out and manually close When switch is OFF and the door is opened to full open it will stay open until a new signal ...

Page 21: ...motor activation time Refer to Closing Activation Time Incorrect setting of strike Refer to Electric Strike Installation Obstruction weather stripping Plumb and square the door Replace warped door Clear door jamb or stop of obstruction Stiff or thick weather stripping may need to be removed Dip switch settings wrong Align dip switch setting Refer to Programming the Receiver Door does not latch doo...

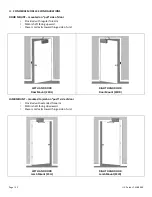
Page 22: ...or shaft facing upward Power cord exits toward hinge side of unit LEFT HAND DOOR Door Mount 23DL RIGHT HAND DOOR Door Mount 23DR JAMB MOUNT mounted to jamb on push side of door Provided with extended forearm Motor shaft facing downward Power cord exits toward hinge side of unit LEFT HAND DOOR Jamb Mount 23JL RIGHT HAND DOOR Jamb Mount 23JR ...

Page 23: ...D CONFIDENTIAL EZ ACCESS A DIVISION OF HOMECARE PRODUCTS INC ALL RIGHTS RESERVED ALL TEXT AND IMAGES CONTAINED IN THIS DOCUMENT ARE PROPRIETARY AND MAY NOT BE SHARED MODIFIED DISTRIBUTED REPRODUCED OR REUSED WITHOUT THE EXPRESS WRITTEN PERMISSION OF EZ ACCESS DIMENSIONS ARE IN INCHES TOLERANCES FRACTIONAL ANGULAR 2 DEG MACH BEND TWO PLACE DECIMAL 03 1 32 THREE PLACE DECIMAL 010 FOUR PLACE DECIMAL ...

Reviews: