


2.
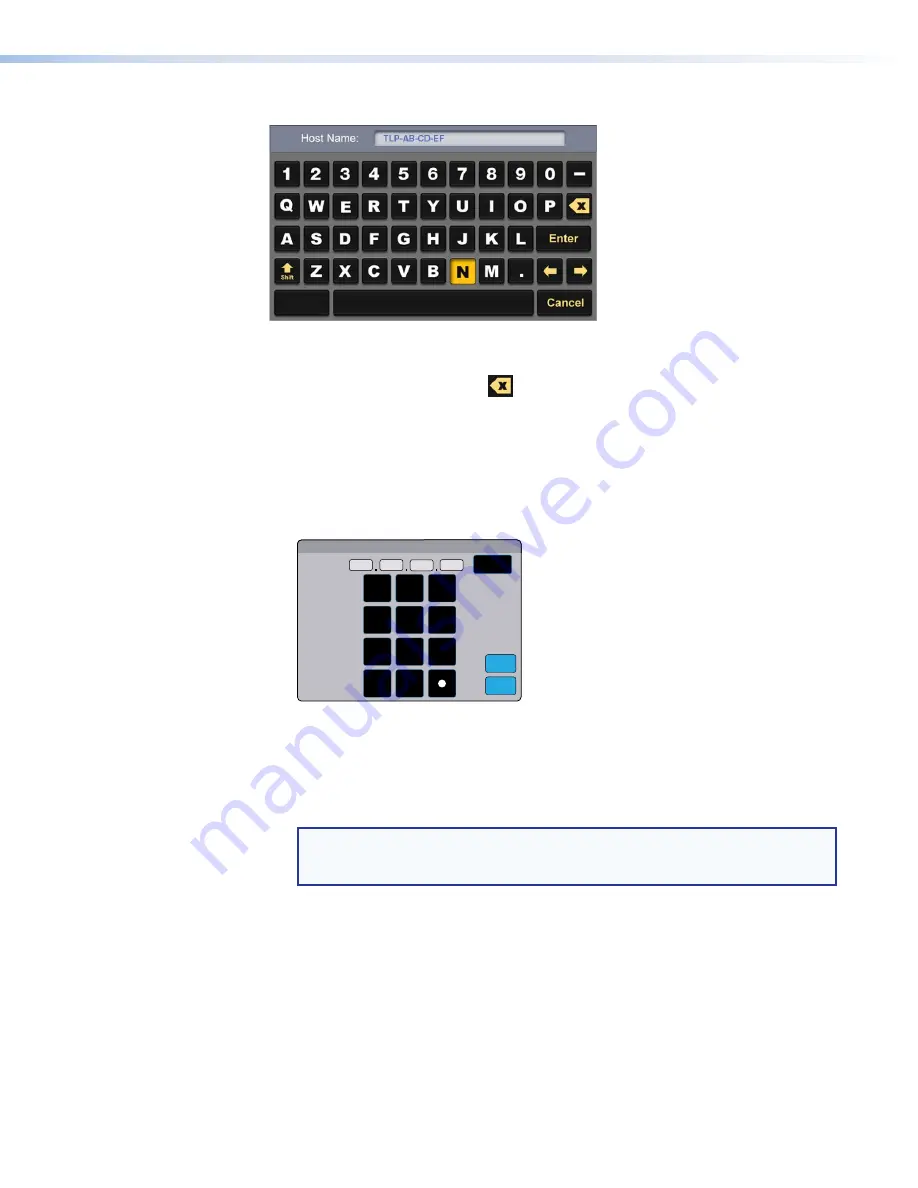
Edit the
Host
Name
by pressing that button. A keypad opens:
Figure 8.
Alphanumeric Keypad
•
Use the keypad to enter a new name, which appears in the
Host
Name
text box.
•
Use the backspace character (
) to delete existing characters.
•
The
right
and
left
arrows
move the cursor inside the
Host
Name
text box.
•
Click the
Shift
key to toggle between upper and lower case letters.
•
Press
Enter
to save the new name.
3.
If DHCP is disabled, set the unit
IP
address
,
subnet
mask
,
gateway
address
, and
DNS
server address.
a.
Press the button for the address to be edited. A screen opens, showing the address
and a numerical keypad.
IP Address
1 9 2
1 6 8
2 5 4
2 5 1
Back
0
1
4
7
3
6
9
8
5
2
Clear
Cancel
OK
Figure 9.
Numeric Pad for Setting IP Addresses
b.
Press
Clear
to remove the old address. If you start typing without pressing
Clear
, the
first octet is over-written and the other octets remain the same.
c.
Press any octet button to highlight and start editing it.
d.
Enter the 3-digit value for that octet (leading zeroes in the octet are ignored).
NOTE:
Octets can have any value between
0
and
255
. You cannot enter an invalid
number. For example, if you try to enter
892
, you are able to enter the
89
but the
2
cannot be entered.
Click
Back
to delete the last digit. If no value has been entered for the selected octet,
pressing
Back
moves the cursor back to the previous octet and deletes the last digit of
that octet.
e.
Press the next octet button and enter a value.
f.
Repeat steps
3c
through
3e
to enter values for all four octets.
g.
Press
OK
to save the changes and return to the Network screen or press
Cancel
to
return to the
Network
screen without saving the changes.
TLP Pro 1220, TLP Pro 1520, and TLP Pro 1720 Series • Setup Menu
15


