


5
The
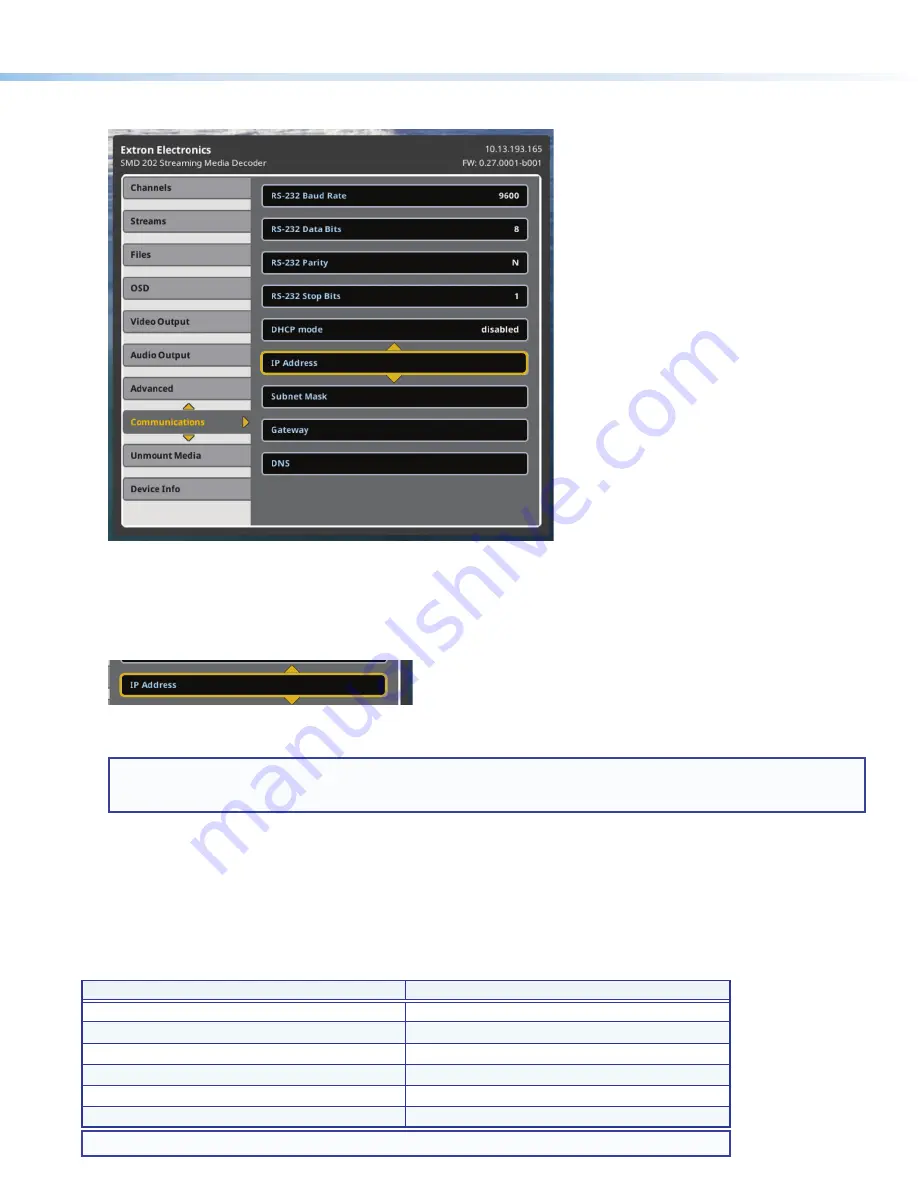
Communications
submenu opens. Configure the communications ports to connect the SMD 202 to your local network
(consult your IT department for the suitable network settings). The default settings are shown below.
192 . 168 . 254 . 254
0 . 0 . 0 . 0
255 . 255 . 0 . 0
0 . 0 . 0 . 0
Figure 6.
On Screen User Interface, Communications submenu.
5.
Press the
Enter
or
Right
button to enter the submenu panel.
6.
Press the front panel (or remote control)
Up
and
Down
buttons to scroll through the submenu items. Stop on the
IP
Address
field.
7.
Press the
Right
arrow button to move the selection arrow to the first octet of the address.
100 . 168 . 254 . 254
0 . 0 . 0 . 0
255 . 255 . 0 . 0
0 . 0 . 0 . 0
8.
Press the
Up
and
Down
buttons to change the octet to the required address, or enter the numbers directly using the optional
IR remote control number buttons.
NOTE:
Press the front panel buttons quickly to accelerate the numbers in the octet. As you press faster, more numbers
are skipped so that the time locating the final number is reduced. You can also accelerate through the numbers using
the IR remote control. The longer you hold the
Up
or
Down
button, the faster it accelerates through the number field.
9.
Repeat steps 7 and 8 for the next three octets.
10.
Press the
Enter
button to accept the new value or press the
Menu
button to cancel the changes.
11.
In the same manner, repeat steps 4 through 10 to configure all communications settings.
12.
When you are finished configuring the communications settings, press
Menu
on the front panel or the remote to exit the OSD.
Alternatively, you can use the following SIS commands to enable and disable DHCP, view and configure the IP address, and
change the subnet mask. Use DataViewer, available from the Extron Web page, on a control PC via any of the control system
connections to send commands to the SMD 202 and view the results. See the
SMD 202 User Guide
for additional information.
SIS Command
Description
E
CI
}
View the current IP address
E
1DH
}
Enable DHCP
E
0DH
}
Disable DHCP
E
2BOOT
}
Restart the network interface and apply changes
E
192.168.254.254CI
}
Set the default IP address
E
255.255.0.0CS
}
Set the default subnet mask
NOTE:
}
= Carriage return (no line feed, hex 0D).


