background image

MSW 4V SDI rs • Serial Communication

Serial Communication, cont’d

3-6

MSW 4V SDI rs • Serial Communication


3-7

Windows-Based Control Program

The Universal Switcher Control Program (part #29-031-01), is 

compatible with Windows 2000 and Windows XP or later, and 

it provides remote control of input selection and front panel 

switch mode selection.

Installing the software

The Universal Switcher Control Program is contained on the CD 

included with the unit.

N

  If the installation program does not self start when the CD 

is loaded, run 

Launch.exe from the CD and follow the 

instructions that appear on the screen.

If you need to reinstall the software or new software is available, 

download updates to this program from the Extron Web site 

(http://www.extron.com).
By default, the Windows installation creates a  

C:\Program Files\Extron\UnivSW

 folder and places a Universal 

Switcher icon onto the desktop.

Using the software

1

To run the software, double-click the Universal Switcher 

Control Program

 icon on your desktop.


Figure 3-2 — MSW software icon

2

In the Comm Port Selection window (figure 3-3), click the 

comm port that is connected to the MSW’s RS-232 port.


Figure 3-3 — Comm port selection window

3

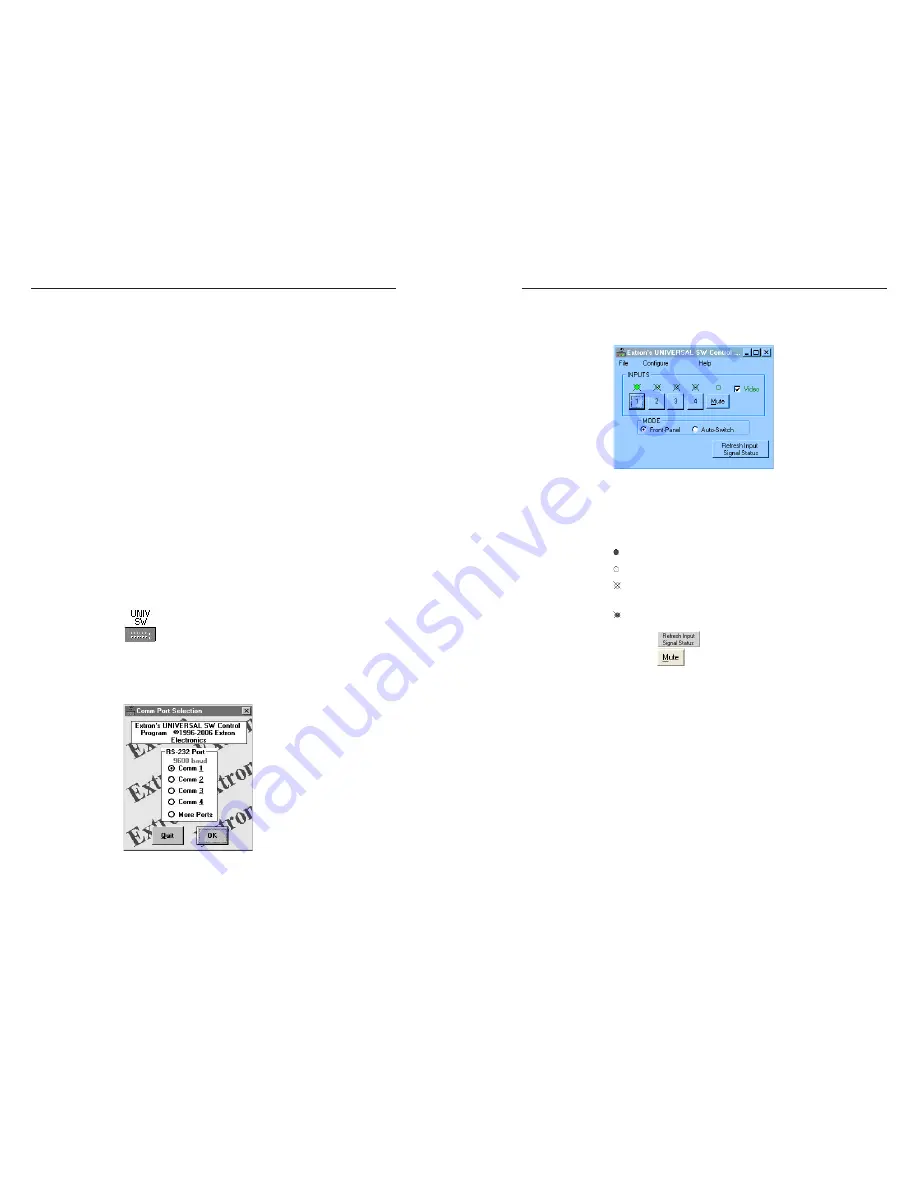
The Extron Universal Switcher Control Program window 

(figure 3-4) displays the selected input and panel mode 

(Front-Panel [normal] or Auto-Switch).


Figure 3-4 — The Universal Switcher program 
window

4

Select and click the desired input button.  Symbols for the 

state of each LED are shown below:


 indicates that the input signal is present and is selected.


 indicates that the input signal is present but not selected.


 indicates that the input signal is not present and not 

    selected.


 indicates that an input signal is not present, but is 

    selected.


Click the 

 button to refresh the input signal status.


Click the 

 button to suppress the video image.


The Mode radio buttons indicate the current mode (Front-

Panel [normal] or Auto-Switch).  You can also change the 

mode through the software by clicking the desired mode’s 

radio button.

Summary of Contents for MSW 4V SDI rs

Page 1: ...Amersfoort The Netherlands 31 33 453 4040 Fax 31 33 453 4050 Extron Electronics Asia 135 Joo Seng Road 04 01 PM Industrial Building Singapore 368363 65 6383 4400 Fax 65 6383 4664 Extron Electronics J...

Page 2: ...n Wartung Alle Wartungsma nahmen sollten nur von qualifiziertem Servicepersonal durchgef hrt werden Die internen Komponenten des Ger tes sind wartungsfrei Zur Vermeidung eines elektrischen Schocks ver...

Page 3: ......

Page 4: ...the MSW is to be connected to a computer or host controller for remote control connect the host s RS 232 cable to the provided 5 pole captive screw connector then connect it to the RS 232 port on the...

Page 5: ...witches to the highest numbered active input N Outputs A and B output an identical signal Step 3 If needed you can create a remote connection via an RS 232 device see chapter 3 Serial Communication A...

Page 6: ...ter One Introduction About this Manual Features Appendix A Specifications Part Numbers and Accessories A 1 Specifications A 2 Parts A 5 Included parts A 5 Optional accessories A 5 68 1191 01 A 09 06 A...

Page 7: ...or the Universal Switcher Control Program software This mini SDI switcher also features a front panel selectable autoswitch mode that automatically switches to the highest numbered input with active...

Page 8: ...Introduction cont d 1 4 MSW 4V SDI rs Introduction MSW 4V SDI rs 2 Chapter Two Installation and Operation Installation Rear Panel Connections Front Panel Controls and Indicators...

Page 9: ...uneven mechanical loading 4 Circuit overloading Connect the equipment to the supply circuit and consider the effect that circuit overloading might have on overcurrent protection and supply wiring App...

Page 10: ...the mounting screws with the slots in the brackets and place the MSW against the surface fitting the screws through the bracket slots 7 Slide the switcher slightly forward or back then tighten all fou...

Page 11: ...be either orange or blue Either color plug can be connected to the rear panel receptacle To wire the connector do the following 1 Cut the DC output cord to the length needed 2 Strip the jacket to expo...

Page 12: ...ed with the Normal button d or Auto button c to select the switching mode Mode is a secondary function of the Input 1 button See Mode selection on the following page f Auto Switch LED When lit the Aut...

Page 13: ...Installation and Operation Installation and Operation cont d 2 10 MSW 4V SDI rs 3 Chapter Three Serial Communication Using Simple Instruction Set SISTM Control Windows based Control Program Updating...

Page 14: ...en it first powers on Vx xx is the firmware version number Inn The switcher sends the Inn message whenever the selected input is changed using the front panel buttons n is the input number Error respo...

Page 15: ...X input 1 through 4 Input video sensing Request all inputs status Example 0 S 0 S Sig X X X X Sig 1 0 0 1 Each X response is the signal status of an input from input 1 to 4 X 0 no signal or 1 signal...

Page 16: ...software 1 To run the software double click the Universal Switcher Control Program icon on your desktop Figure 3 2 MSW software icon 2 In the Comm Port Selection window figure 3 3 click the comm port...

Page 17: ...C Do not interrupt the firmware upload before it is 100 complete Interrupting the upload corrupts the firmware and the switcher will not operate properly afterwards If you experience problems with th...

Page 18: ...before the status bar has progressed completely across the indicator window the firmware may be corrupted and may no longer respond to the Universal Switcher Control Program If you experience problem...

Page 19: ...e 75 ohms Return loss MSW 4SV rs 25 dB DC 10 MHz Other models 40 dB DC 10 MHz DC offset max allowable 5 0 V Input coupling MSW 4V rs MSW 4SV rs DC MSW 4V SDI rs AC Video output Number signal type MSW...

Page 20: ...eight 3 lbs 2 kg Vibration ISTA 1A in carton International Safe Transit Association Listings UL CUL Compliances CE FCC Class A VCCI AS NZS ICES MTBF 30 000 hours Warranty 3 years parts and labor N All...

Reviews: