4
FOX3 Matrix 80x • Setup Guide (Continued)
Audio Inputs
(see
on page 2) — Connect
audio input devices to an audio 5-pole captive screw
port (see figure 4 to wire the captive screw connector).
Audio Outputs
— Connect audio output devices to an
audio 5-pole captive screw port (see figure 4 to wire the
captive screw connector).
Unbalanced Stereo Input
Balanced Stereo Input
Do not tin the wires!
Tip
Ring
Tip
Ring
LR
Sleeves
Tip
Sleeve
Sleeve
Tip
LR
Unbalanced Stereo Output
Balanced Stereo Output
Do not tin the wires!
Tip
No Ground Here
No Ground Here
Tip
LR
Sleeves
Tip
Ring
Tip
Ring
LR
Sleeves
Figure 4.
Audio Input Wiring Diagram
DMP Expansion port and LED
—
•
Expansion Port
— Connect an STP cable between this port and the Expansion port on an optional Extron DMP Digital
Matrix Processor for digital audio connection. Receive and transmit eight 2-channel stereo inputs and eight 2-channel
stereo outputs via this RJ-45 connection.
•
Link LED
— Lights to indicate that the port is connected to a compatible device.
NOTE:
Only connect Extron non-AT audio devices to the DMP Expansion port.
Dante Expansion ports
— Connect RJ-45 connectors to external Dante devices for digital audio networking. Receive and
transmit 32 2-channel inputs and 32 2-channel outputs via these two RJ-45 connections.
Fiber optic I/O board LED indication
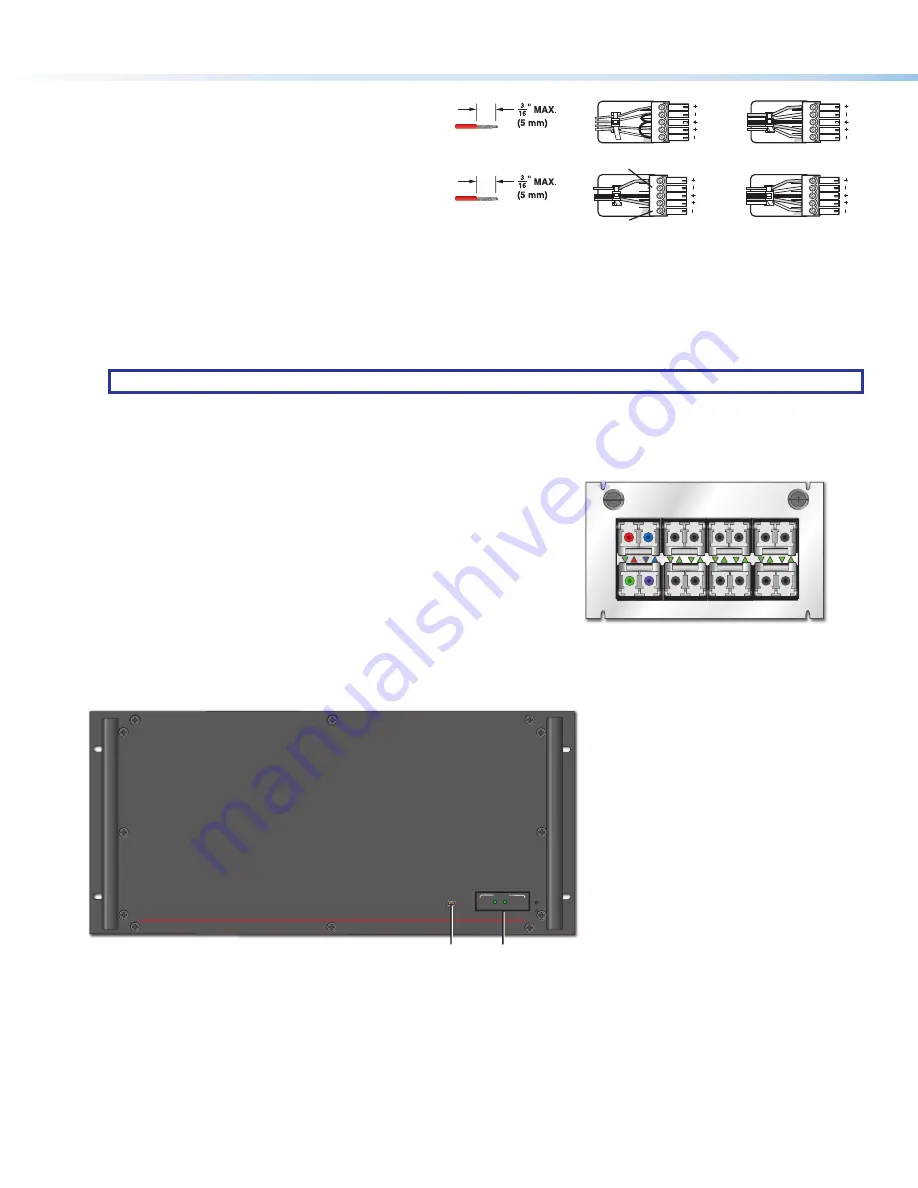
On the fiber optic I/O boards, the input and output LEDs on the transceivers
light green when 10G light is detected. The arrow LEDs point to the input and
output port they represent.
In figure 5, SFP 1 and SFP 5 are examples of the LEDs that indicate the input
and output port (different colors are used to indicate the connection only).
•
Out 1 is red and the corresponding arrow LED is red.
•
In 1 is blue and the corresponding arrow LED is blue.
•
Out 5 is purple and the corresponding arrow LED is purple.
•
In 5 is green and the corresponding arrow LED is green.
OUT
IN
4
OUT
IN
8
OUT
IN
3
OUT
IN
7
OUT
IN
2
OUT
IN
6
OUT
IN
1
OUT
IN
5
FOX3 MATRIX 8io
Figure 5.
Fiber Optic I/O Board LEDs
Front Panel
FOX3 MATRIX 80x
PRIMARY
REDUNDANT
FIBER OPTIC DIGITAL MATRIX SWITCHER
Extron
POWER
CONFIG
A
A
A
B
B
B
Figure 6.
FOX3 Matrix 80x Switcher Front Panel
A
USB
Config port
— If desired, connect computer to the front panel Configuration port.
B
Primary and Redundant Power Supply LEDs
— Light to indicate the power supply status.
•
Green
— Indicates that the associated power supply is operating within normal tolerances.
•
Red
— Indicates that the associated power supply is operating outside the normal tolerances, there is no AC connected
to the power supply, or the power supply has failed (see
Removing and Installing a Power Supply Module
page 12 to replace the power supply).
•
Unlit
— Indicates that the power supply is not connected.
4
5
6


