background image

Revision Date: 

10/16/2020 


Page 22 of 28


DMP Plus Series C V / C V AT – Patton POTS 

Appendix B: How to manually set the IP address of the Patton 

SN4112


Login


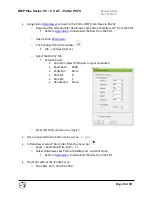
Accessing your SmartNode via the local console port (or via a Telnet session) causes the login screen to 

display. Type the factory default login: 

administrator 

and leave the password empty. Press the 

Enter 

key after the password prompt. 


login:administrator  
password: <Enter>  
172.16.40.1> 


After you have successfully logged in you are in the operator execution mode, indicated by > as 

command line prompt. With the commands 

enable 

and 

configure 

you enter the configuration 

mode. 


172.16.40.1>enable  
172.16.40.1#configure   
172.16.40.1(cfg)# 
 

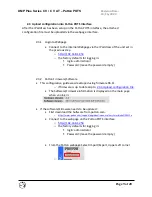
Changing the IP address


Select the context IP mode to configure an IP interface. 


172.16.40.1(cfg)#context ip router   
172.16.40.1(ctx ip)[router]# 
 

Now you can set your IP address and network mask for the interface 

eth0

.  

Within this example a class C network (192.168.1.0/24) is assumed. The IP address in this example 

is set to 

192.168.1.253  

(you should set this to  an unused IP address on your network). 


172.16.40.1(ctx-ip)[router]#interface eth0 
172.16.40.1(if-ip)[eth0]#ipaddress 192.168.1.253 255.255.255.0 
 
2002-10-29T00:09:40 : LOGINFO    : Link down on interface eth0. 
2002-10-29T00:09:40 : LOGINFO    : Link up on interface eth0. 
 
192.168.1.253(if-ip)[eth0]# 


Copy this modified configuration to your new start-up configuration. Upon the next start-up the 

system will  initialize itself using the modified configuration. 


192.168.1.253 (if-ip)[eth0]#copy running-config startup-config 
172.16.1.99(if-ip)[eth0]# 
 

The SmartNode can now be connected with your network. 

Summary of Contents for DMP 128 FlexPlus C V AT

Page 1: ...DMP Plus Series C V Models DMP Plus Series C V AT Models Patton POTS Configuration Guide REVISION 1 0 0 DATE OCTOBER 16 2020 ...

Page 2: ...Revision Date 10 16 2020 Page 2 of 28 DMP Plus Series C V C V AT Patton POTS Revision Log Date Version Notes Oct 16 2020 1 0 0 Initial Release ...

Page 3: ... address on Patton 7 2 2 1 Setting the IP address via DataViewer 7 2 3 Upload configuration into Patton POTS interface 9 2 3 1 Login to Webpage 9 2 3 2 Patton Firmware Software 9 2 4 Upload configuration File 11 2 4 1 To restart reload select Reload in the lower left 12 2 4 2 If any changes are made they will need to be saved to the startup config 12 2 5 Adjust auto hang up Call disconnection 13 2...

Page 4: ...ation Files Attached to PDF 21 Appendix B How to manually set the IP address of the Patton SN4112 22 Appendix C How to import configuration into DMP Plus 23 Appendix D Patton RS 232 Cable wiring detail 24 Appendix E Copy of DMP Plus VoIP Configuration 25 Appendix F Copy of Patton configuration 26 ...

Page 5: ...not need to be connected to a network The DMP Plus will not register to a call server or Patton POTS interface The DMP Plus and Patton POTS interface need to be located on the same subnet VLAN Features supported POTS interface will support a single POTS line on FXO Port 0 0 Hold is supported 1 1 1 Features not supported 3 Way calling is not supported Hook Flash is not supported VoIP Dialer in DSP ...

Page 6: ...Firmware R6 11 2019 07 02 1 1 4 Wiring Using a CAT5 6 network cable o Directly connect LAN 2 of DMP Plus to o Patton 10 100 ENET port ETH 0 0 port Figure 3 DMP 64 C V AT Plus Figure 4 Patton SN4112 JO EUI Connect the analog Telephone POTS line to the Voice Port FXO 0 0 o Port 1 Figure 5 Patton SN4112 JO EUI Rear Panel Figure 6 Analog Phone Line POTS 1 2 ...

Page 7: ...on com voip gateway sn4110 2 1 2 Firmware used during testing R6 11 2019 07 02 SN4110_H323_SIP_R6 11_2019 07 02 Firmware can be downloaded at patton com o https www patton com support upgrades index asp um S martNode 20411x 2 2 Setting IP address on Patton The Patton SmartNode default configuration has Interface Ethernet 0 ETH0 set to DHCP from the factory The attached configuration Patton_Config ...

Page 8: ... the toolbar File Connect ALT E o Select the RS 232 Tab Setup the port Com Port select COM port on your computer Baud Rate 9600 Parity Bit None Data Bit 8 Stop Bit 1 Handshake None o Press OK Enter until you see login Once connected to the Patton and you see login In DataViewer select Run Script from the menu bar o Tools Send Script File ALT F o Select DataViewer Set Patton IP address txt and Clic...

Page 9: ...Password leave the password empty 2 3 2 Patton Firmware Software This configuration guide was developed using firmware R6 11 o if firmware is up to date skip to 2 3 3 Upload configuration File The Software Firmware information is displayed on the main page when you log in If the software Firmware needs to be updated First download the Software from patton com o https www patton com support upgrade...

Page 10: ...o Firmware upload o Once the VoIP Gateways are shut down the Download firmware dialog will appear o Select Choose file and select the downloaded ZIP file o Select Import o Firmware will download and be programmed into the Patton POTS interface o Once the firmware update is complete the box will need to be Reload Restarted before the update will take effect ...

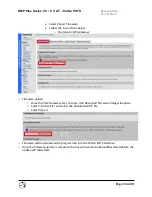
Page 11: ...he unit has been restarted From the Patton webpage Select Import Export Upper Left corner o Select Import Configuration then click Choose file o Select the Patton_Config cfg attached to this PDF document Refer to Appendix A to download the files from the PDF o Select Import Once the File has been imported the Patton will need to be rebooted reloaded ...

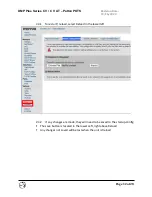
Page 12: ...atton POTS 2 4 1 To restart reload select Reload in the lower left 2 4 2 If any changes are made they will need to be saved to the startup config The save button is located in the lower Left right above Reload Any changes not saved will be lost when the unit is Reload ...

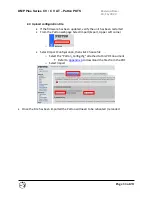
Page 13: ...if necessary Select FXO under ports Then select IF_FXO_00 o Adjust Disconnect Signal section for POTS line o Battery Reversal momentarily swaps DC polarity on the line o Loop Break momentarily disconnects the line voltage Most commonly used method The Loop break duration is set for 220 ms to 600 ms and can be adjusted if needed o Disconnect Tones Specify the tones to end a call Not commonly used I...

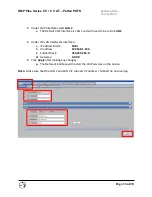
Page 14: ...a SIP to POTS connection 3 1 Network Interface Configuration Need to make sure that the LAN 1 and LAN 2 IP subnets IP address Subnet do not overlap The default subnet mask on LAN 1 of 255 255 0 0 needs to be changed to 255 255 255 0 The LAN 1 IP interface will be used for Setup and control These settings can be changed per your application 1 Click on the Network tab followed by Interface tab 2 Und...

Page 15: ...d will need to be set to LAN 2 6 Under the LAN 2 Network interface a IP address Mode Static b IP address 192 168 1 254 c Subnet Mask 255 255 255 0 d Gateway 0 0 0 0 7 Click Apply after making any changes a The Network interface will restart the VoIP services on the device Note Make sure that the LAN 1 and LAN 2 IP subnets IP address Subnet do not overlap ...

Page 16: ... C V C V AT Patton POTS 3 2 Transport Configuration Click on the Transport tab to access signaling transport configuration Check that the transport is set to UDP In the event that changes need to be made click Apply to commit any adjustments to the device ...

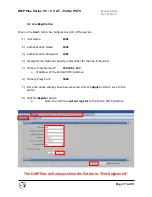
Page 17: ...word 1001 4 Display Name Optional Specify an identifier for the line if required 5 Primary Proxy Name IP 192 168 1 253 a IP address of the Patton POTS interface 6 Primary Proxy Port 5060 7 Once the above settings have been entered click the Apply button to save to the device 8 Click the Register button a Note the VoIP Line will not register to the Patton POTS interface The DMP Plus will always sho...

Page 18: ...he Audio tab Codecs will only be available for use within phone calls if they are moved from the Available to the Assigned column By default G 711u and G 711a are assigned to the system Codec assignment and priority can be set per line The Patton POTS interface will only work with G 711u and G 711a Click the Apply button to commit any changes to the device ...

Page 19: ...DMP Plus Series C V C V AT Patton POTS 3 5 Dialing Use the Dialing tab to select Out of Band RFC 2833 for the Patton POTS interface Click Apply after selecting Out of Band RFC 2833 DTMF signaling method for the line This can be set per line ...

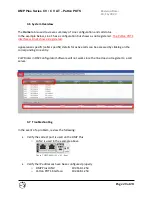
Page 20: ...ecific caller specific details for active calls can be accessed by clicking on the corresponding Line entry VoIP Dialer in DSP Configurator Software will not work since the line does not register to a call server 3 7 Troubleshooting In the event of a problem review the following Verify the correct port is used on the DMP Plus o LAN 2 is used in the example above Figure 7 DMP 64 PLUS C V AT Rear Ve...

Page 21: ...tion Files Attached to PDF If needed the configuration file voipConfig conf is attached to the PDF To access the file select Attachments from the left side bar see figure A1 Then save the attachment before uploading to DMP Plus see Figure A2 below Figure A1 Save Attachment Figure A2 Show Attachments ...

Page 22: ...text IPmode to configure an IP interface 172 16 40 1 cfg context ip router 172 16 40 1 ctx ip router Nowyou can set your IP address and networkmask forthe interface eth0 Within thisexample a classC network 192 168 1 0 24 isassumed The IP address in thisexample is set to 192 168 1 253 you should set this to anunused IP addresson your network 172 16 40 1 ctx ip router interface eth0 172 16 40 1 if i...

Page 23: ...guration webpage and click on the System tab 2 Under Import System Configuration click the Browse button to locate the voipConfig conf file attached to this PDF i Refer to Appendix A to download the files from the PDF 3 Click the Import button to update the DMP Plus Series with the system configuration 4 A notification will appear once the settings have applied successfully ...

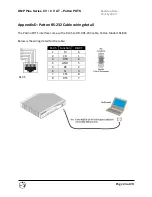
Page 24: ...ton POTS Appendix D Patton RS 232 Cable wiring detail The Patton POTS interface come with a RJ 45 to DB 9 RS 232 cable Patton Model 16F 894 Below is the wiring detail for the cable b RJ 45 RJ 45 Function DB 9 F 1 RI 6 2 CD 1 3 DTR 4 4 GND 5 5 RX 2 6 Tx 3 7 CTS 8 8 RTS 7 ...

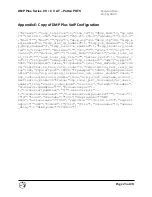
Page 25: ...alwaysallow sip_transport udp sipport 5060 srtprequire false rtcpenable true reg_default_time 36 00 registration_fail_retry_count 0 registration_fail_retry_de lay 600 rtpstartport 50000 rtpendport 50999 sipkeepaliveen abled true sip_outgoing_termination_use_cancel_enable false sip_outbound_as_route_enable true sip_reject_username_account_ destination_mismatch false sip_local_port_increased_for_use...

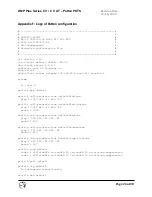
Page 26: ...ofile call progress tone defaultDialtone play 1 1000 350 13 440 13 profile call progress tone defaultAlertingtone play 1 1000 440 19 480 19 pause 2 3000 profile call progress tone defaultBusytone play 1 500 480 24 620 24 pause 2 500 profile call progress tone defaultReleasetone play 1 250 480 24 620 24 pause 2 250 profile call progress tone defaultCongestiontone play 1 250 480 24 620 24 pause 2 25...

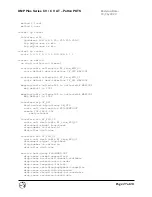
Page 27: ... table called e164 to called e164 MAP1002 map default to 1002 interface sip IF_SIP bind context sip gateway GW_SIP route call dest service FXO HUNT OUT remote 192 168 1 254 early connect interface fxo IF_FXO_00 route call dest table RT_from_FXO_00 disconnect signal loop break ring number on caller id dial after dial tone interface fxo IF_FXO_01 route call dest table RT_from_FXO_01 disconnect signa...

Page 28: ...itch no shutdown context sip gateway GW_SIP interface IF_GWSIP bind interface eth0 context router port 5060 context sip gateway GW_SIP no shutdown port ethernet 0 0 medium auto encapsulation ip bind interface eth0 router no shutdown port fxo 0 0 use profile fxo us encapsulation cc fxo bind interface IF_FXO_00 switch no shutdown port fxo 0 1 use profile fxo us encapsulation cc fxo bind interface IF...

Reviews: