USER MANUAL
Laser Distance Meter MODELS DT40M, DT60M, and DT100M
Page 1: ...USER MANUAL Laser Distance Meter MODELS DT40M DT60M and DT100M ...
Page 2: ...ions 3 Descriptions 4 Measurement Preparation 6 Programming Menu 8 Distance Measurements 8 Area Measurements 10 Volume Measurements 12 Indirect Measurements Pythagorean 13 Stakeout Function 16 20 point Datalogger 17 Maintenance 18 Display Error Codes 20 Specifications 20 ...
Page 3: ...laser beam from the top of the instrument WARNING Do not directly view or point the laser at an eye Do not look directly into the beam using an optical aid such as binoculars This can create a hazard Low power visible lasers do not normally present a hazard but may present some potential for hazard if viewed directly for extended periods of time Please read all safety instructions carefully before...
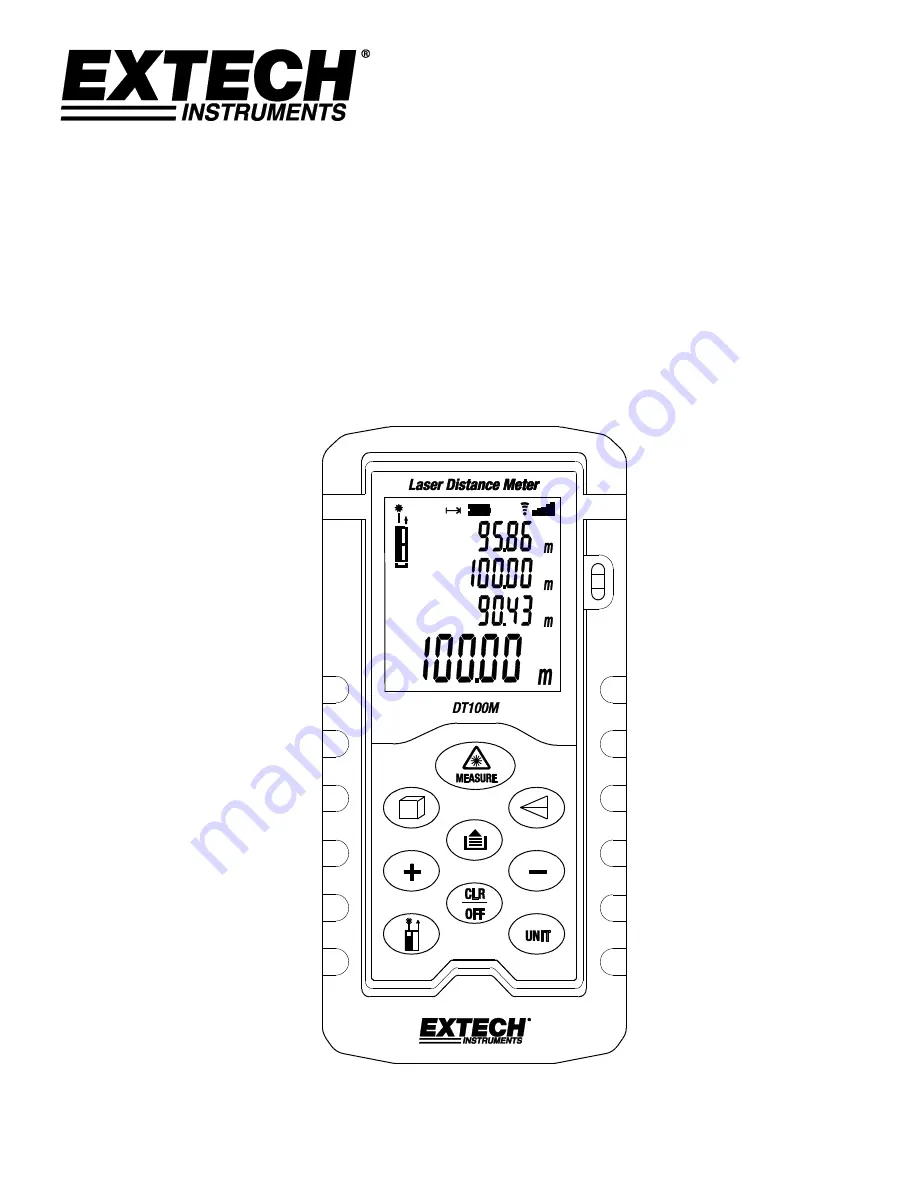
Page 4: ...ment mode 2 Battery status 3 Datalogger icon and memory location 1 20 4 Signal strength icons 5 Laser pointer default mode 6 Edge Reference from top or bottom of meter 7 Indirect measurements Single Pythagorean Double Pythagorean and Double Pythagorean partial height 8 Stakeout mode 9 Area Volume mode 10 Primary summary display line 11 Auxiliary Display lines 1 top 2 and 3 12 Units of measure ...
Page 5: ...er mode press CLR to exit Long press Open program menu Short press Clear display Long press Power OFF Short press Area Volume mode Long press to 1st beep Stakeout mode Indirect measurements Press 1x Single Pythagorean mode Press 2x Double Pythagorean mode Press 3x Double Pythagorean partial height Add Subtract keys Short press Measurement edge selection Long press Backlight ON OFF Short press Sele...
Page 6: ...accurate measurements may result from low battery measured distance exceeding specified range and irregular shaped objects near the target Range considerations The range is limited to 40m 131 2 60m 197 or 100m 328 1 depending on model At night or dusk if the target is in shadow the measuring range without target plate is increased Use a target plate to increase the range during daylight or if the ...
Page 7: ... automatically switches OFF after three 3 minutes of inactivity Long press CLR to switch the unit OFF manually 4 Press CLR to cancel the last action performed or clear the last data displayed on the screen 5 Press UNIT to change the unit of measure ft feet in inches m meters 6 Long press to turn the backlight on or off 7 Short press the reference key to select the top edge or bottom edge reference...
Page 8: ...to offset display by 7mm 4 bP on oFF Use keys to set beeper default ON OFF 5 bL On oFF Use keys to set backlight default ON OFF 6 od On oFF Unused mode Distance Measurements Single Distance Measurements 1 Momentarily press the MEASURE key to switch the meter ON Dashes will appear on the display 2 If the Laser point is already ON go directly to step 3 below If the Laser point is not ON press MEASUR...
Page 9: ...ayed dynamically in auxiliary displays above the primary display 1 Press the MEASURE key to switch the meter ON 2 Press and hold MEASURE for 3 seconds to begin a continuous measurement session The laser pointer will stay ON in continuous mode 3 The meter will beep with each new automatic measurement update approx every one half second 4 The MIN reading will be indicated example below left and will...
Page 10: ... bottom 3 Press the plus or minus key The first reading will move to auxiliary display line 2 4 The plus or minus sign will appear on auxiliary display line 3 5 Press MEASURE to turn Laser ON if it is not already ON 6 Press MEASURE to take the second reading The second reading appears on auxiliary display line 3 7 Read the sum or difference of the two readings on the primary display line 8 Press C...
Page 11: ...uxiliary display lines 1 and 2 will now show the Length and Width The primary display will show the Area in ft2 or m2 Note that the laser pointer will switch off automatically if too much time is taken between steps Press MEASURE to switch the Laser pointer back ON and then try the test again Adding Subtracting Area Calculations 1 After completing an Area calculation see previous section with the ...
Page 12: ...take the room Length measurement 6 The cube s Width will now be flashing indicating that a Width measurement is to be taken 7 Press MEASURE to turn Laser ON if it is not already ON 8 Press MEASURE again to take the room Width measurement 9 The cube s Height side will now be flashing indicating that a Height measurement is to be taken 10 Press MEASURE to turn Laser ON if it is not already ON 11 Pre...
Page 13: ...isplay line bottom Auxiliary displays will show the two individual Volume calculations Indirect Measurements Pythagorean Single Pythagorean Calculation 2 Measurements This device can measure the vertical height from Point 1 to Point 2 with the operator taking two measurements Point X to 1 and then Point X to 2 1 Press the MEASURE key to switch the meter ON 2 Press once 3 A right triangle shape wil...
Page 14: ...perator stands at Point X The first measurement is Point X to 1 the second measurement is a horizontal line from Point X to 2 and the third measurement is from Point X to 3 1 Press the MEASURE key to switch the meter ON 2 Press the key two times 3 The double triangle icon will appear with its top diagonal line flashing 4 Press MEASURE to turn Laser ON if it is not already ON 5 From Point X aim the...
Page 15: ...nt 2 by taking three measurements The first measurement is Point X to 1 the second measurement is from Point X to 2 and the third measurement is a horizontal line from Point X to 3 1 Press three times and the icon will display 2 Press MEASURE to turn Laser ON if it is not already ON 3 Press MEASURE to measure from Point X to Point 1 4 Press MEASURE to turn Laser ON if it is not already ON 5 Press ...
Page 16: ...e distances A and B in diagram below that can be used independently to mark defined measured lengths for example in wood frame construction or fence posting 1 Press MEASURE to switch the meter ON Set the measurement reference to front or rear meter edge using the key 2 Press and hold until the first beep 3 On auxiliary display line 1 one digit for value A will flash Set the value of the A stakeout...
Page 17: ...the measured distance is the stakeout distance or a negative number sign when the measured distance is the stakeout distance 9 The meter will start beeping at a distance of 0 1m 3 9 from the matching dimension Note that the beep tone is different for negative and positive values The beeping tone will change when you reach the stakeout distance 10 Mark your locations accordingly 11 Stop the measure...
Page 18: ...ance WARNING Do not operate the meter until the battery compartment cover is in place and fastened securely This instrument is designed to provide years of dependable service if the following care instructions are performed 1 Keep the meter dry and free from dust 2 Use and store the meter in nominal temperature conditions Temperature extremes can shorten the life of the electronic parts and distor...
Page 19: ...teries so they do not leak and damage the unit If the meter is to be stored for long periods the batteries should be stored separately to prevent damage to the unit Never dispose of batteries in a fire Batteries may explode or leak Never mix battery types Always install new batteries of the same type Never dispose of used batteries or rechargeable batteries in household waste As consumers users ar...
Page 20: ...e target plate Hardware failure Return for service Specifications General Specifications Display 5 digit 99999 backlit multifunction LCD Laser diode Class 2 red laser wavelength 635nm Battery Two 2 AAA alkaline batteries Battery Life 5 000 measurements approx Backlight APO After 35 seconds Laser APO After 35 seconds Meter APO After 3 minutes Operating conditions 0 to 40 C 32 to 104 F Storage condi...
Page 21: ... 99 sq ft Volume calculation range 999 99m3 999 99 cu ft Resolution Distance Area Volume 0 0 in 0 00 ft2 0 00ft3 0 000m 0 000m2 0 000m3 0 00ft 0 00ft2 0 00ft3 Accuracy 2mm 0 08 Measurement update rate 0 3 3 secs depending on target reflectivity Copyright 2017 FLIR Systems Inc All rights reserved including the right of reproduction in whole or in part in any form www extech com ...