background image

4-Port  SATA3  RAID/HyperDuo  PCIe(x2)  Card


7 

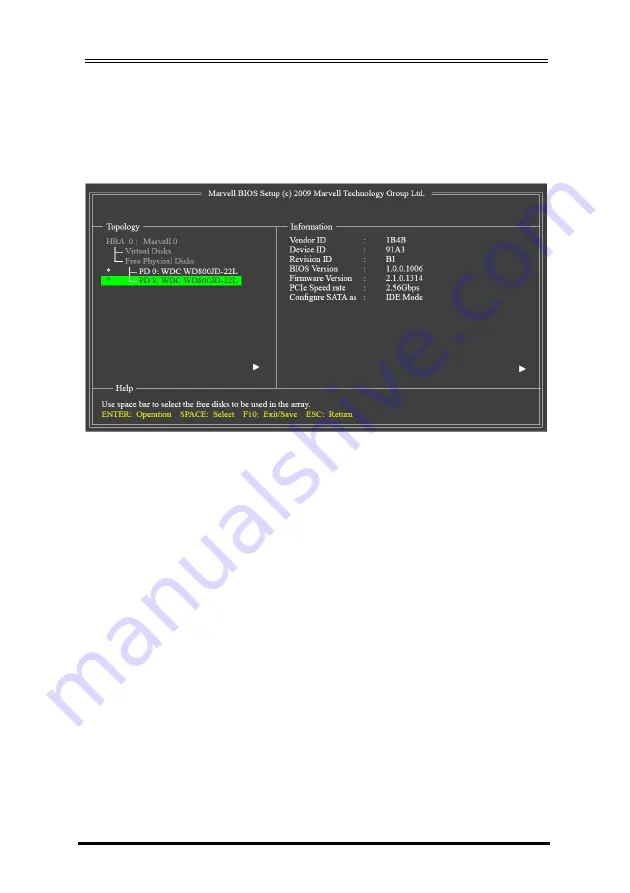
6.1 Create a Disk Array:


Under 

Free  Physical  Disks

,  use  the  <Space>  key  to  select  the  hard 

drives  to  be  included  in  the  RAID  array.  The  selected  hard  drive  will 
be  marked  with  an  asterisk  (*).  After  selecting  the  hard  drives,  press 
<Enter> to proceed. 


To  further  configure  the  disk  array,  use  the  up  or  down  arrow  key  to 
move  the  selection  bar  to  select  an  item  in  the  right  block  of  the 
screen  and  press  <Enter>.  Set  the  required  items  in  sequence  and 
press <Enter> after each step:


1.


RAID  Level: 

Select  a  RAID  level.  Options  include  RAID  0  (Stripe) 

and RAID 1 (Mirror).   

2.


Stripe Size: 

Select the stripe block size. Options include 32 KB and 

64 KB. 

3.


Gigabyte Rounding: 

Select whether to permit the installation of a 

replacement  drive  that  is  smaller  than  the  failed  drive  when 
performing a RAID 1 rebuild. Options include None, 1G, and 10G.   

4.


Quick  Init: 

Select  whether  to  quickly  erase  old  data  on  the  hard 

drives when creating the array.   

5.


VD  Name: 

Enter  an  array  name  with  1~10  letters  (letters  cannot 

be special characters). 

6.


Next: 

After  completing  the  settings  above,  move  to 

Next 

and 

press  <Enter>  to  begin  creating  the  array.  When  prompted  to 
confirm whether to create this array, press <Y> to confirm or <N> 
to cancel. 

Summary of Contents for EX-3516

Page 1: ...eatures Supports 1 lane 5 0Gb s PCI Express Gen 2 Data Transfer Rate Built in 4 Internal SATA3 Ports Supports RAID 0 1 0 1 and HyperDuo Safe or Capacity Modes Supports Windows based RAID GUI Marvell S...

Page 2: ...d into the slot Carefully press the board into the slot until it seats firmly 4 Secure the SATA3 RAID PCIe Card with the slot cover screw 5 Install the SATA cables from the SATA connectors to your SAT...

Page 3: ...PCIe Card 5 2 Non RAID mode Single Disk Mode This mode is the Single Disk mode Each disk drive will be treated as one disk volume in the operating system 5 3 Striping RAID 0 Read and write sectors of...

Page 4: ...then looks to the idle drive to perform the next read access If one of the mirrored drives suffers a mechanical or did not respond the remaining drive will continue to function 5 5 Striping Mirroring...

Page 5: ...figured with one hard drive and one SSD HyperDuo uses intelligent algorithms to automatically migrate hot data to the SSD while enabling all data to be safely stored on a larger capacity SATA HDD Hype...

Page 6: ...augments SSD and HDD capacity for the most cost effective configuration Turn on your computer and press Ctrl and M keys to enter BIOS Setup during the POST Power On Self Test Please check the Help fie...

Page 7: ...ID Level Select a RAID level Options include RAID 0 Stripe and RAID 1 Mirror 2 Stripe Size Select the stripe block size Options include 32 KB and 64 KB 3 Gigabyte Rounding Select whether to permit the...

Page 8: ...press Y to confirm or N to cancel With the Marvell Storage Utility RAID GUI you can setup a disk array or view the current array status in the operating system Before installing the MSU utility you h...

Page 9: ...Note After the installation you must login the utility with the same account name and password that you use to login the operating system If you did not set the account password before click Login to...

Page 10: ...destroyed the data on the good drive by accident mistake when they are changing drive or cables or modes And they lost their important data since they did NOT backup them first For RAID 0 mode please...

Reviews: