Maintenance
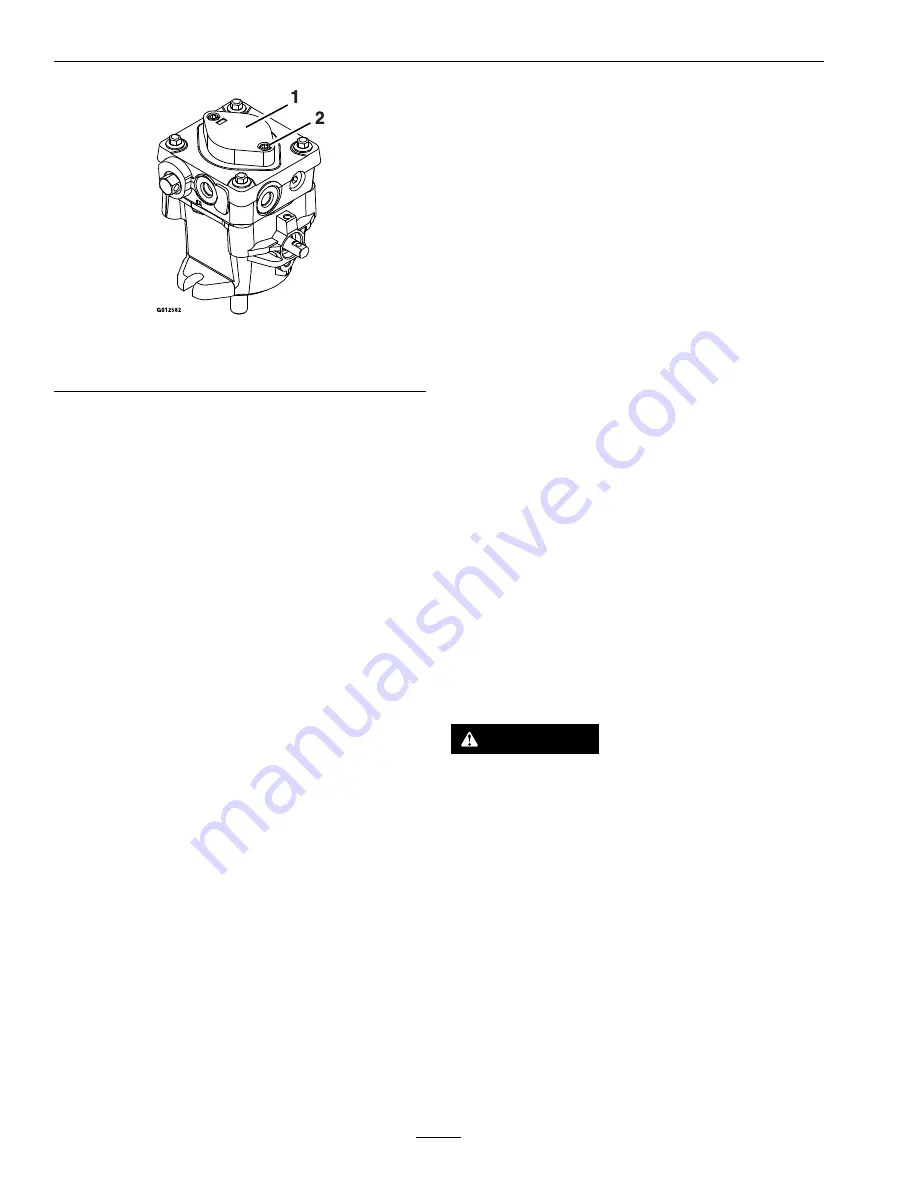
g012852
Figure 22
1.
Charge pump cap
2.
Loosen 1 1/2 turns only
1.
Stop engine and wait for all moving parts to stop.
Raise the rear of the machine up onto jack stands
high enough to raise the drive wheels off the
ground.
2.
Check oil level as stated in
Check Hydraulic Oil
Level
section.
3.
Start engine and move throttle control ahead to
full throttle position. Move RH motion control
lever inward (together) and move both levers
forward with equal pressure.
If either drive wheel does not rotate, it is possible
to assist the purging of the charge pump by
carefully rotating the tire in the forward position.
Note:
It is necessary to lightly touch the charge
pump cap with your hand to check the pump
temperature. If the cap is too hot to touch, turn
off engine. The pumps may be damaged if the
pump becomes too hot.
If either drive wheel still does not rotate continue
with step 4.
4.
Thoroughly clean the area around each of the
charge pump housings.
5.
To “prime” charge pump, loosen two hex socket
head capscrews (shown in Figure 22)
1 1/2 turns
only. Make sure engine is not running.
Lift
the charge pump housing upward and wait for
a steady flow of oil to flow out from under the
housing. Retighten the capscrews. Do this for
both pumps.
Note:
Hydraulic reservoir can be pressurized up
to 5 psi to speed this process.
6.
If either drive wheel still does not rotate, stop
and repeat steps 4 and 5 above for the respective
pump. If wheels rotate slowly, the system may
prime after additional running. Check oil level
as stated in
Check the Hydraulic Oil Level
section.
7.
Allow unit to run several minutes after the charge
pumps are “primed” with drive system in the full
speed position. Check oil level as stated in
Check
the Hydraulic Oil Level
section.
8.
Check hydro drive linkage adjustment as stated in
Hydro Drive Linkage Adjustment
section in
Adjustments.
Wheel Hub Nut Torque
Specification
Service Interval: After the first 100 hours
Every 500 hours thereafter
Torque the nut on the wheel motor tapered shaft to
175-225 ft-lb (237-305 N-m).
Note:
Do
Not
use anti-seize compound on the
wheel hub.
Check Spark Arrester
(if equipped)
Service Interval: Every 50 hours
WARNING
Hot exhaust system components may ignite
gasoline vapors even after the engine is stopped.
Hot particles exhausted during engine operation
may ignite flammable materials. Fire may result
in personal injury or property damage.
Do Not refuel or run engine unless spark arrester
is installed.
1.
Stop engine, wait for all moving parts to stop, and
remove key. Engage parking brake.
2.
Wait for muffler to cool.
3.
If any breaks in the screen or welds are observed,
replace arrester.
4.
If plugging of the screen is observed, remove
arrester and shake loose particles out of the
arrester and clean screen with a wire brush (soak
38
Summary of Contents for STARIS S Series
Page 1: ...STARIS S SERIES For Serial Nos 408 644 346 Higher Part No 4505 317 Rev A ...
Page 50: ...Schematics Schematics Electrical Schematic Kawasaki g303795 50 ...
Page 51: ...Schematics Electrical Schematic Kohler EFI g303794 51 ...
Page 52: ...Schematics Hydraulic Diagram g304191 52 ...
Page 54: ...Service Record Date Description of Work Done Service Done By 54 ...
Page 55: ...55 ...


